
With the Shopper.com Wordpress plugin, you can integrate your Shopper.com store into your Wordpress blog or website. You can launch your Shopper.com store within your Wordpress site by entering the Shopper.com API details. (Please note that a premium subscription is required to access the API keys.)
Here is a step-by-step guide to help you learn how to use our WordPress Plugin to migrate your Shopper Store to WordPress:
Step 1: Install the WordPress Plugin
If you are new to plugins on WordPress or not sure about how to do the same, follow these steps:
- Log in to your WordPress blog/ website
- A menu panel will now be visible on the left side of the page.
- Scroll down until you come across the “Plugin” option.
- In the search bar, enter “Shopper.com”.
- Select the plugin and click on the blue “Activate” button.
- This will install the Shopper WordPress Plugin on your account.
Step 2: Access the Shopper WordPress Plugin
Once you have the Shopper WordPress plugin installed, the next thing you need to do is know how to access your plugin to start porting products and collections to WordPress.
For that, open the menu panel on your WordPress account and navigate down.
Any plugin that’s installed on your WordPress account will be listed below the “Settings” tab on the menu panel.
Once Shopper.com is installed and activated, you will see a tab called “Shopper.com” under the Settings menu.
Click on Shopper.com to start customizing and integrating your Shopper Store on WordPress.
Step 3: Setting Up Your Shopper.com WordPress Plugin
If you follow the steps we covered until this point, you will see a “Settings” page open with the following tabs: Connection and Setting.
Both of these tabs have different fields that require you to enter specific information from your Shopper account to complete the porting of your Shopper Store to WordPress.
Let’s take a look at what you need to do under each tab:
1) Connection
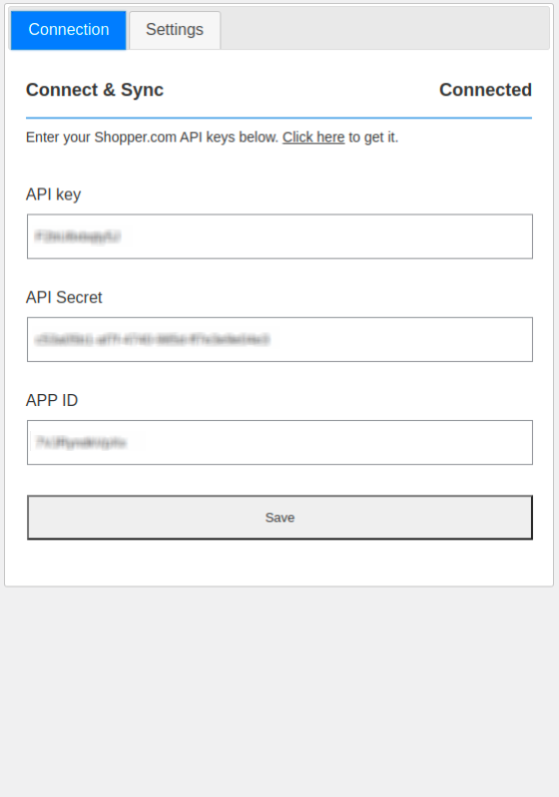
The connection tab in the plugin is the first step you need to complete in order to port your Shopper Store with the WordPress Plugin.
You need to copy and paste your Shopper.com account’s API Key, API Secret, and APP ID to do that.
Click Here to get the API keys
The link will directly take you to the API Settings on your Shopper account, or you can manually navigate through your Shopper account settings, and make your way to API.
Copy the API Key, API Secret, and APP ID, one at a time and paste it accordingly to the three fields.
Once everything’s copy-pasted, tap the “Save” option to integrate and port your Shopper Store to WordPress.
2) Setting
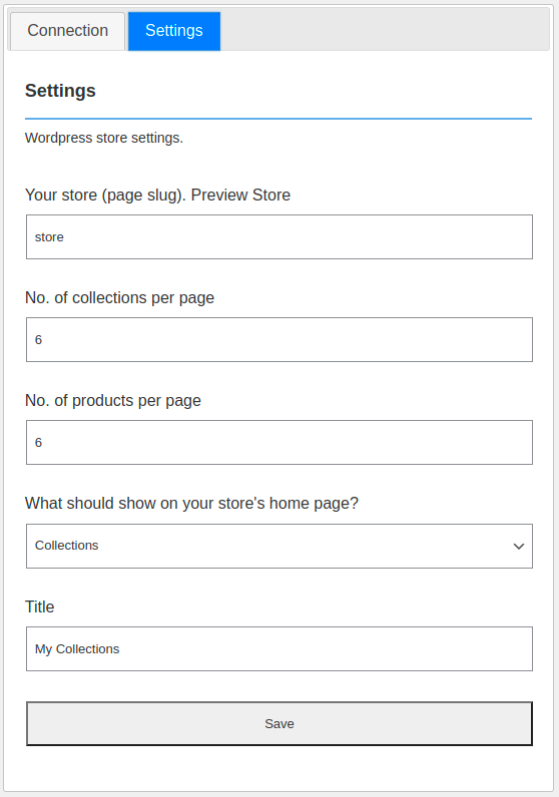
Now that your Shopper store has been ported to WordPress, you can customize your store as required with the help of different options in the “Setting” tab.
You can edit the store slug, number of collections per page, number of products per page, what should be shown on the page (collections or products), and enter the title.
Here is how the different options will reflect on your WordPress Store integration:
Your Store (Page Slug): Add the slug for your page to decide where your store should appear. We recommend you to use generic terms like “store” or “mystore” for easy accessibility.
For example: https://booksforchildren.xyz/store/
No. of Collections Per Page: Enter a numerical value of how many collections you wish to showcase on one of your WordPress store page(s).
No. of Products Per Page: Enter a numerical value of how many products you wish to showcase on one of your WordPress store page(s).
What Should You Show on Store’s Home Page: You can choose to either showcase your products or showcase your collections on your WordPress store. Select one from the two options in the drop-down to choose the one you need.
Title: This is the central text that will appear above the product or collection you decide to showcase on your WordPress Store.
Click on “Save” once you are done customizing to save your WordPress Store.