
Follow these steps to start change your profile information:
- Log in to your Shopper account.
- On your home page, tap on the “Edit Your Profile” option.
- Make the changes, and click on “Save Changes” when you are done.
You can change your profile picture, your name/ store title, your bio about your store, and add up to three links including your social links.
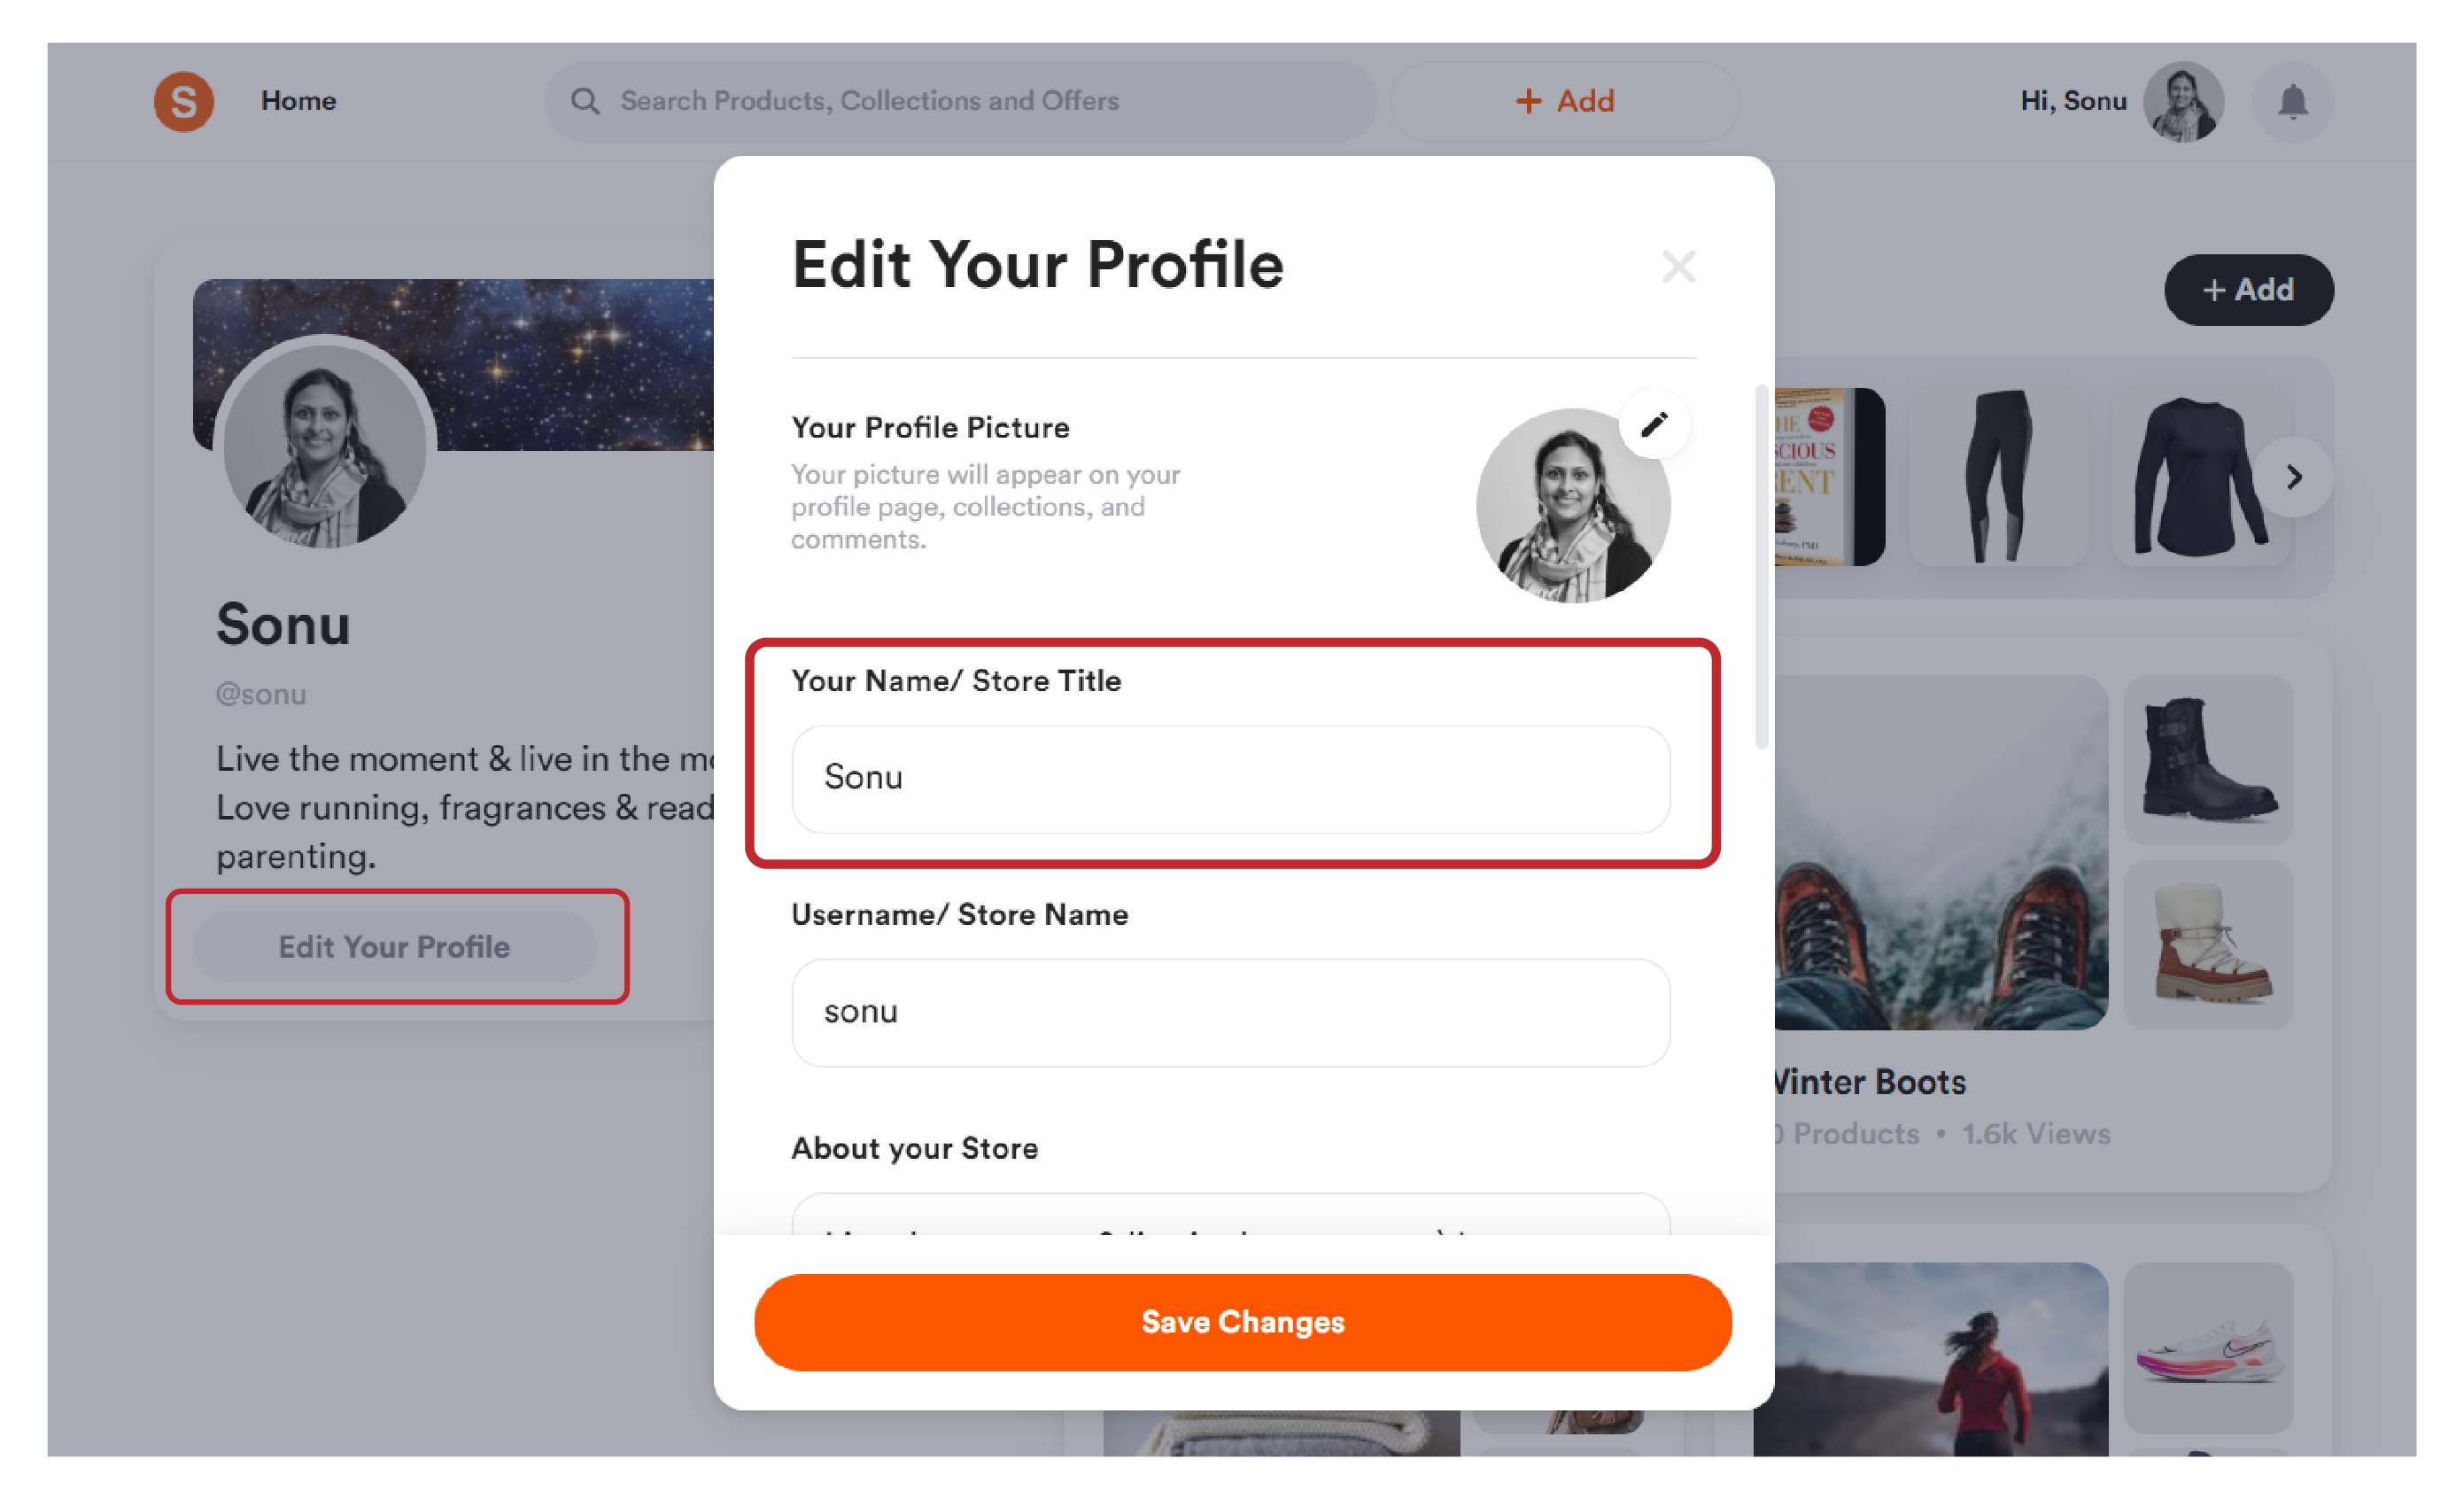
How to change your name/ Store title?
Store titles are similar to the profiles you use on social networking sites that are known to your fans and followers.
What’s even more exciting to note is that it only takes a few minutes to make the changes and have them reflected on your account. Here is a step-by-step guide on how to change your name/ store title.
- Log in to your account.
- On the home page, look for the “Edit Your Profile” button on the left menu panel.
- Tap “Edit Your Profile” and scroll down to “Your Name/Store Title”
- Make changes here to change the name of your Shopper name.
- Please note that this is the name that is displayed underneath your Shopper profile picture.
- Click on “Save Changes” once you are done to have the changes reflected on your account.
How to change your Username/ Store Name?

Store name or username on Shopper refers to the name by which your store will be addressed on the platform.
This is the name that will appear followed by the “@” symbol.
For stores with generic names, if there are others that go by your same name, you might have to add numerical or alphabetic changes.
Store names are offered on a first-come first-priority basis, and if a user already claimed the store name you are looking for, you will have to modify your store name and username.
The store name will also be the default website URL for your store if you have the free plan for Shopper. (shopper.com/username is the default username for creators on our platform)
If you want to have the changes reflected on your default store’s website URL, you will need to edit your Username/Store Name.
In order to do that, follow these steps:
- Log in to your account.
- On the home page, look for the “Edit Your Profile” button on the left menu panel.
- Tap “Edit Your Profile” and scroll down until you come across “Username/Store Name”.
- Make changes to the store name as required.
- Once you are done, click on the “Save Changes” button.
Username guidelines
- Your username cannot be longer than 25 characters. However keep the shorter for the ease of use.
- A username can only contain alphanumeric characters (letters A-Z, numbers 0-9) with the exception of underscores, as noted above. Check to make sure your desired username doesn't contain any symbols, dashes, or spaces.
If the store name you want is available, you will see the changes reflected on your account. Your website URL will also display the changes you make and feature the updated store name on your store URL.
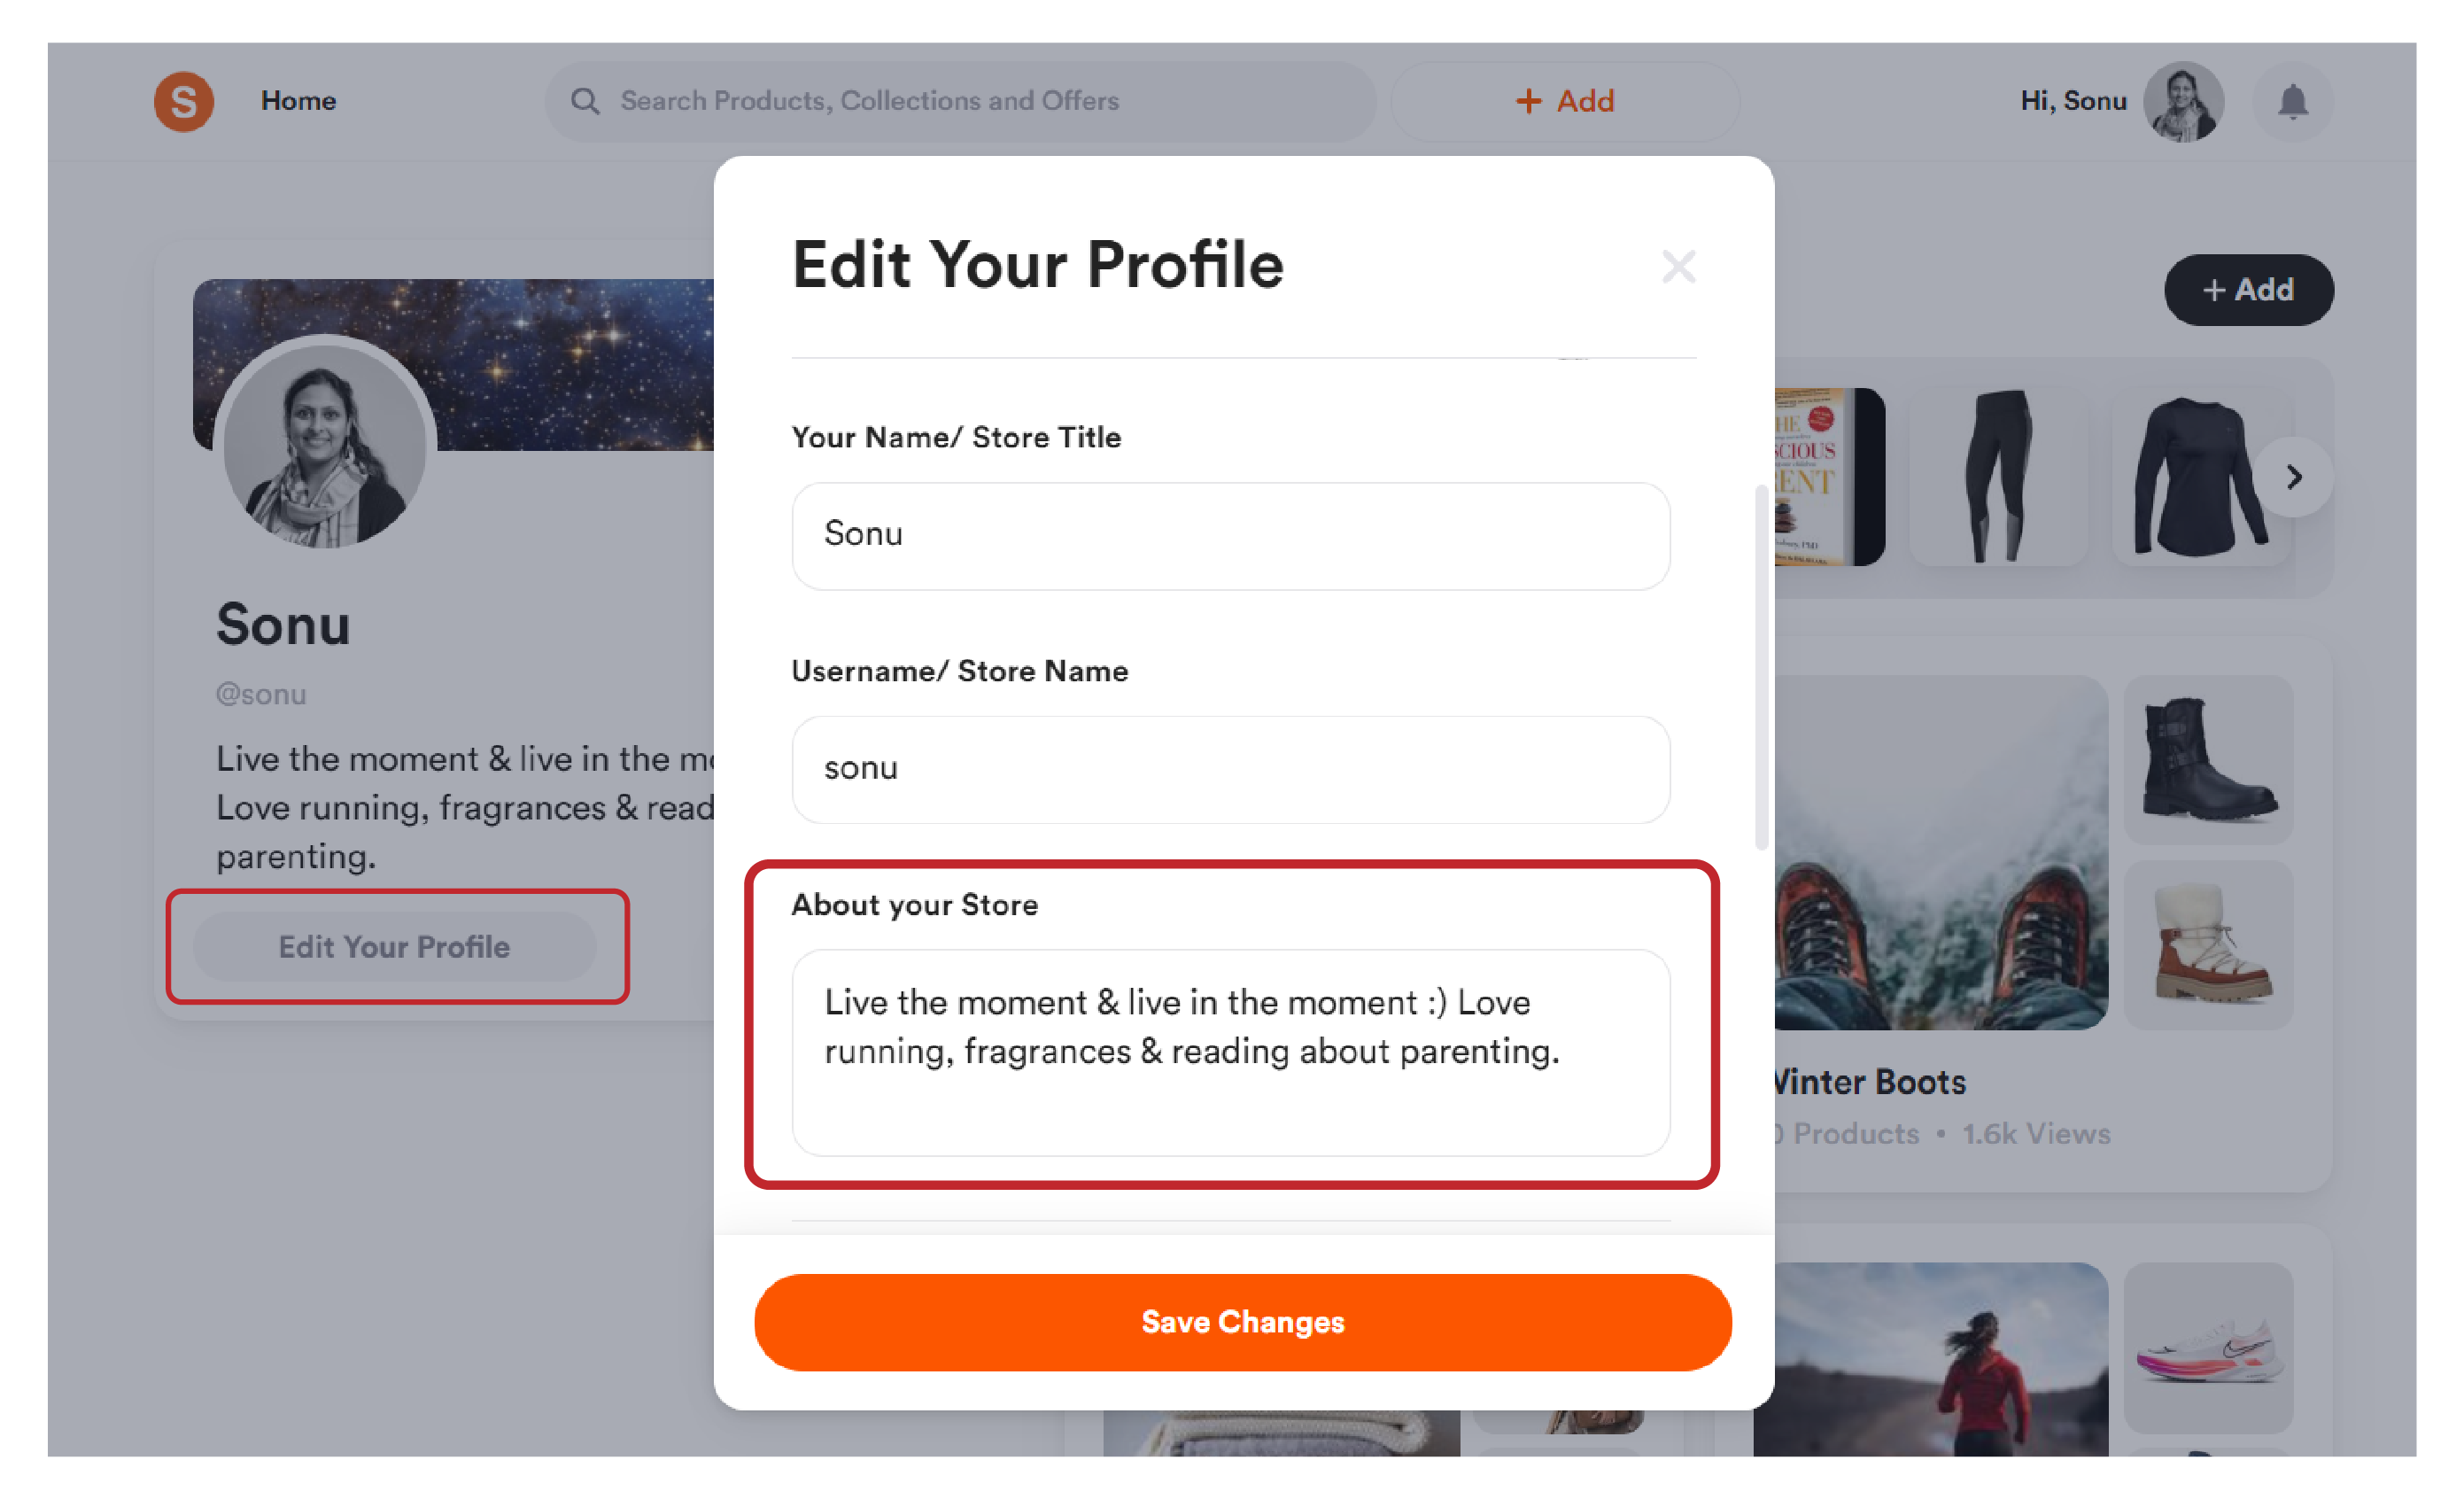
How to edit your bio?
Shopper offers creators to add a bio about what they are all about on your Shopper profile.
You can give a brief about what your area of interest is, which platform you are focused on, and interesting information about what your content is all about.
Please note that the Shopper bio comes with a character limit of 115 characters, so make sure that you keep it short and sweet.
Here is a step-by-step guide on how to edit your bio on Shopper:
- Log in to your Shopper account.
- On the home page, look for the “Edit Your Profile” button on the left menu panel.
- Tap “Edit Your Profile” and scroll down until you come across “About your store”.
- Make changes as required (keep in mind that the character limit is restricted to 115 characters).
- Once you are done, click on the “Save Changes” button.
The store bio is displayed below the Store Title, and Store Name of your profile.
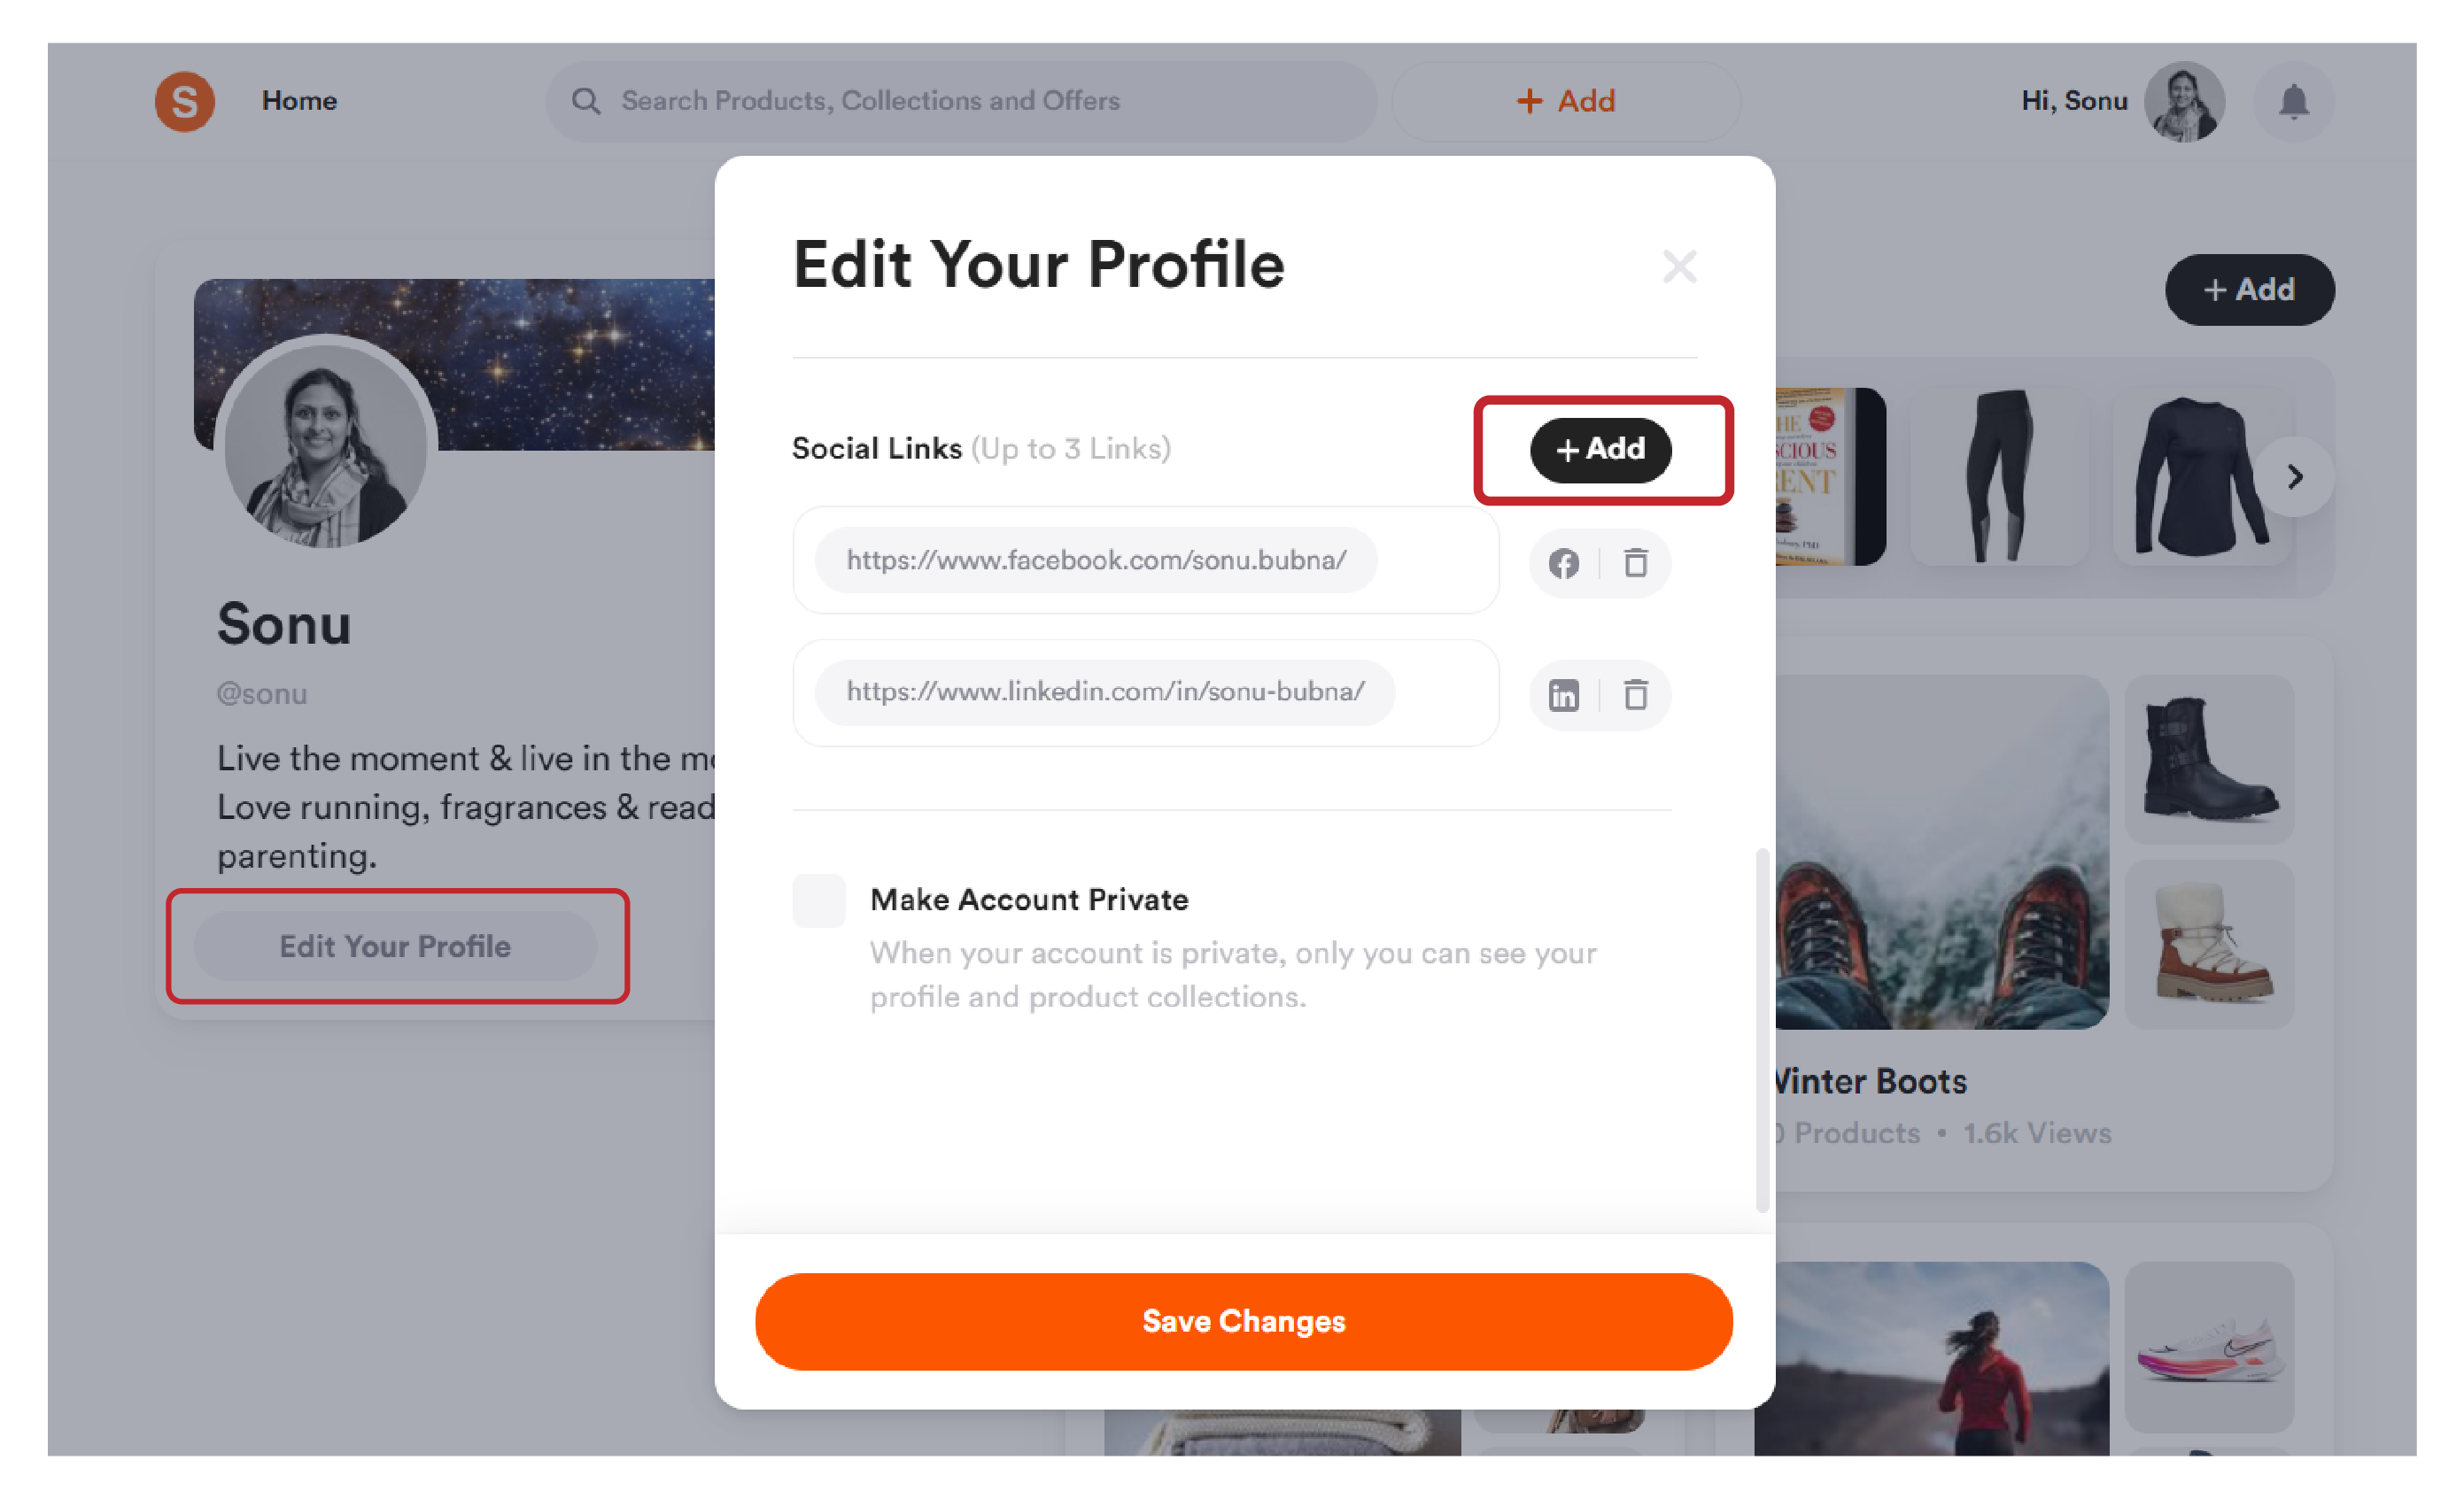
How to add your links?
You can add up to three links of your account.
If you are someone that wants to share your website link, profile links on Facebook, Instagram, YouTube, or any other social networking, you can make use of the social links tab to add it to your profile.
Follow these steps to your social links
- Log in to your account.
- On the home page, look for the “Edit Your Profile” button on the left menu panel.
- Tap “Edit Your Profile” and scroll down until you come across “Social Links”.
- You can add up to 3 links (maximum) to your Shopper profile.
- Click on the “+Add” next to the “Social Links” tab on your profile.
- Now enter the website URL, or head over to your social media handle and copy the link.
- Come back to Shopper and paste the link in the field.
- Repeat the process until you have all the links, and click on “Save Changes” once you are done.
The pop-up links can be edited as required and you can also change the order of pop-ups as required.