
Blog will allow you to create rich content that attracts organic traffic to your Shopper.com store.
Please follow the following steps to enable the blog:
- Once logged in to your profile page, hover the mouse over your profile icon on top right corner.
- From the drop down that appears, select “Settings”
- On the “Settings” page, tap on “Blog Settings” under “Store” options.
- Click on the “Enable Blog” option by moving the slider so that it turns from grey to orange.
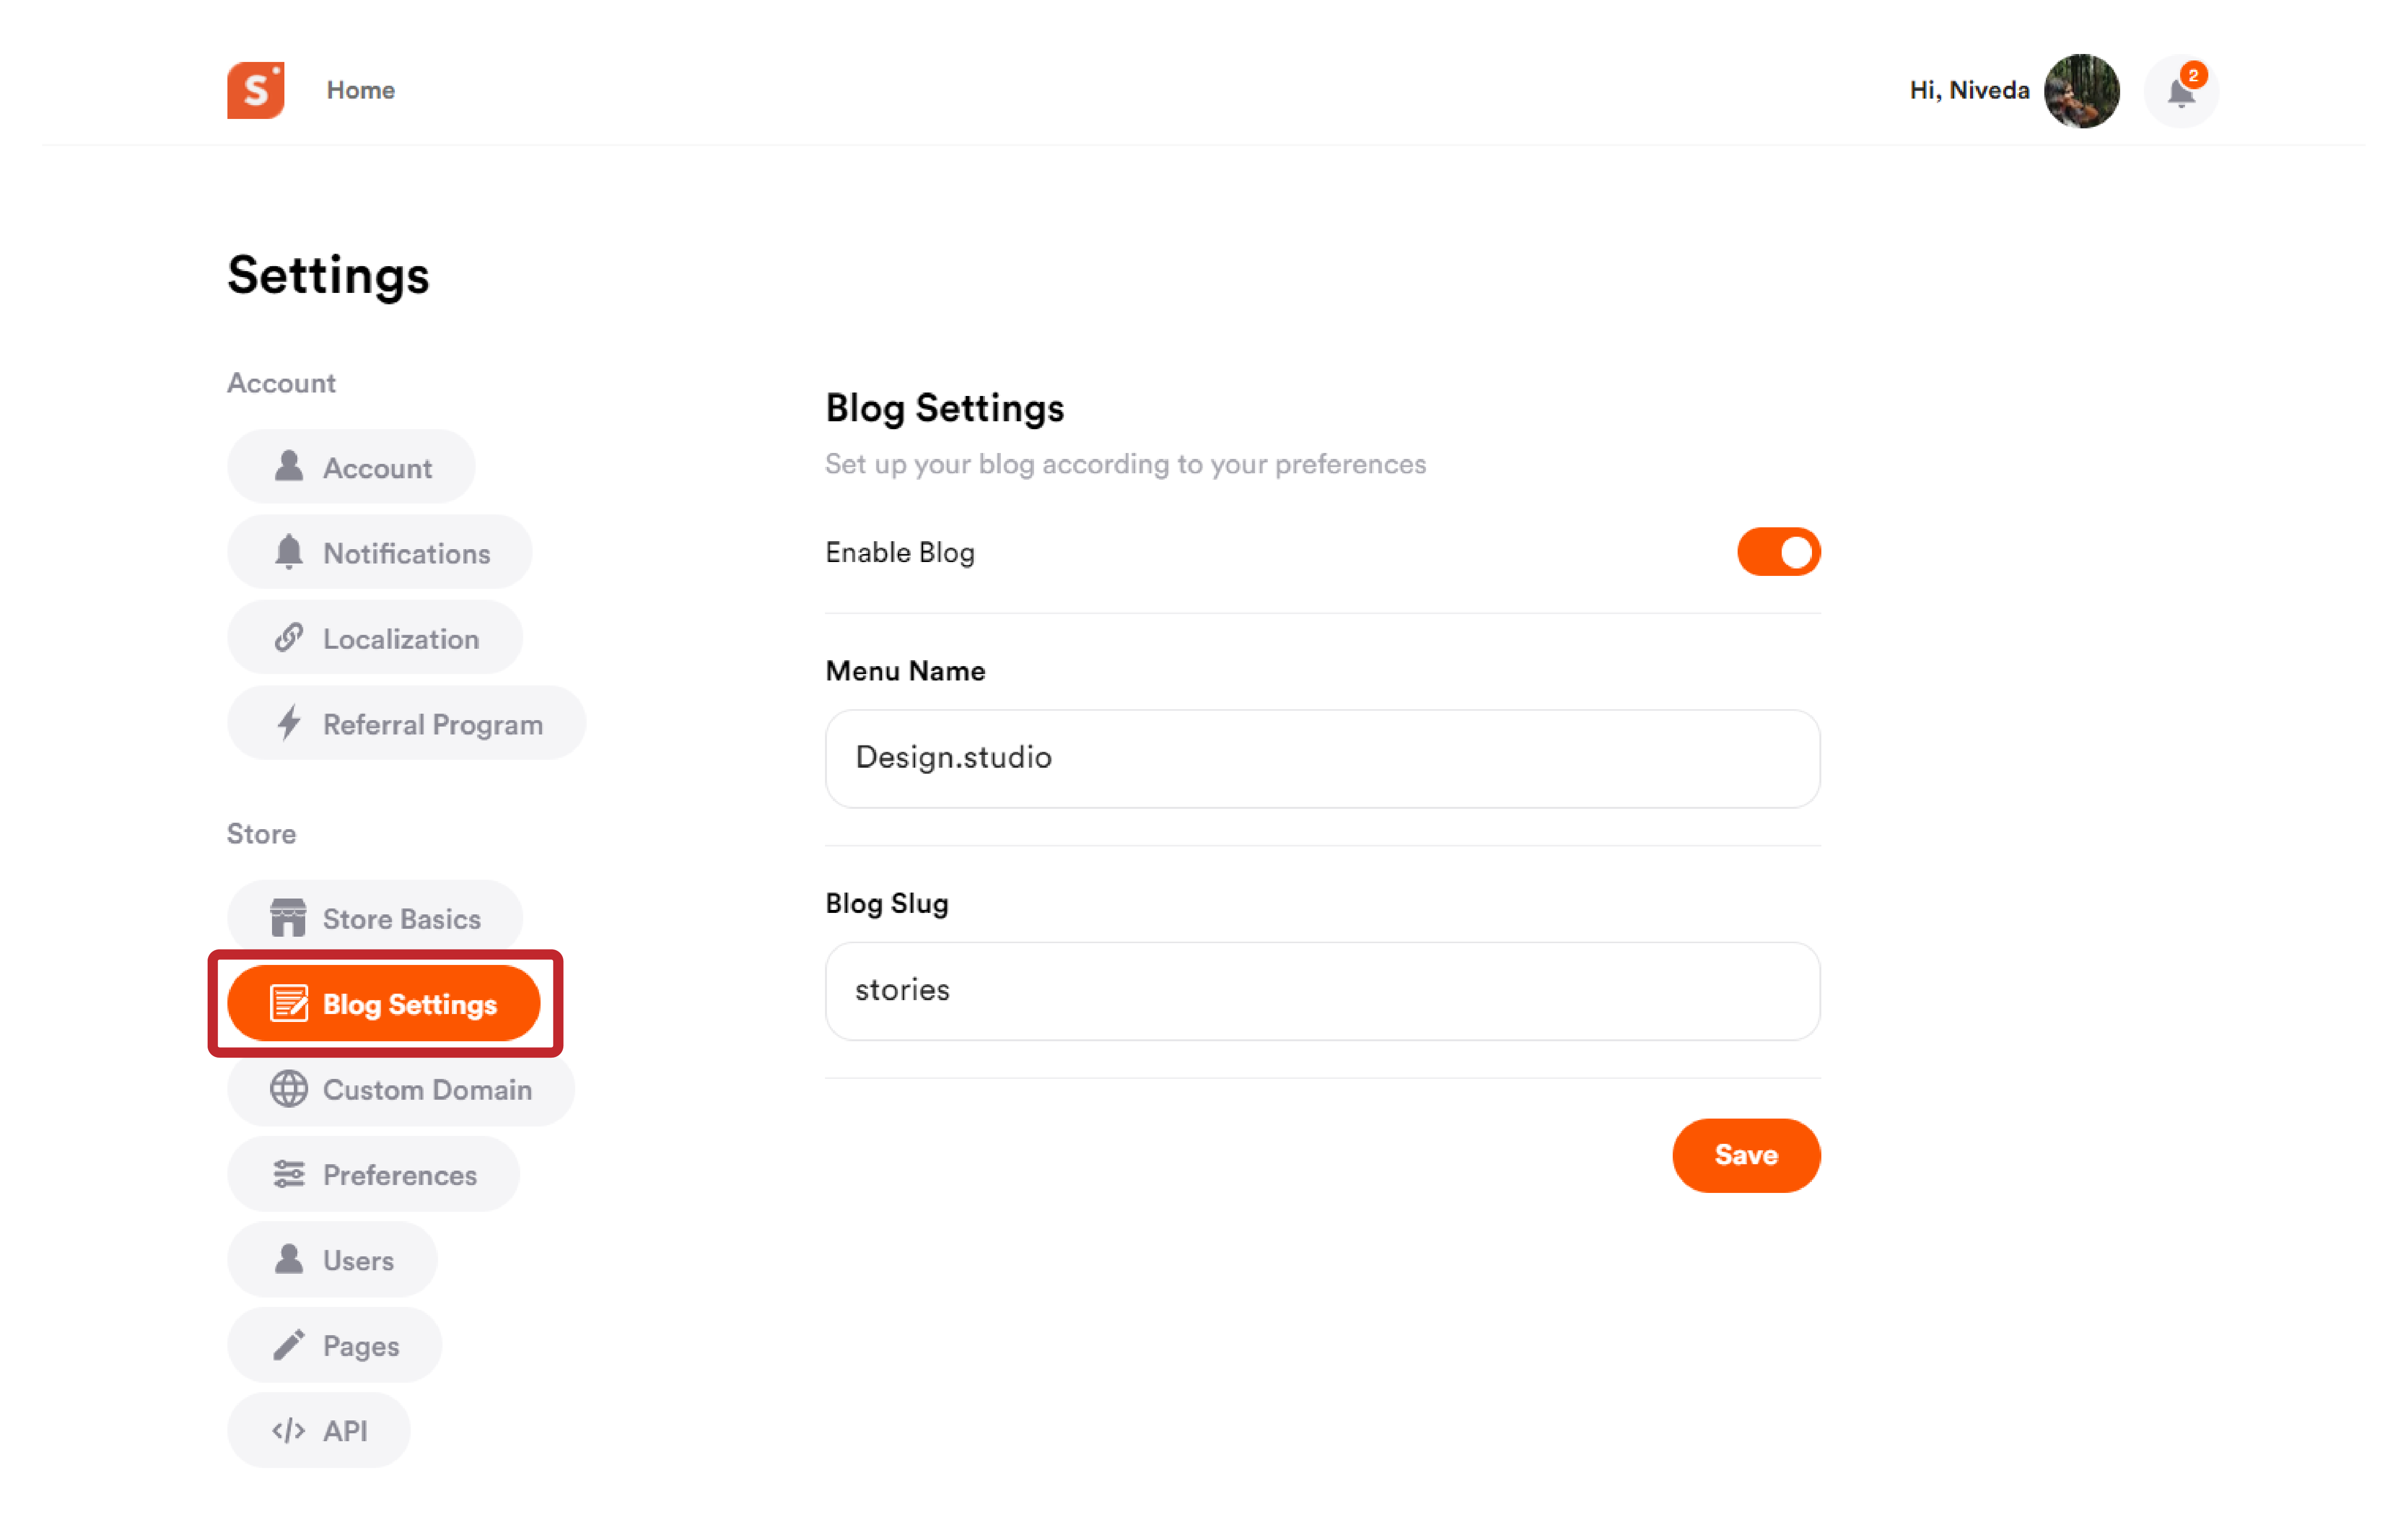
Once you enable the blog, two options will now be unlocked for customization - Menu Name, and Blog Slug.
Menu Name: Enter the store name in Menu Name, as it will appear as the H1 (header) of your store. You can have any menu name you wish to choose.
Blog Slug: Customize your blog’s website address by adding a blog slug on the blog settings menu.
After entering all the details, click on “Save” to confirm the changes.
How to Add New Blogs?
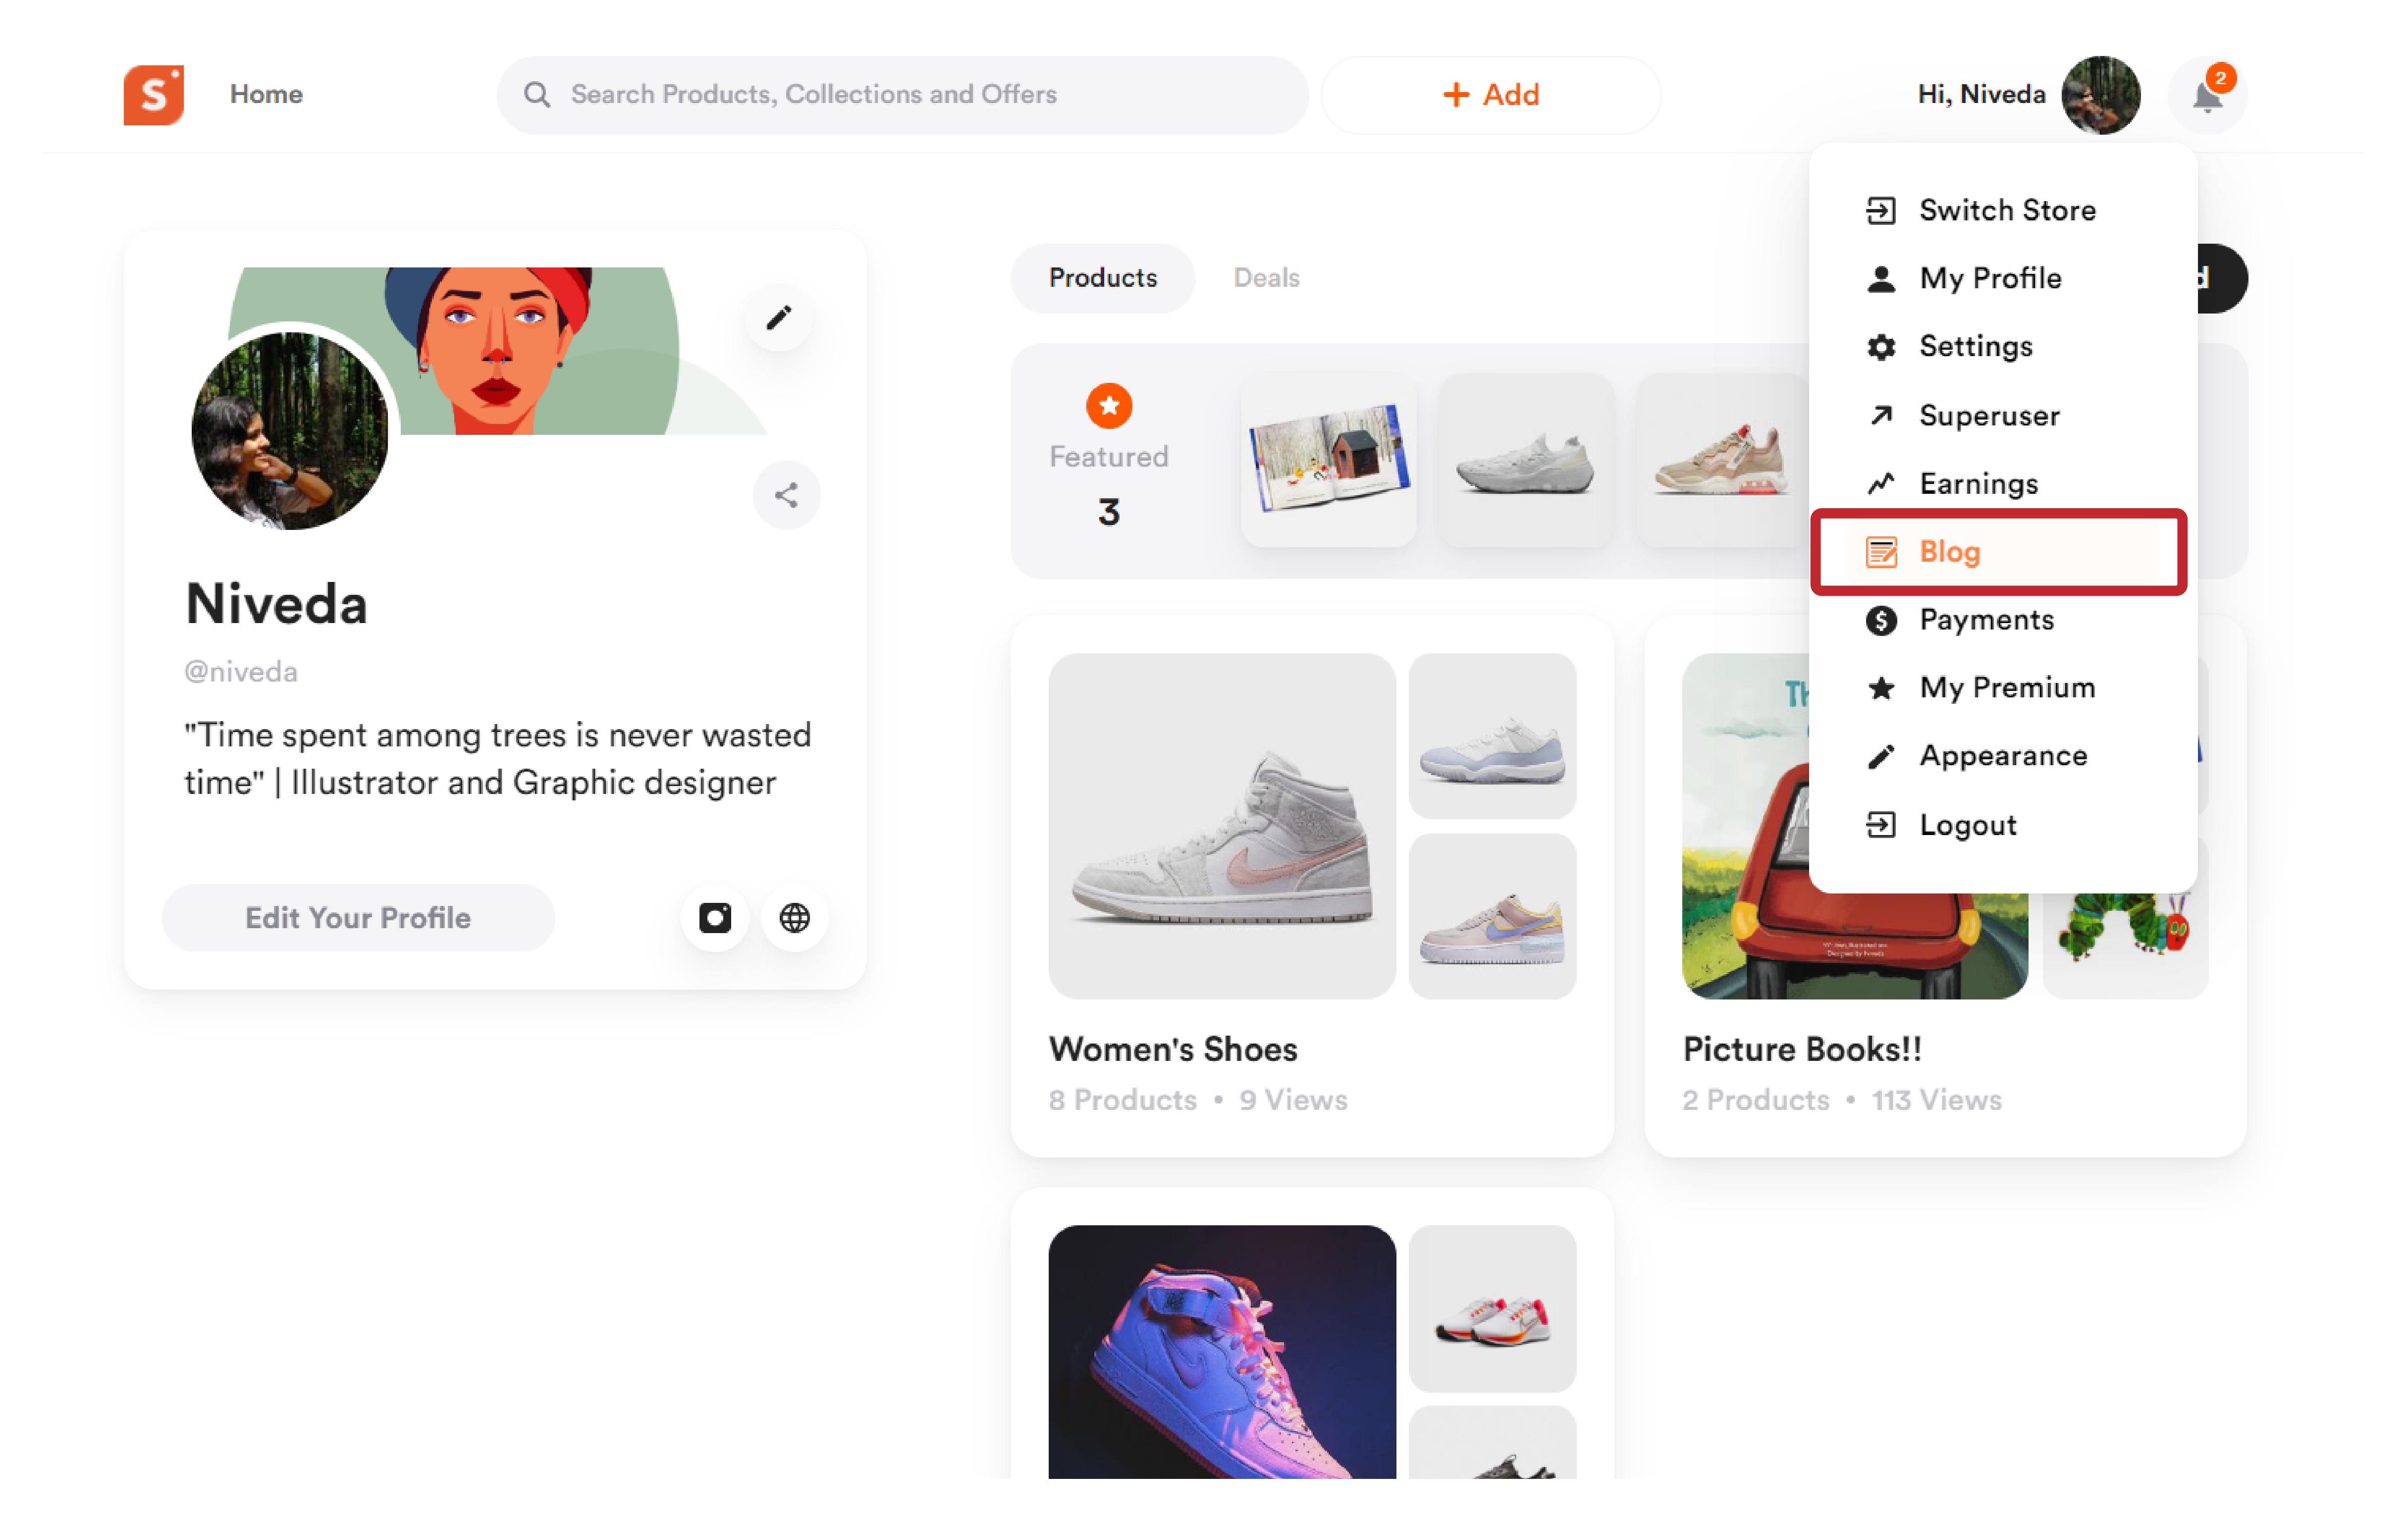
After enabling blogs on your Shopper account, you can head over to your blog by hovering over your profile icon and selecting “Blog” option from the drop down.
On tapping the “Blog” option, you will be taken directly to your blog’s editor.
You can start creating your first blog post by clicking on the “New Post” option from the top right corner.
You can enter text, add embeds like images, videos, html, and so on.
Choose to publish immediately or save the blog as drafts, or schedule it to publish at a later time.
How to Access Blogs on Shopper and Where it Will Appear?
On the store page, the blogs will appear in the header menu.
If you set the blog slug as blog, then the direct access URL will be youdomain.com/blog.
Please note that the blog option is available only with a custom domain.