
Google Analytics is a great tool to track information about the people who visit your website.
The same applies to your Shopper store as well, and by making use of Google Analytics, you get access to a lot of information like the number of visitors, their location, how long they stay on your store page, and what keywords they use to find your Shopper store.
With this information from Google Analytics, you can also identify some of the existing flaws in your Shopper store and fix them to get more discoverability and reach.
If you are new to Google Analytics, follow our step-by-step guide below to get your Google Analytics property ID and connect Google Analytics to your Shopper.com store.
Things to Remember
Before we start the breakdown of steps you need to follow to connect Google Analytics to your Shopper store, it is important to take note of these points:
- Google Analytics has added a new type of property called Google Analytics 4 (GA4). You can track information about your Shopper store using a Google Analytics 4 property ID (G-XXXXXXXXXX) or a Universal Analytics property ID (UA-XXXXXXXX-XX). You can only use one property to track events on your site at a time. Learn about the difference between Google Analytics 4 and Universal Analytics
- If your site uses a cookie banner, Google Analytics will only gather data after a visitor provides consent and approves using the relevant cookies.
Now that this is done, let’s start our step by step guide on connecting Google Analytics to your Shopper store:
Step 1 - Get Your Google Property ID
The first thing you need to do to connect Google Analytics to your Shopper store is to get your unique Google Property ID.
There are two ways to get access to your Google Property ID depending on whether you want to use Google Analytics 4 or a Universal Analytics property.
1. Using Google Analytics 4
If you are planning to use the newly introduced Google Analytics 4 feature, you will need to follow these steps:
- Sign in to your Google Analytics account (Sign up if you don’t have it yet)
- On the home page left panel, scroll down until you come across the “Admin” option.
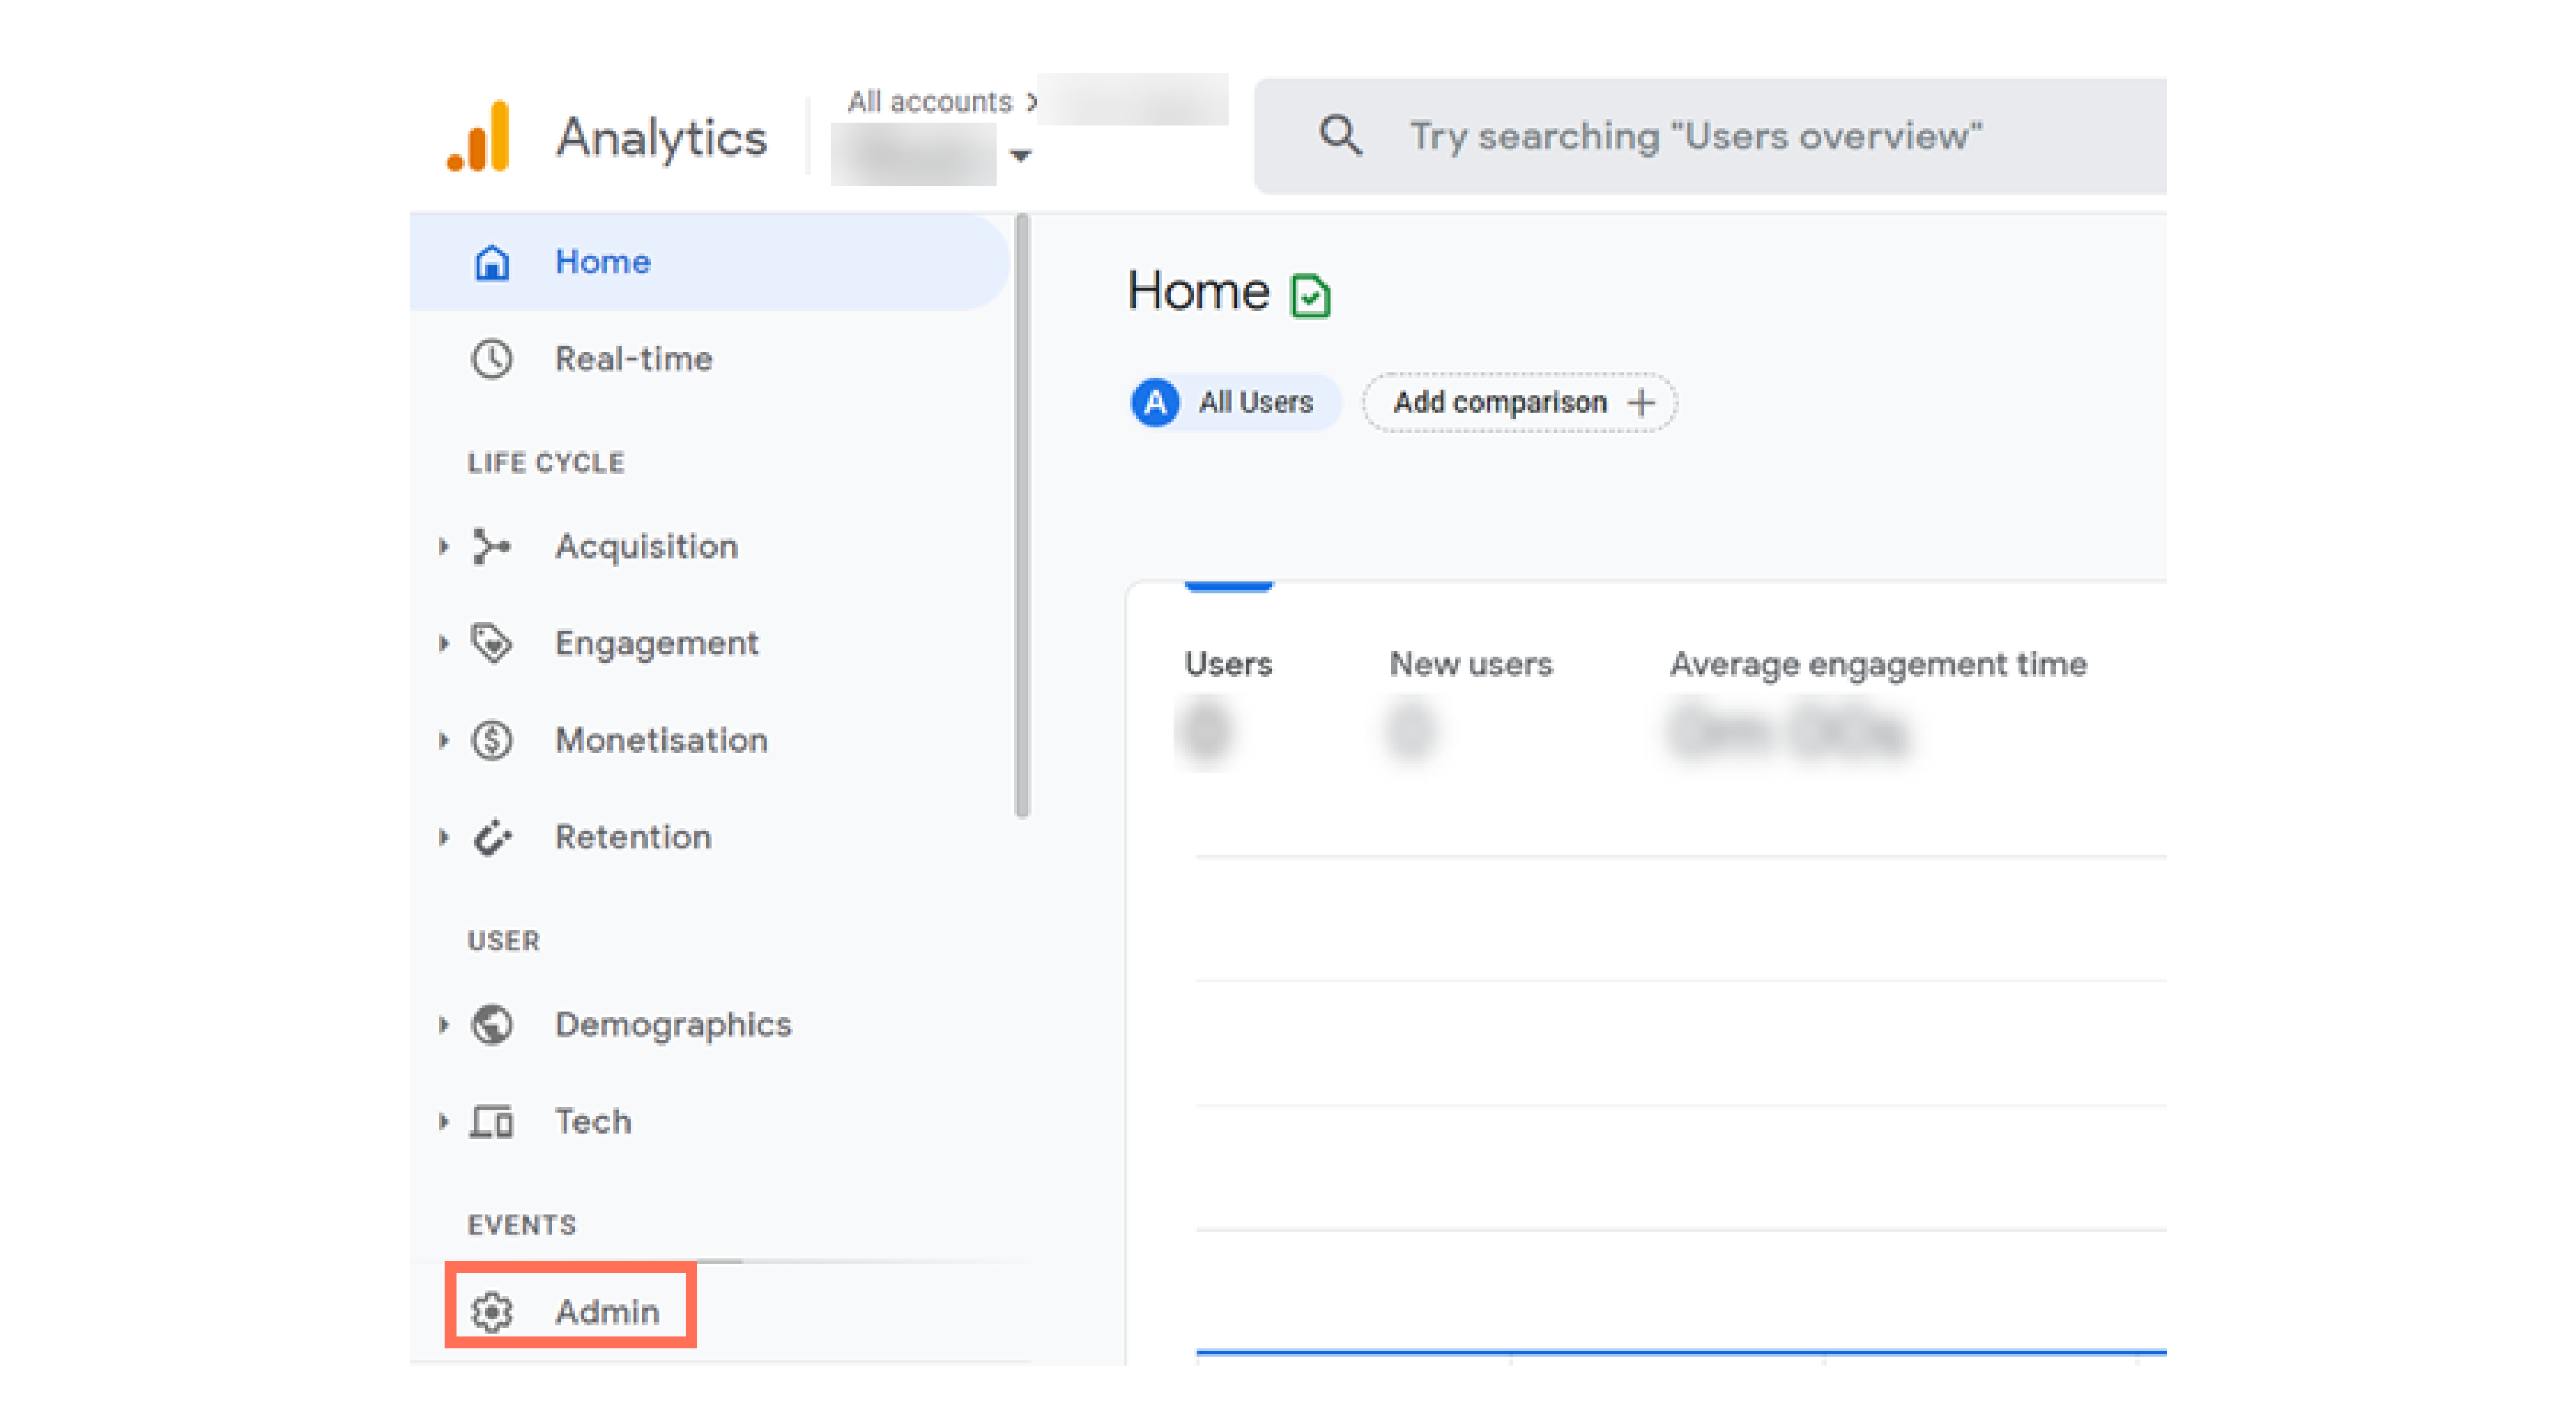
- Tap “Admin” and click on “+Create Property”
- From there, you will need to enter a property name.
- You will then be required to choose a reporting time and currency from the drop-down menu.
- Tap “Next” and select your type of business from the “Industry Category” drop-down menu.
- Select your business size.
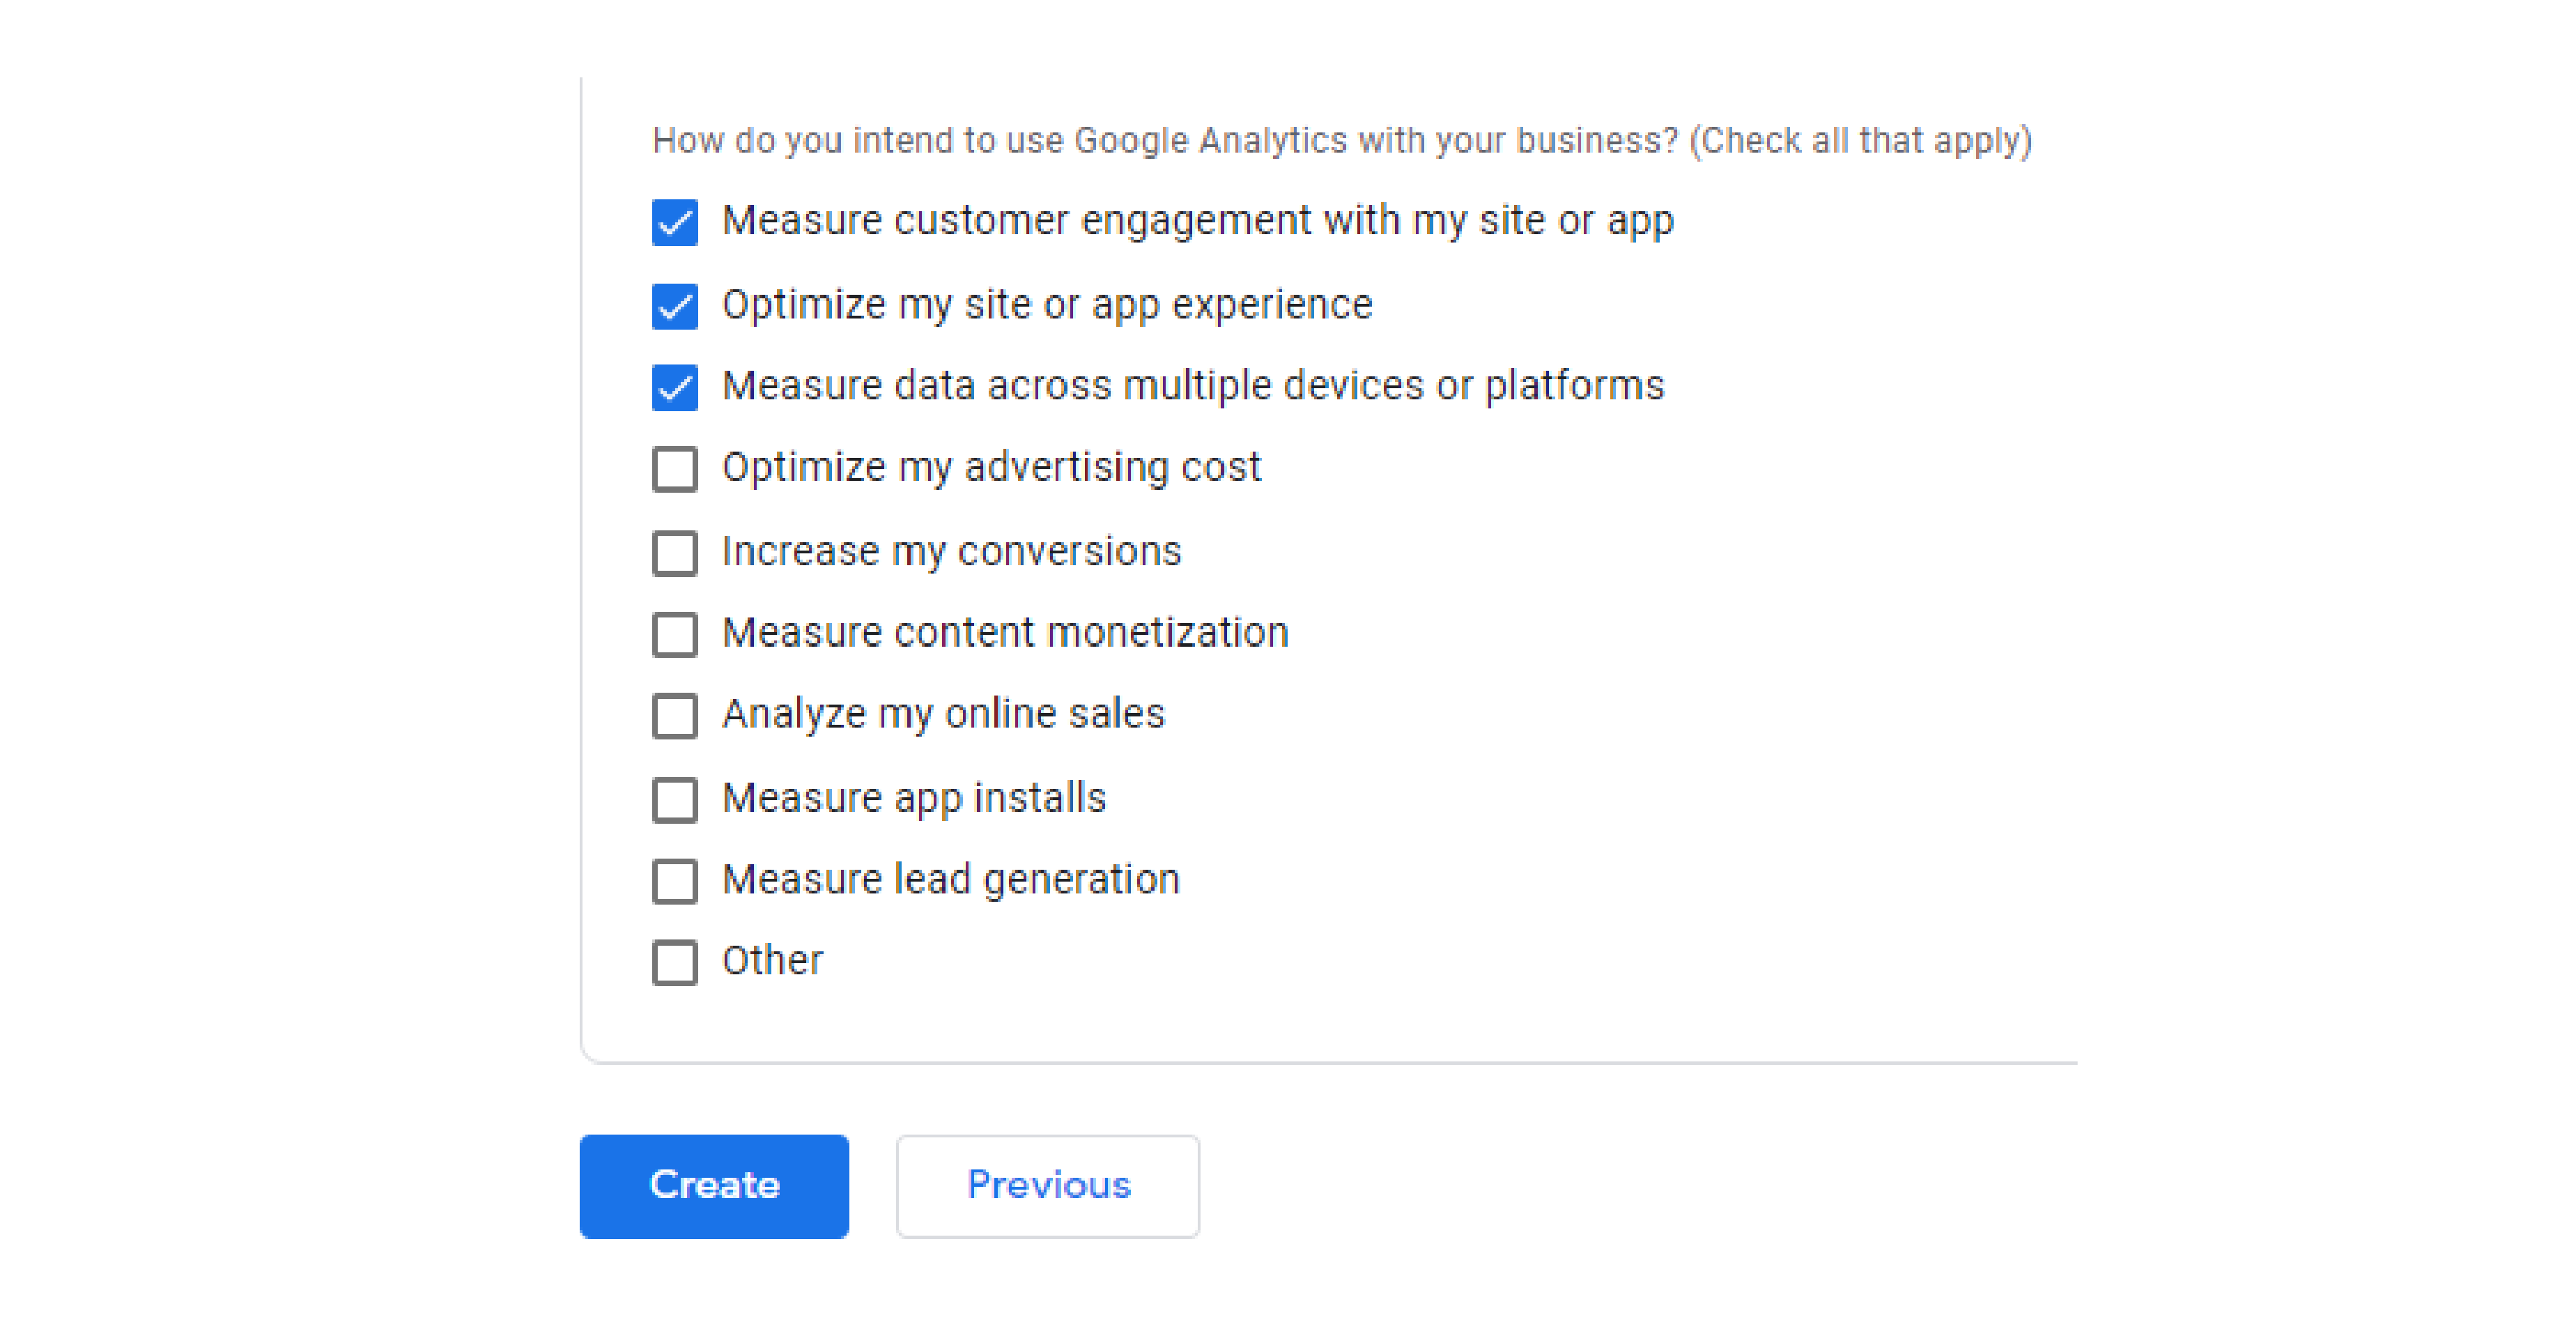
- Now, select the information you want to track under “How do you intend to use Google Analytics with your business?”

- Click “Create” and choose “Web” under the “Choose a Platform” option.
- Next, you will need to add your website URL and a stream name under “Set Up Your Web Stream”.
- Tap the “Settings” icon.
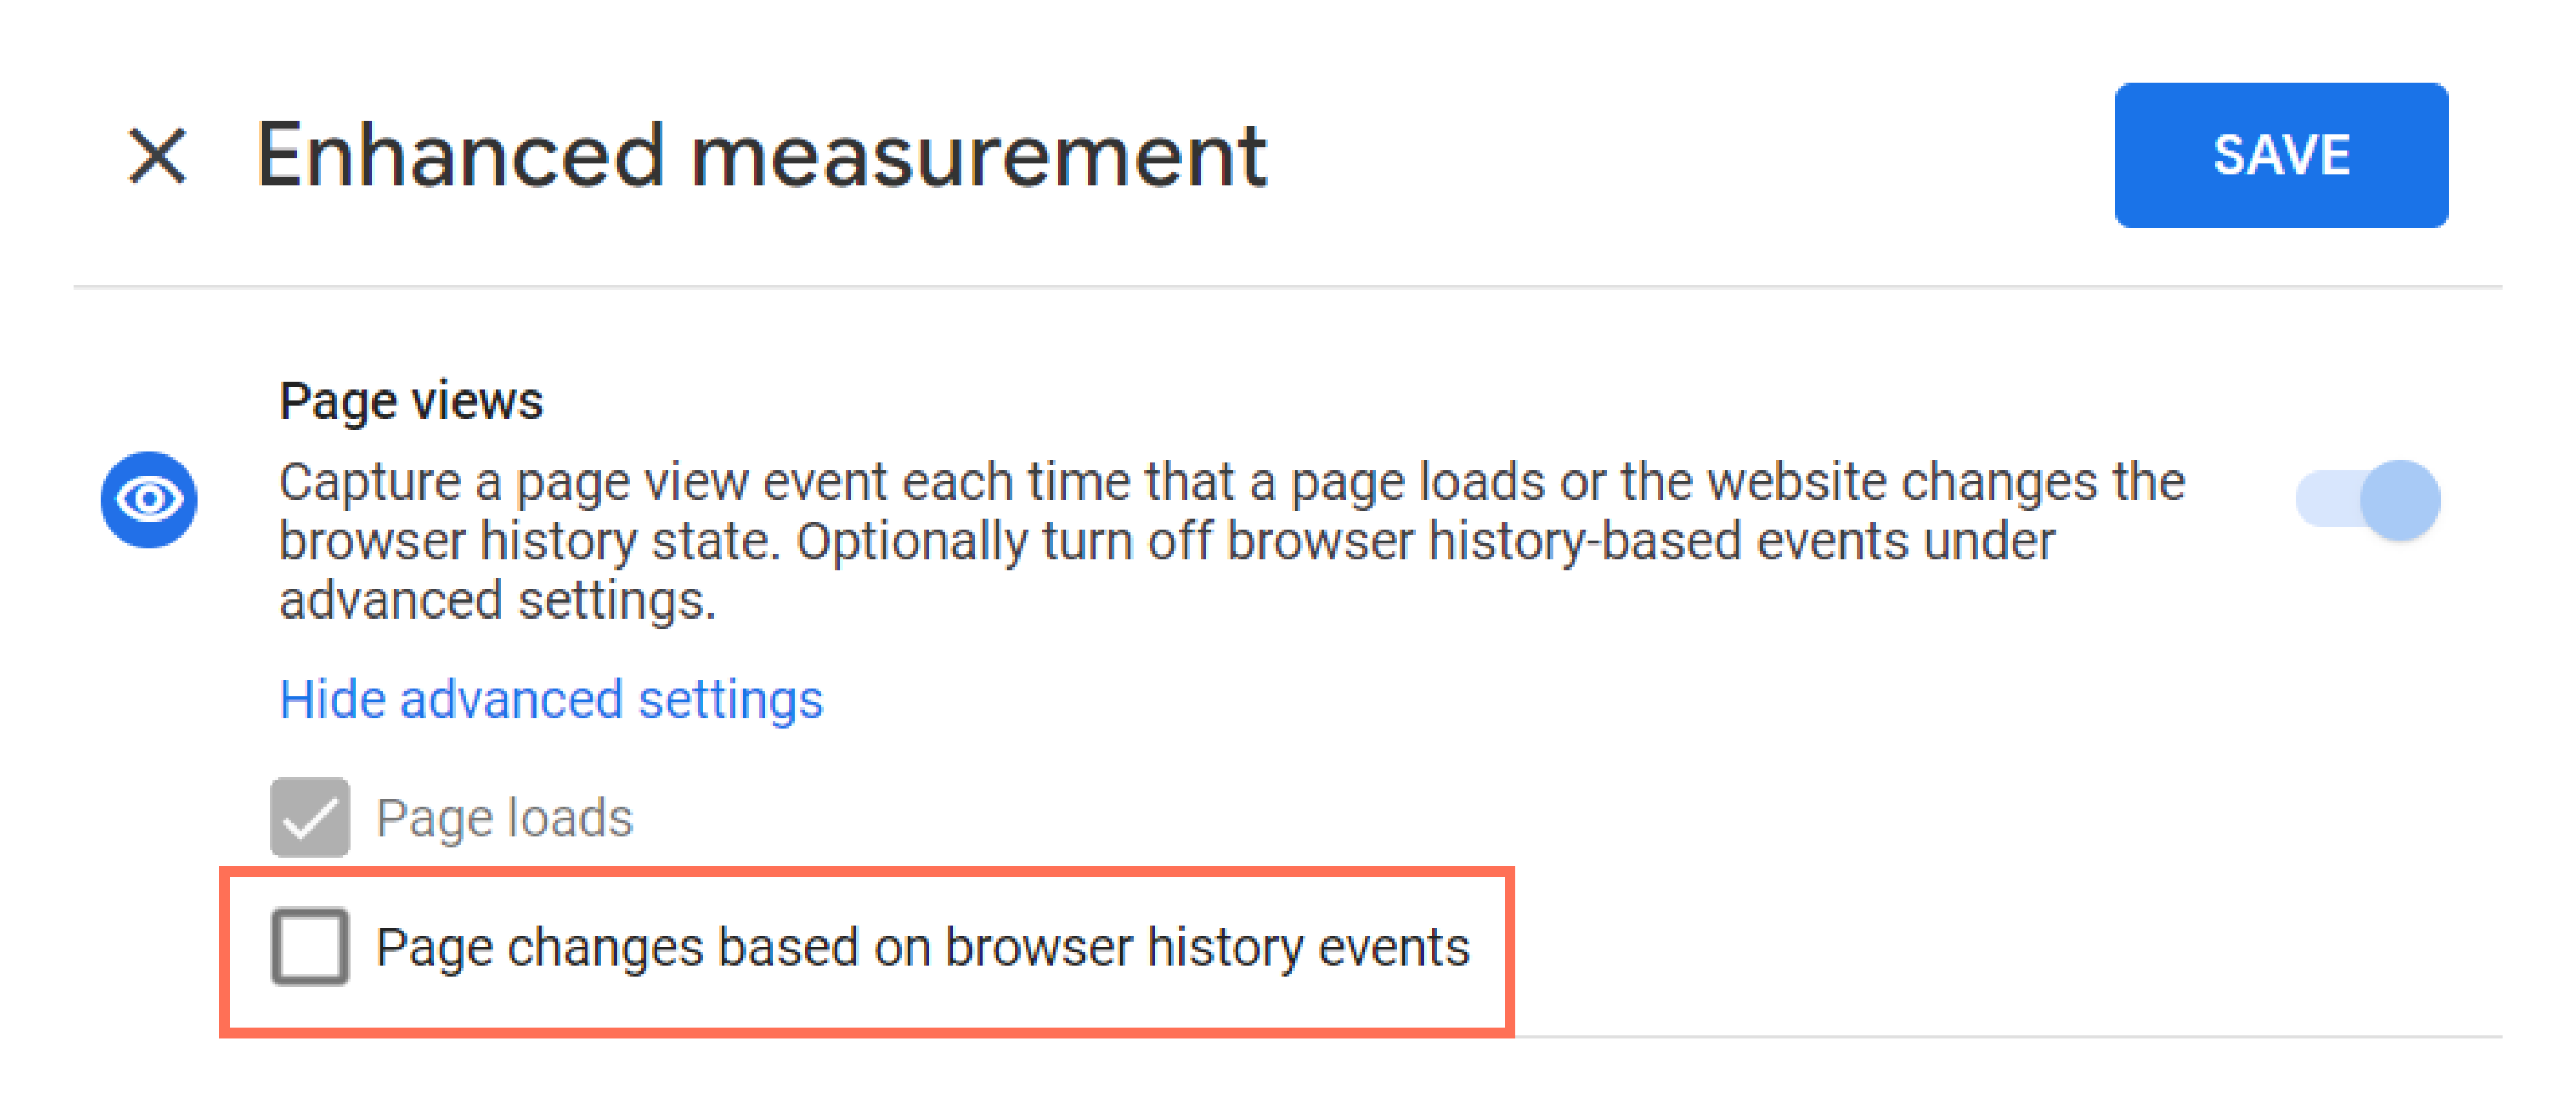
- Now click on the “Show Advanced Settings” under “Page Views”.
- Deselect the “Page changes based on browser history events” checkbox option.
- Next, you will need to disable the “Site Search” toggle.
- Click on “Save” when you are done with these steps.
- Tap on “Create Stream” and copy your Measurement ID

That’s all you need to do.
2. Using Universal Analytics
The alternative option you have to connect to Google Analytics is to use a universal analytics property. Follow this detailed guide to connect Analytics to your account by using universal analytics:
- Sign in to your Google Analytics account.
- Click on the “Admin” icon at the bottom left panel of the home page.

- Now, click on “+ Create Property” and enter a property name.
- From there, choose your reporting time zone, and currency from the drop-down menu.
- Tap on the “Show advanced options” next.
- Enable the “Create a Universal Analytics property” toggle.
- Add your website URL and click on the “Create a Universal Analytics property only” option.

- Select “Next” and choose your type of business from the “Industry Category” drop-down menu.
- Choose your business size and add the information you want to track under “How do you intend to use Google Analytics with your business”.
- Click “Create” and copy your tracking ID.
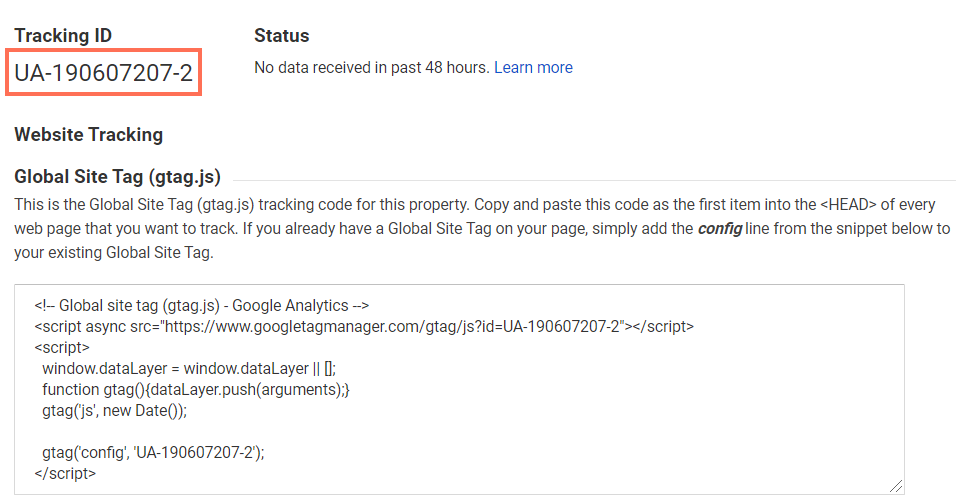
You are now all set to use a universal analytics property.
Step 2 - Add Your Google Analytics Property to Shopper Store
Now that you are done with the complex part of getting your Google property ID, all that’s left is to add your Google Analytics property to marketing integrations in your dashboard.
Follow the steps to complete connect Google Analytics to your Shopper store:
- Sign in to your Shopper.com account.
- Go to Settings tab on your dashboard and then go to Preferences
- Next, you will need to paste your Google Analytics 4 or Universal Analytics Tracking ID that you copied without any extra spaces before the code.
- Click on “Save” when you are done.
Please be aware that it may take some time for the analytics to appear in your Google Analytics account.
If you have connected multiple domains to your website, you will need to add your Google Analytics code to your primary domain only, rather than your secondary domains.