Measure, optimize and build audiences for your ad campaigns with Facebook Pixel on your Shopper account. The FB pixel analytics tool can help you track customer behavior in your store, and the data can help you improve your marketing efforts, like retargeting. Complete the Facebook pixel integration on your Shopper account by following the steps below:
How to Get FB Pixel?
If you already have a Facebook account, it’s pretty straightforward to complete the FB pixel integration.

Login to Facebook and follow these steps to create an FB pixel code or get an existing FB pixel.
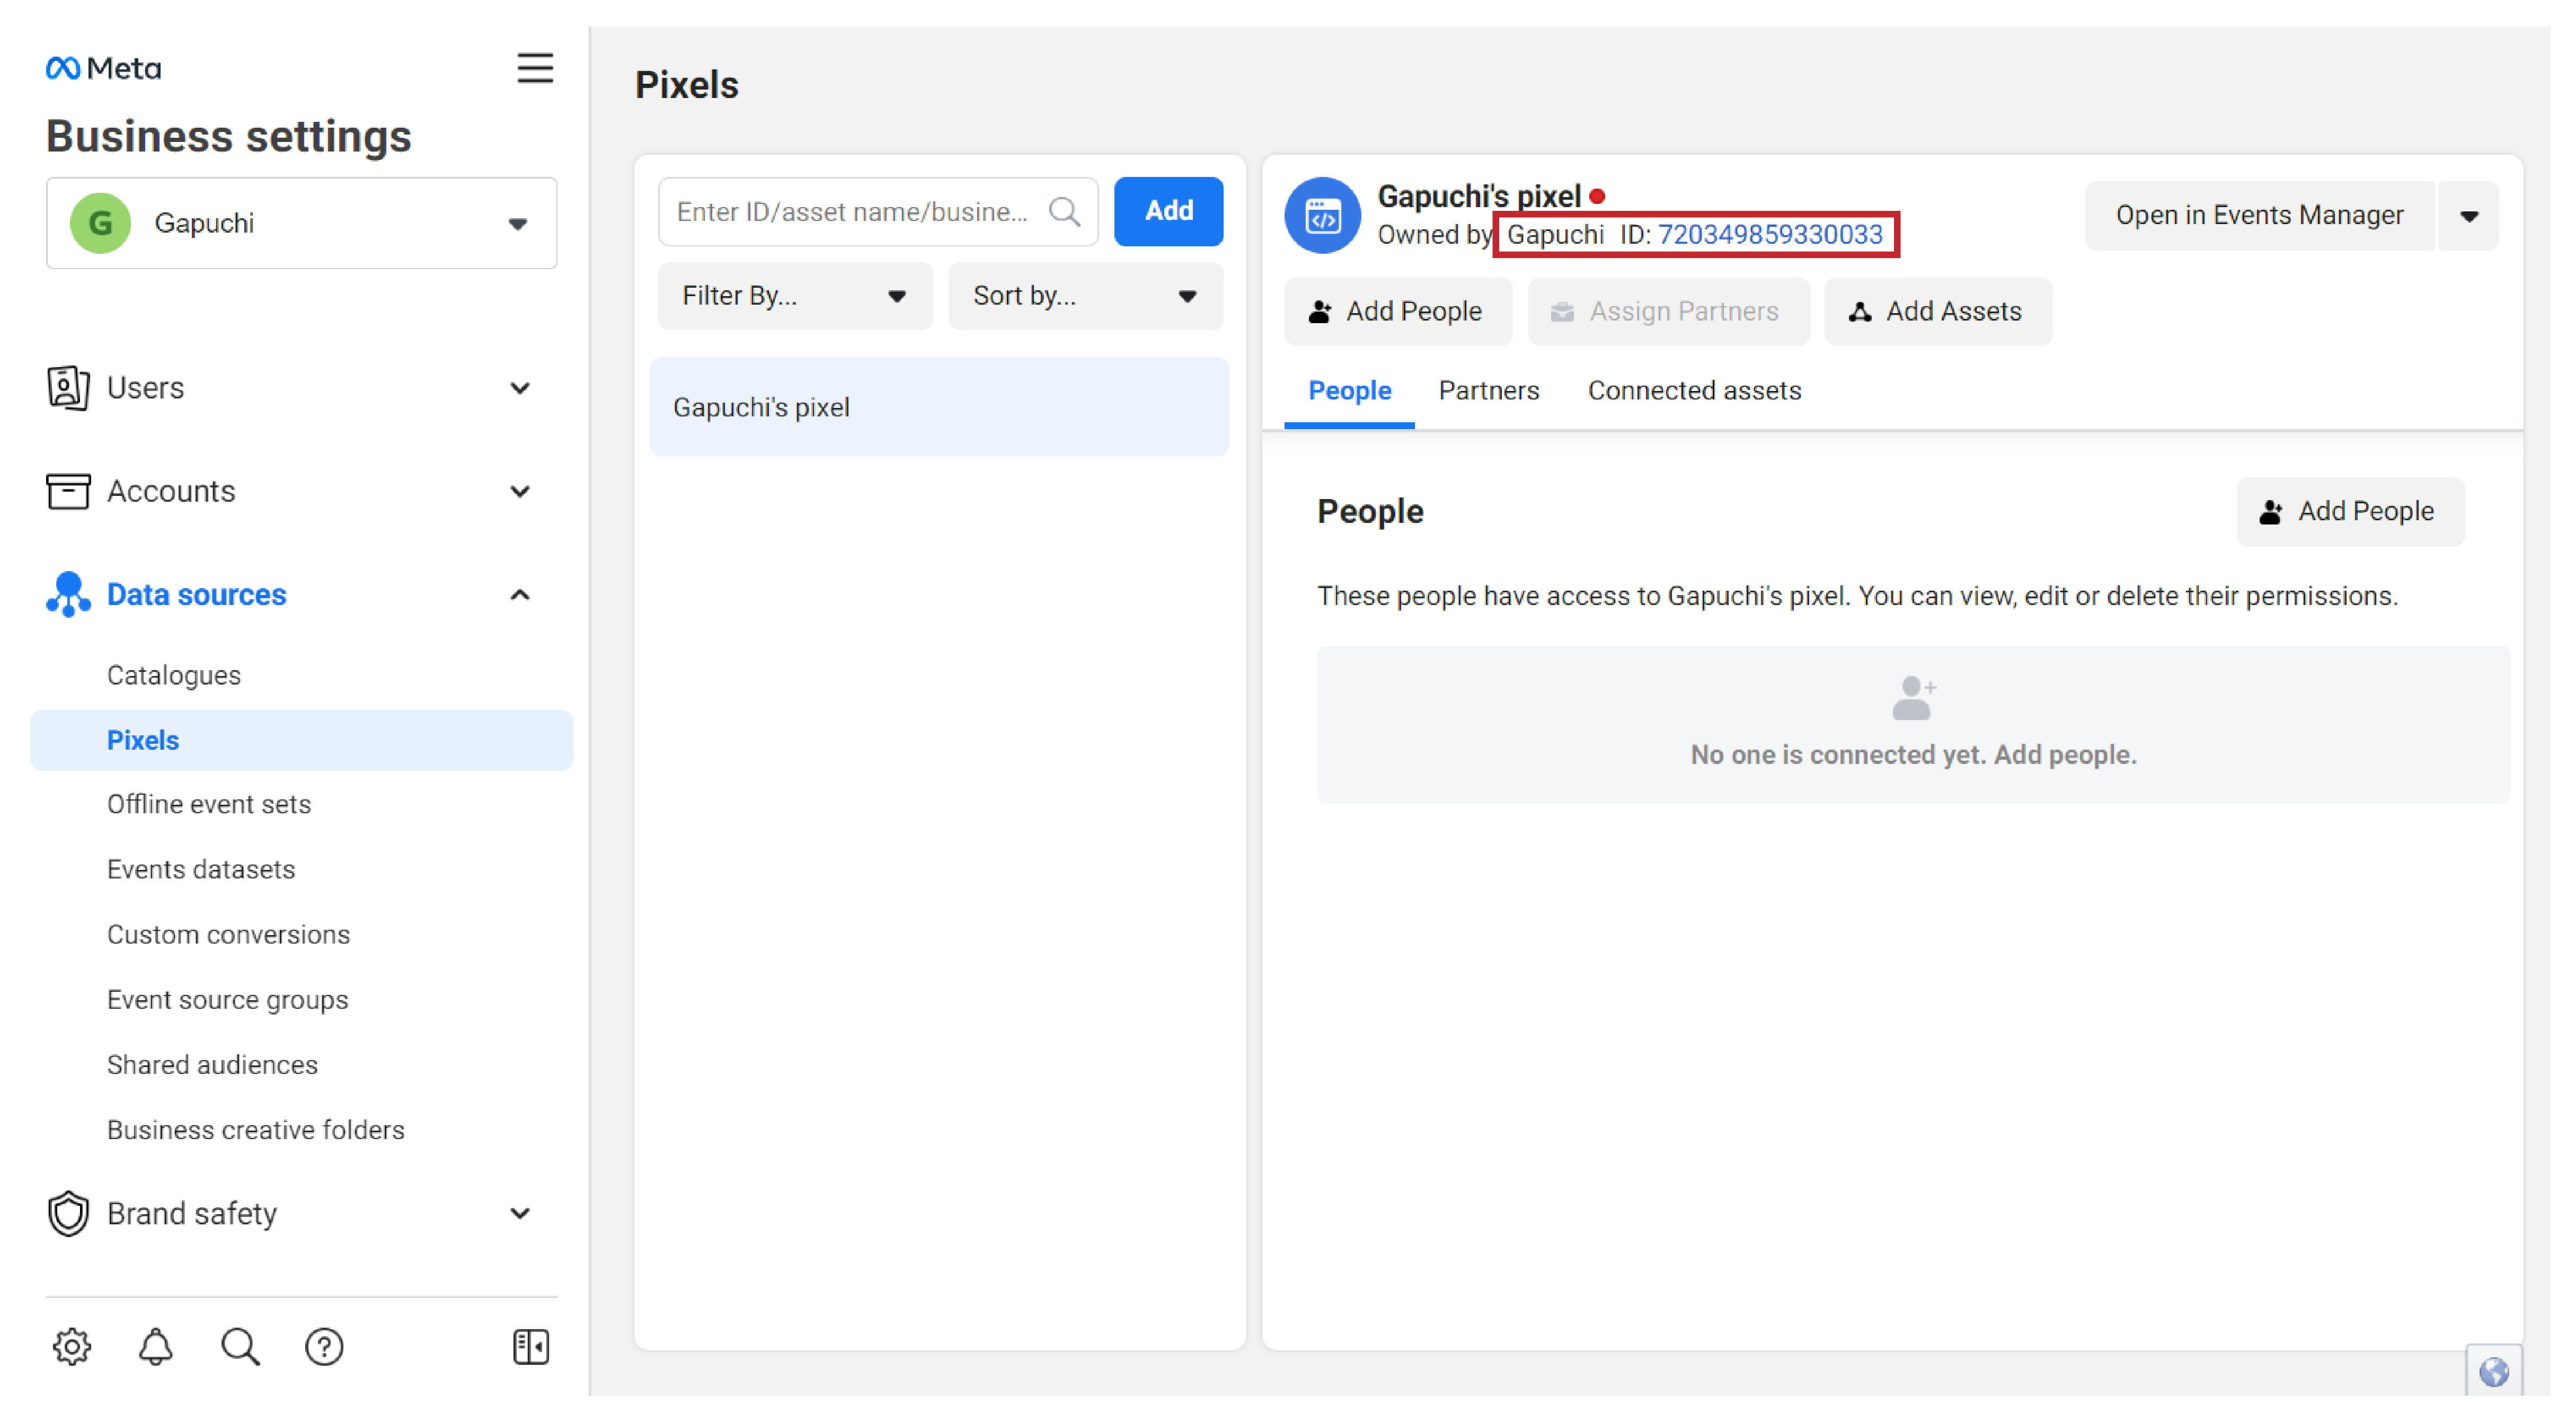
- Head over to Facebook Business Manager and login to your account.
- From there, go to ‘Business Settings’.
- Next, select the business that you have added to your business manager.
- Look for ‘Data Sources’ and click on it.
- Tap on ‘Pixels’ and click on the ‘+Add’ button.
- Enter a name for your Pixel, and add your website URL (if you have an existing website)
- You will see the FB pixel now displayed on your business manager.
- Copy the meta pixel code.
Please note that you are required to have a website for your business, and must be able to update your website’s code to complete the Facebook pixel setup.
Where and How to Paste Your FB Pixel
Once you complete the activation of your FB pixel, you will be granted access to your meta pixel code. Copy the code and do the FB pixel integration on your Shopper account by following these steps:

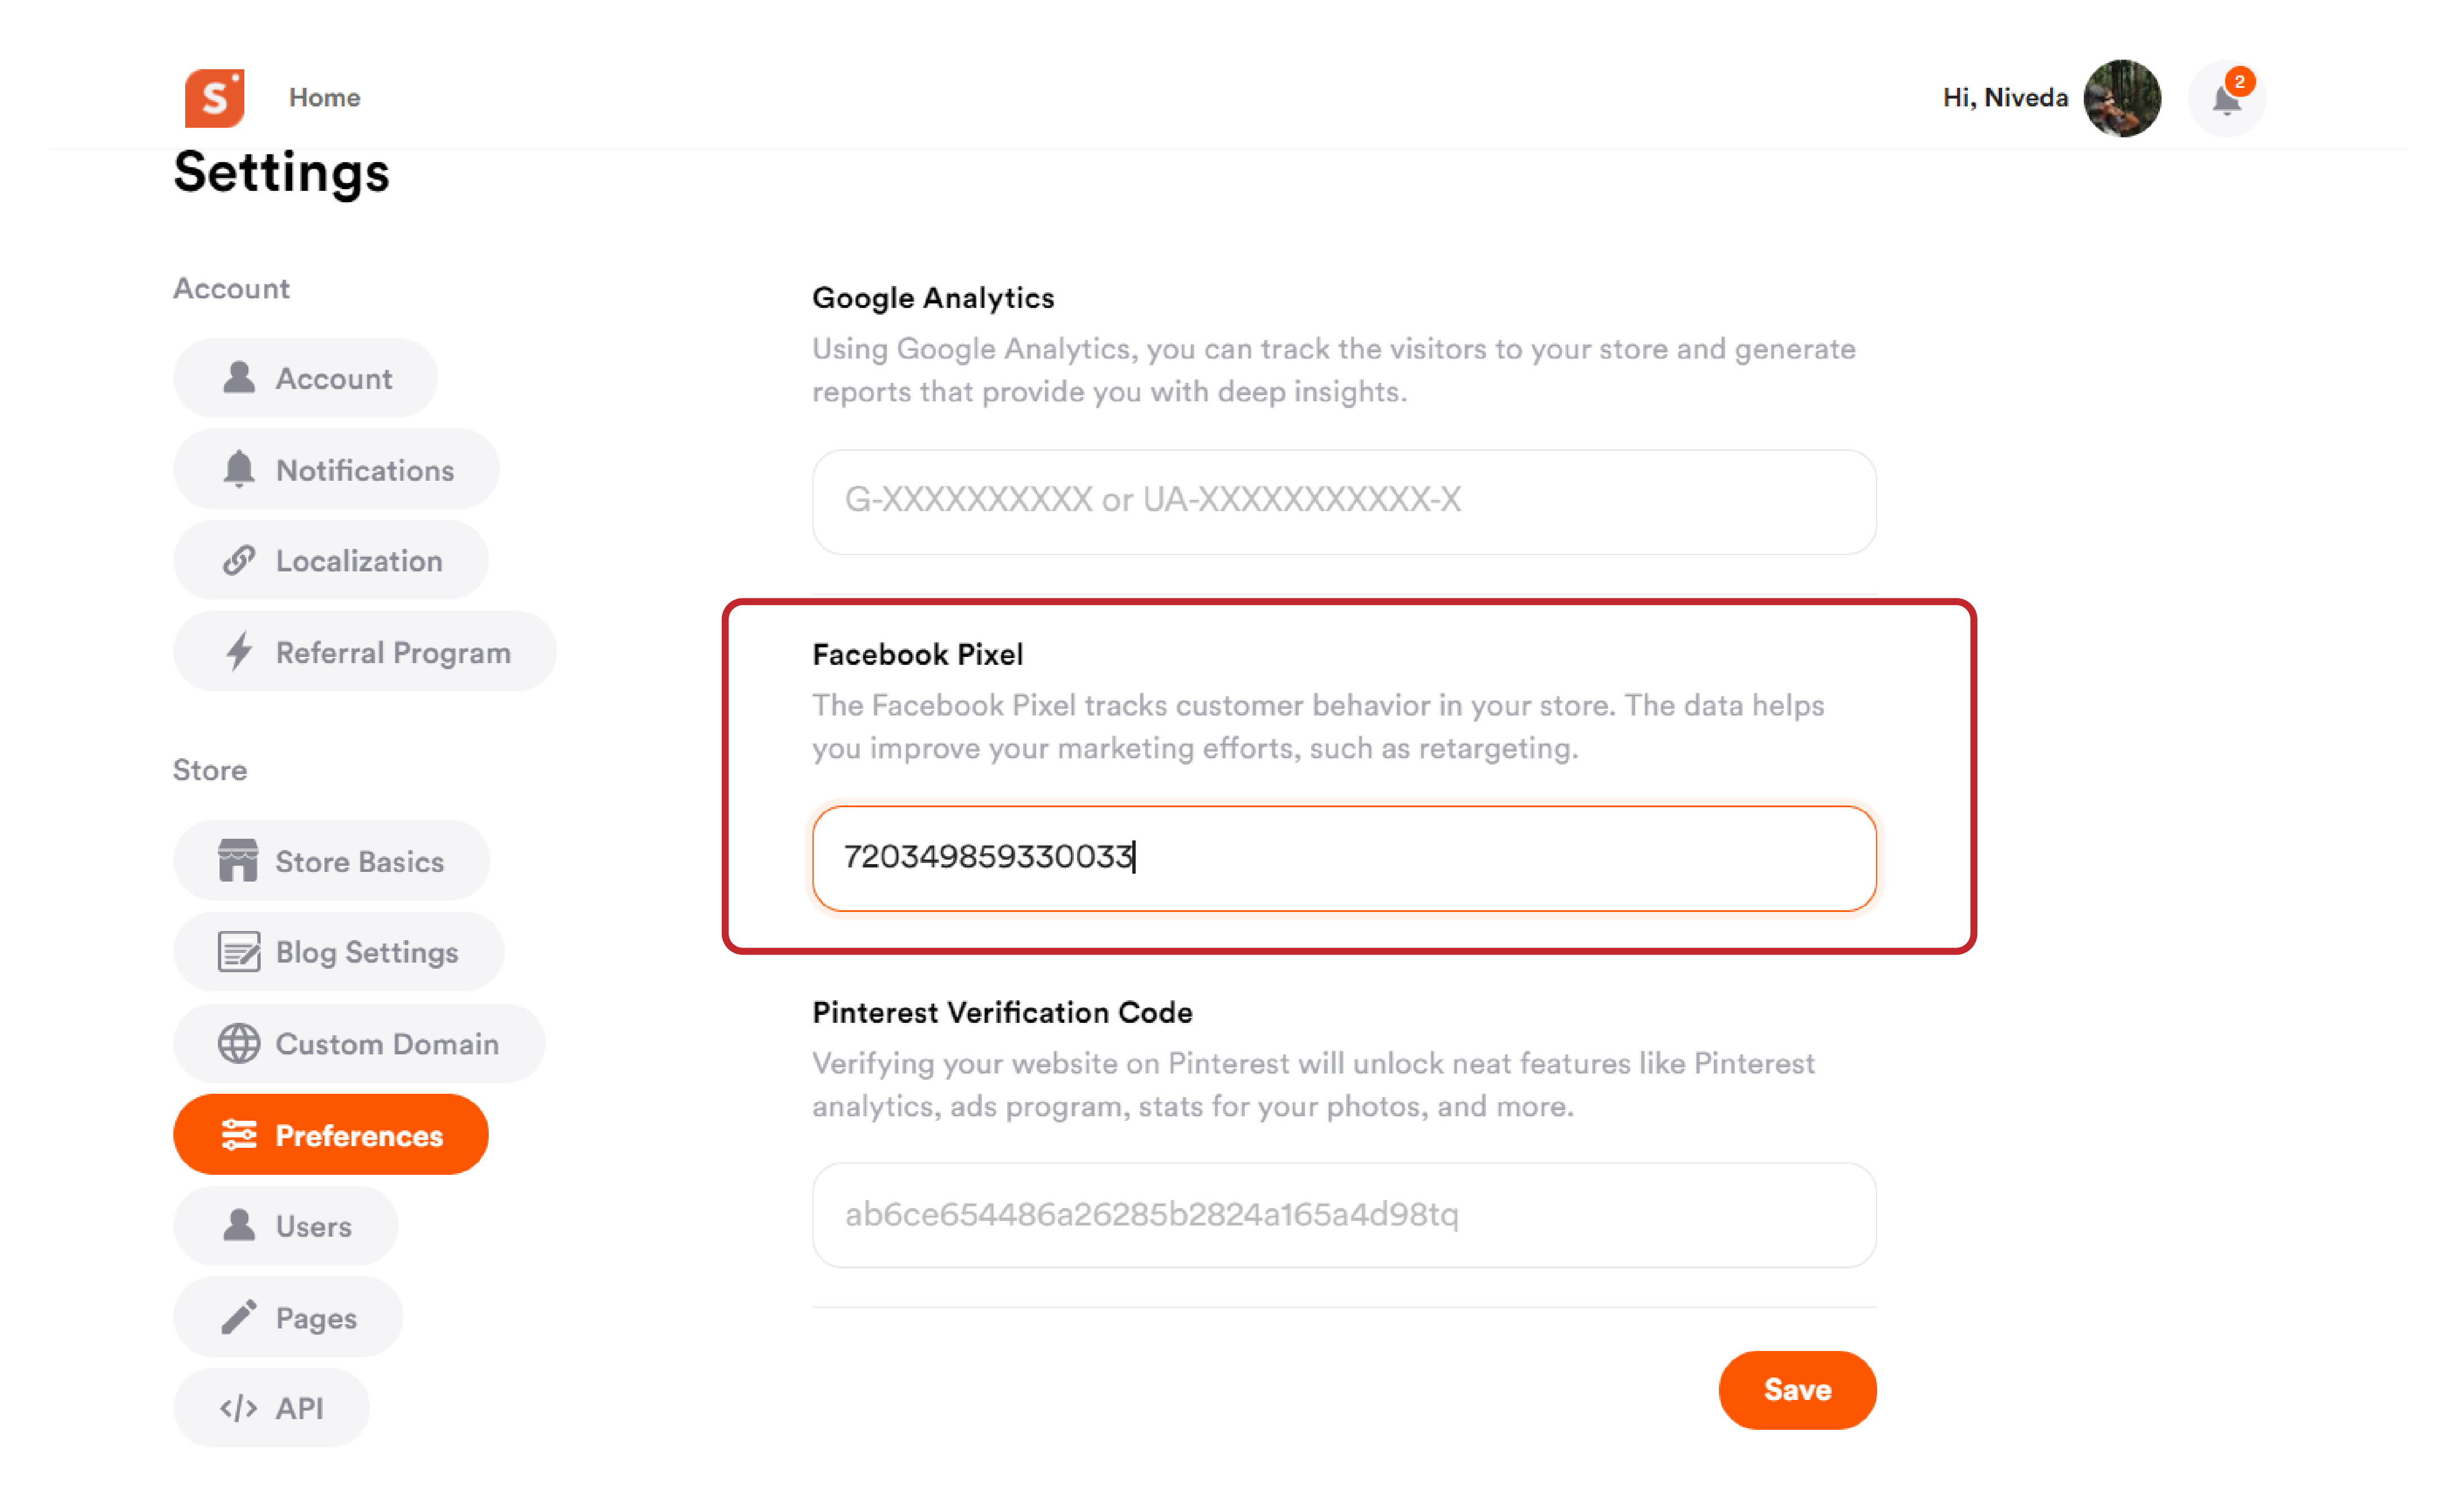
- Hover over your profile icon on the Shopper homepage.
- Click on ‘Settings’ from the drop-down menu that appears.
- Now look under the ‘Store’ tab for ‘Preferences’ and click on it.
- Paste your Meta pixel code that you copied in the field below the ‘Facebook Pixel’ menu.
- Tap the ‘Save’ button to complete the FB pixel integration.
