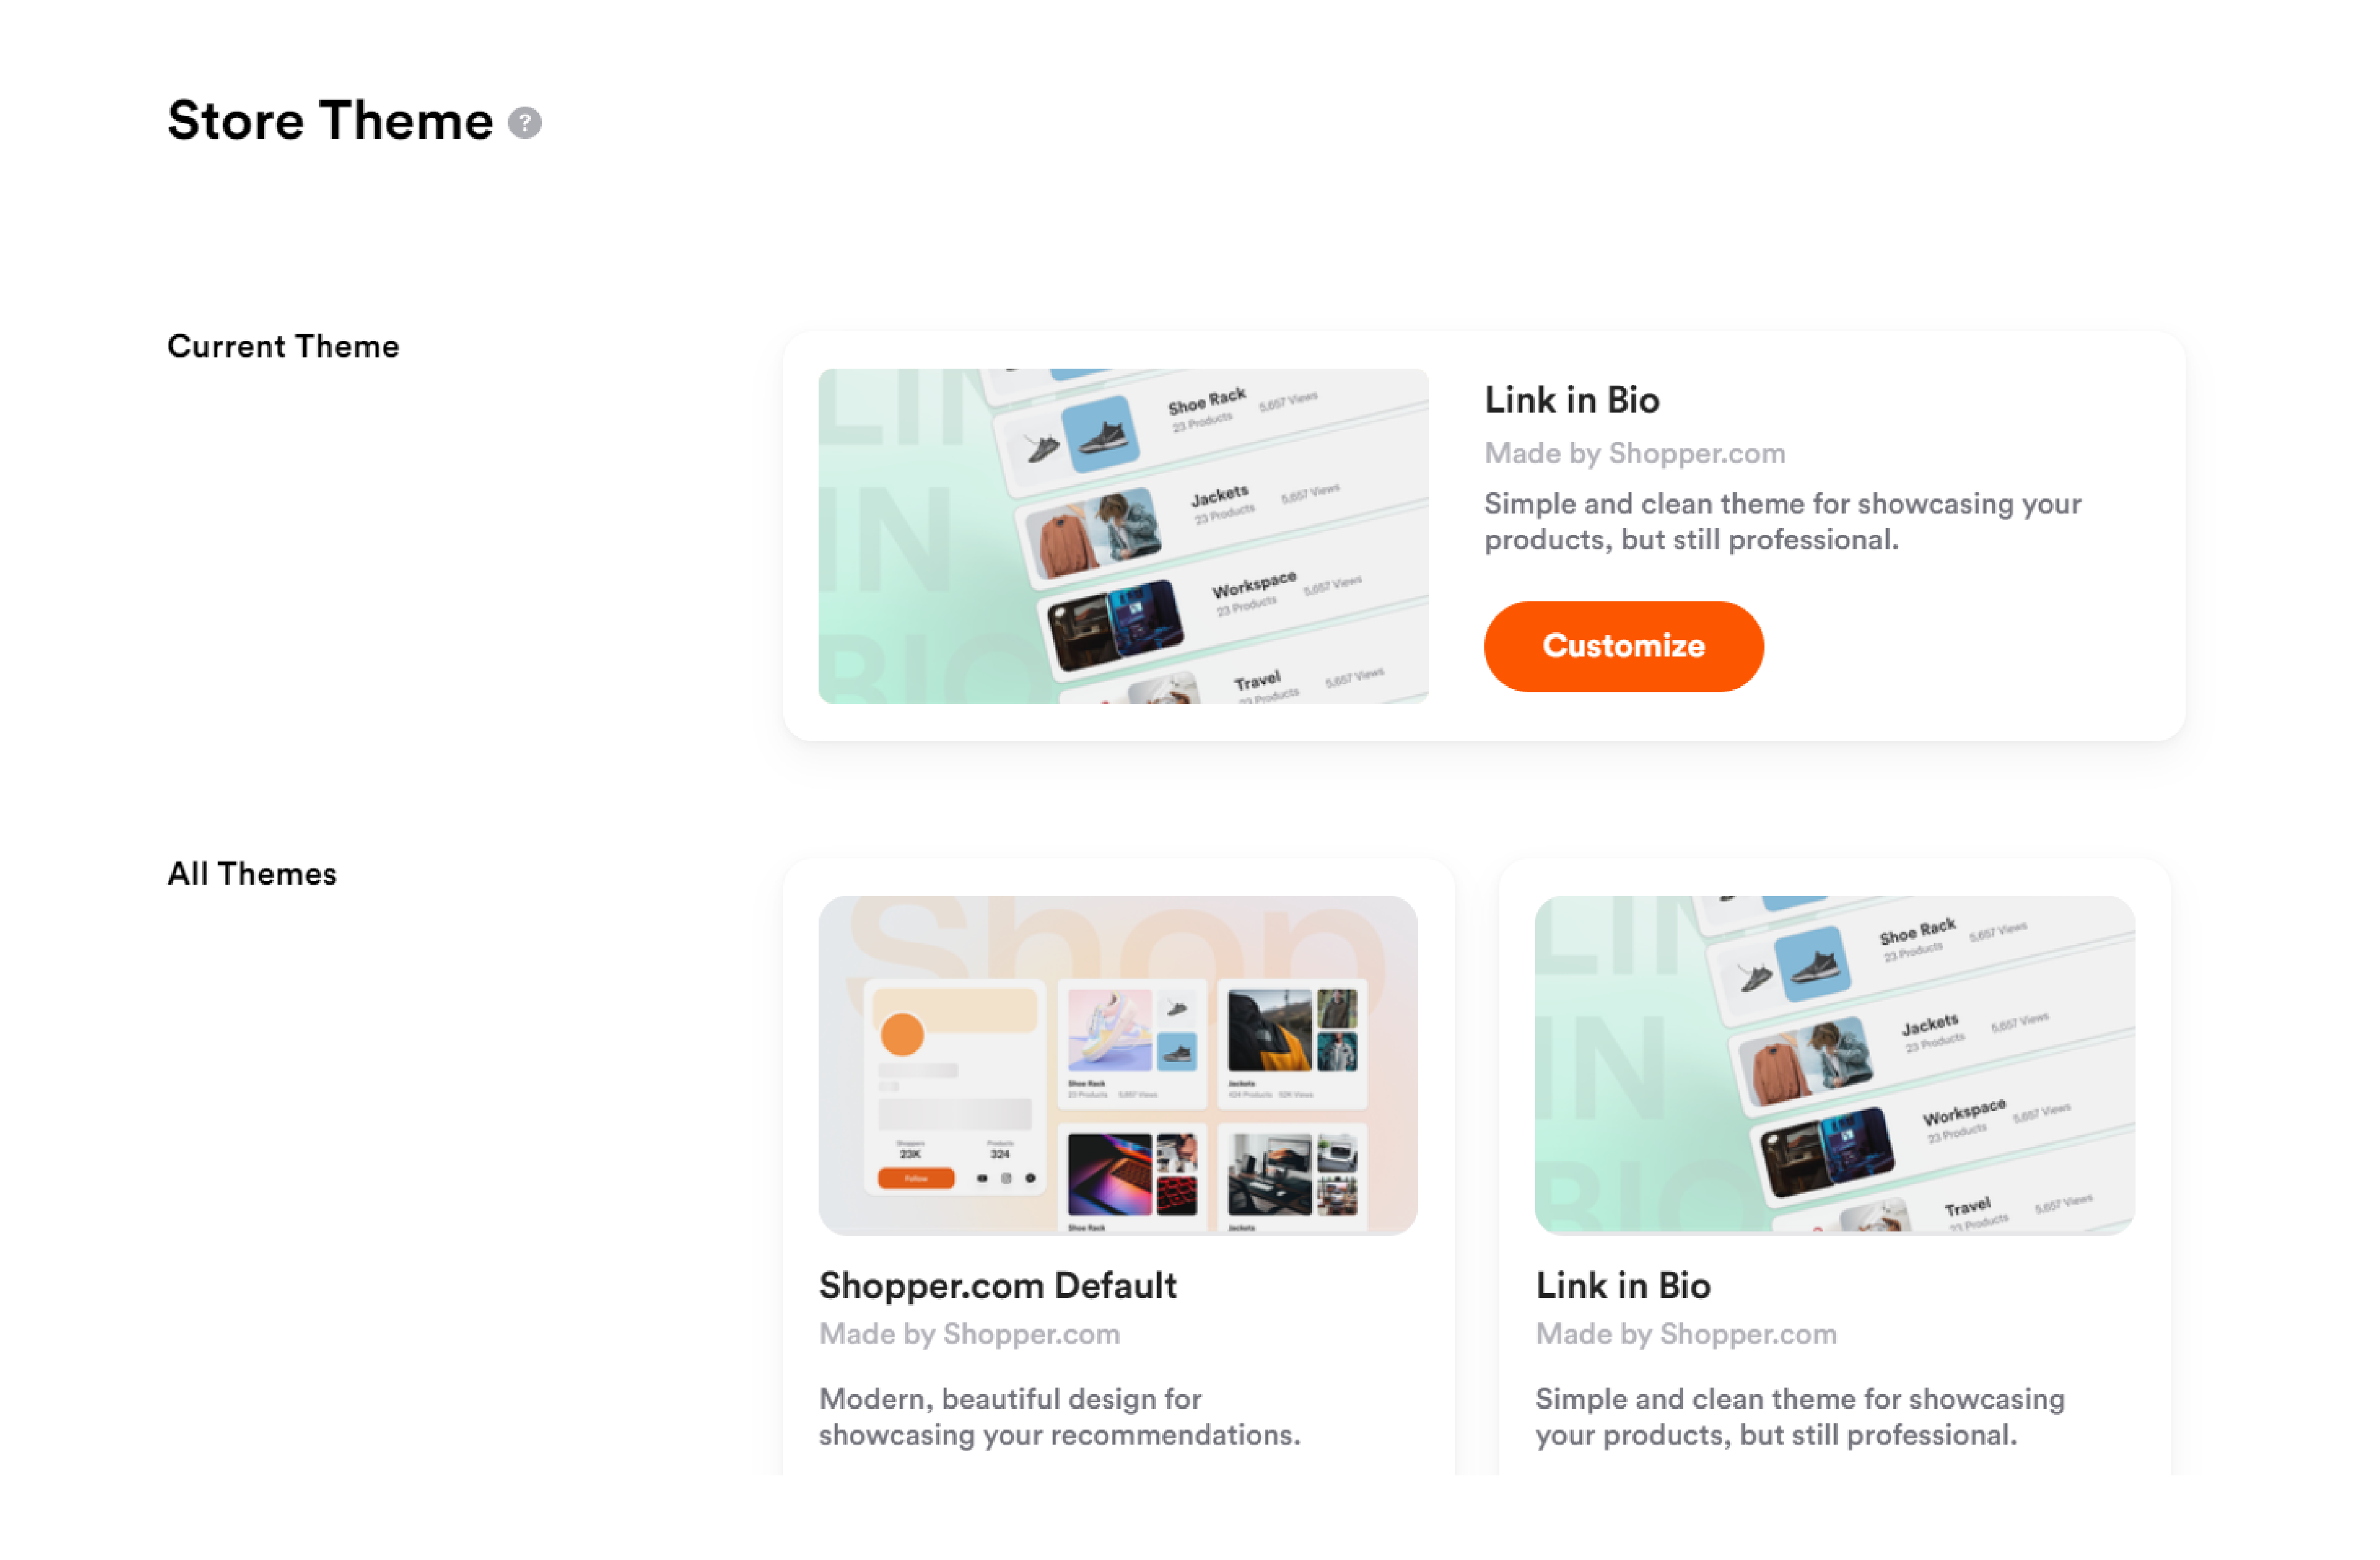
You can now personalize your Shopper page with customizable themes!

If you have a Creator or Creator Plus subscription plan enabled on your Shopper page, custom themes are one of the many value added benefits and services you get access to.
Setting up a custom theme is super easy and you already have two different theme layouts to choose from.
You can also personalize the background image you want for your Shopper page, which gives you more flexibility and options for personal branding like adding your logo as a background image!
Now that you have an idea about custom themes, let’s take a look at how to change your theme.
How to Change the Theme on a Shopper Page?
Follow these steps to change the theme on your Shopper page:
- Hover over your profile picture and select ‘Appearance’ from the drop down menu.
- You will be taken to the ‘Store Theme’ editor
- Here, you will be able to see two options - Current Theme, and All Themes
- Current theme will showcase the active theme (Shopper default if you haven’t changed themes).
- All Themes has the alternative theme options you can choose from.
- Select the theme you want from ‘All Themes’ options if you wish to change the existing theme.
- Click on ‘Customize’ to further personalize your active theme.
- You will be taken to the theme editor, where there will be multiple options you can choose.
- Look for the ‘Theme Settings’ menu on the top right corner of the page and click on it
- Click on the field next to ‘Background’ to add a solid color, search for images, or upload an image from your storage.
- You can choose to go with a full background fill, or repeated fill
- Select a primary color and choose dark or light theme to set the tone
- You can click on the ‘Page’ drop down menu from the top left corner to switch between home page, product page, and collection page to see how the theme looks.
- Once everything looks good to go, click on the ‘Publish Theme’ option to save your custom theme.
