
Using Bulk product upload feature you can add up to 100 products in one go.To make it hassle-free, continue reading this help page to get all the information you need on how to add more products at once
How can I add more than one product?
Bulk uploading products on Shopper works just like how you normally add products to your store.
The only major difference is that you will need to upload a CSV (comma-separated values) file.
The CSV file must have information like product name, product URL, collection names (if you wish to add your products into collections), product images, affiliate status, affiliate URL, description, and offer URL (if you want to attach offers to any product).
If you are new to bulk uploading a website, or not sure about how to create a CSV file, please download the CSV sample template we have on the bulk upload page.
You can edit the sample template with your product information and upload the same file to make it even easier.
If you are still having difficulties in understanding how the bulk uploading feature works, follow these steps:
- Log in to your Shopper account.
- Click on the “+Add” icon and select “Product”
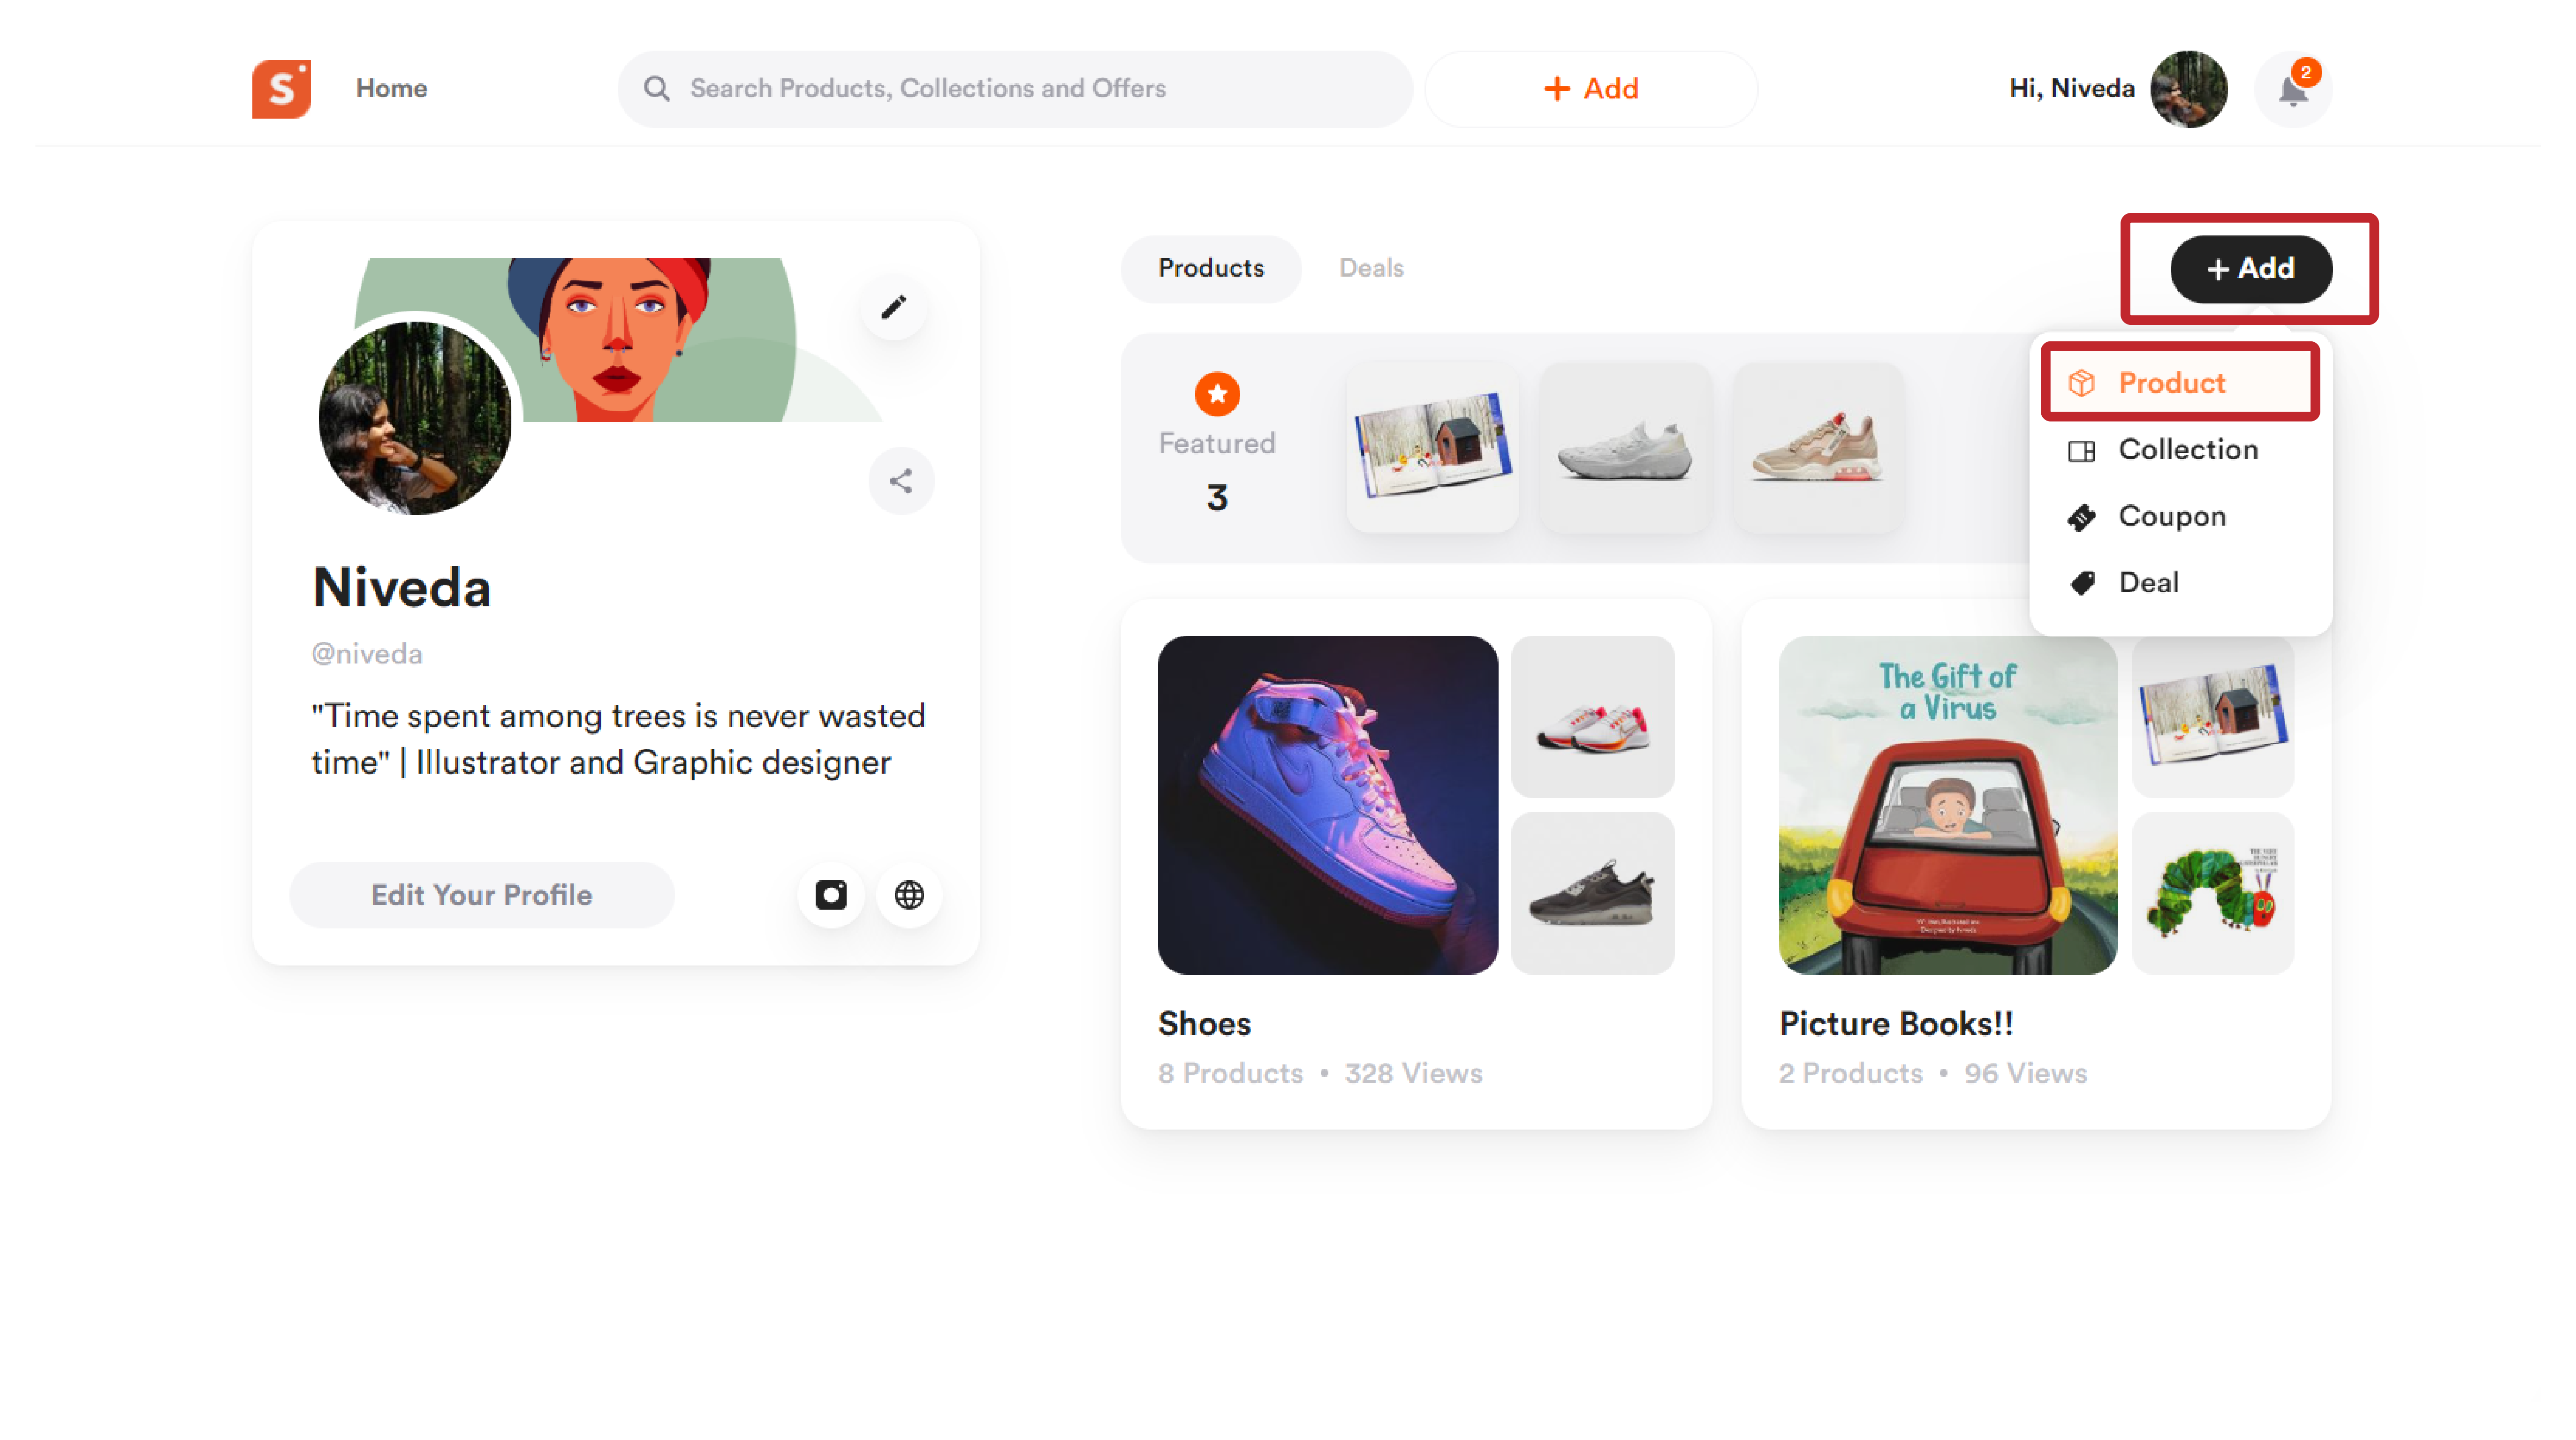
- Now look for the “Import Product from CSV” option and tap on it.

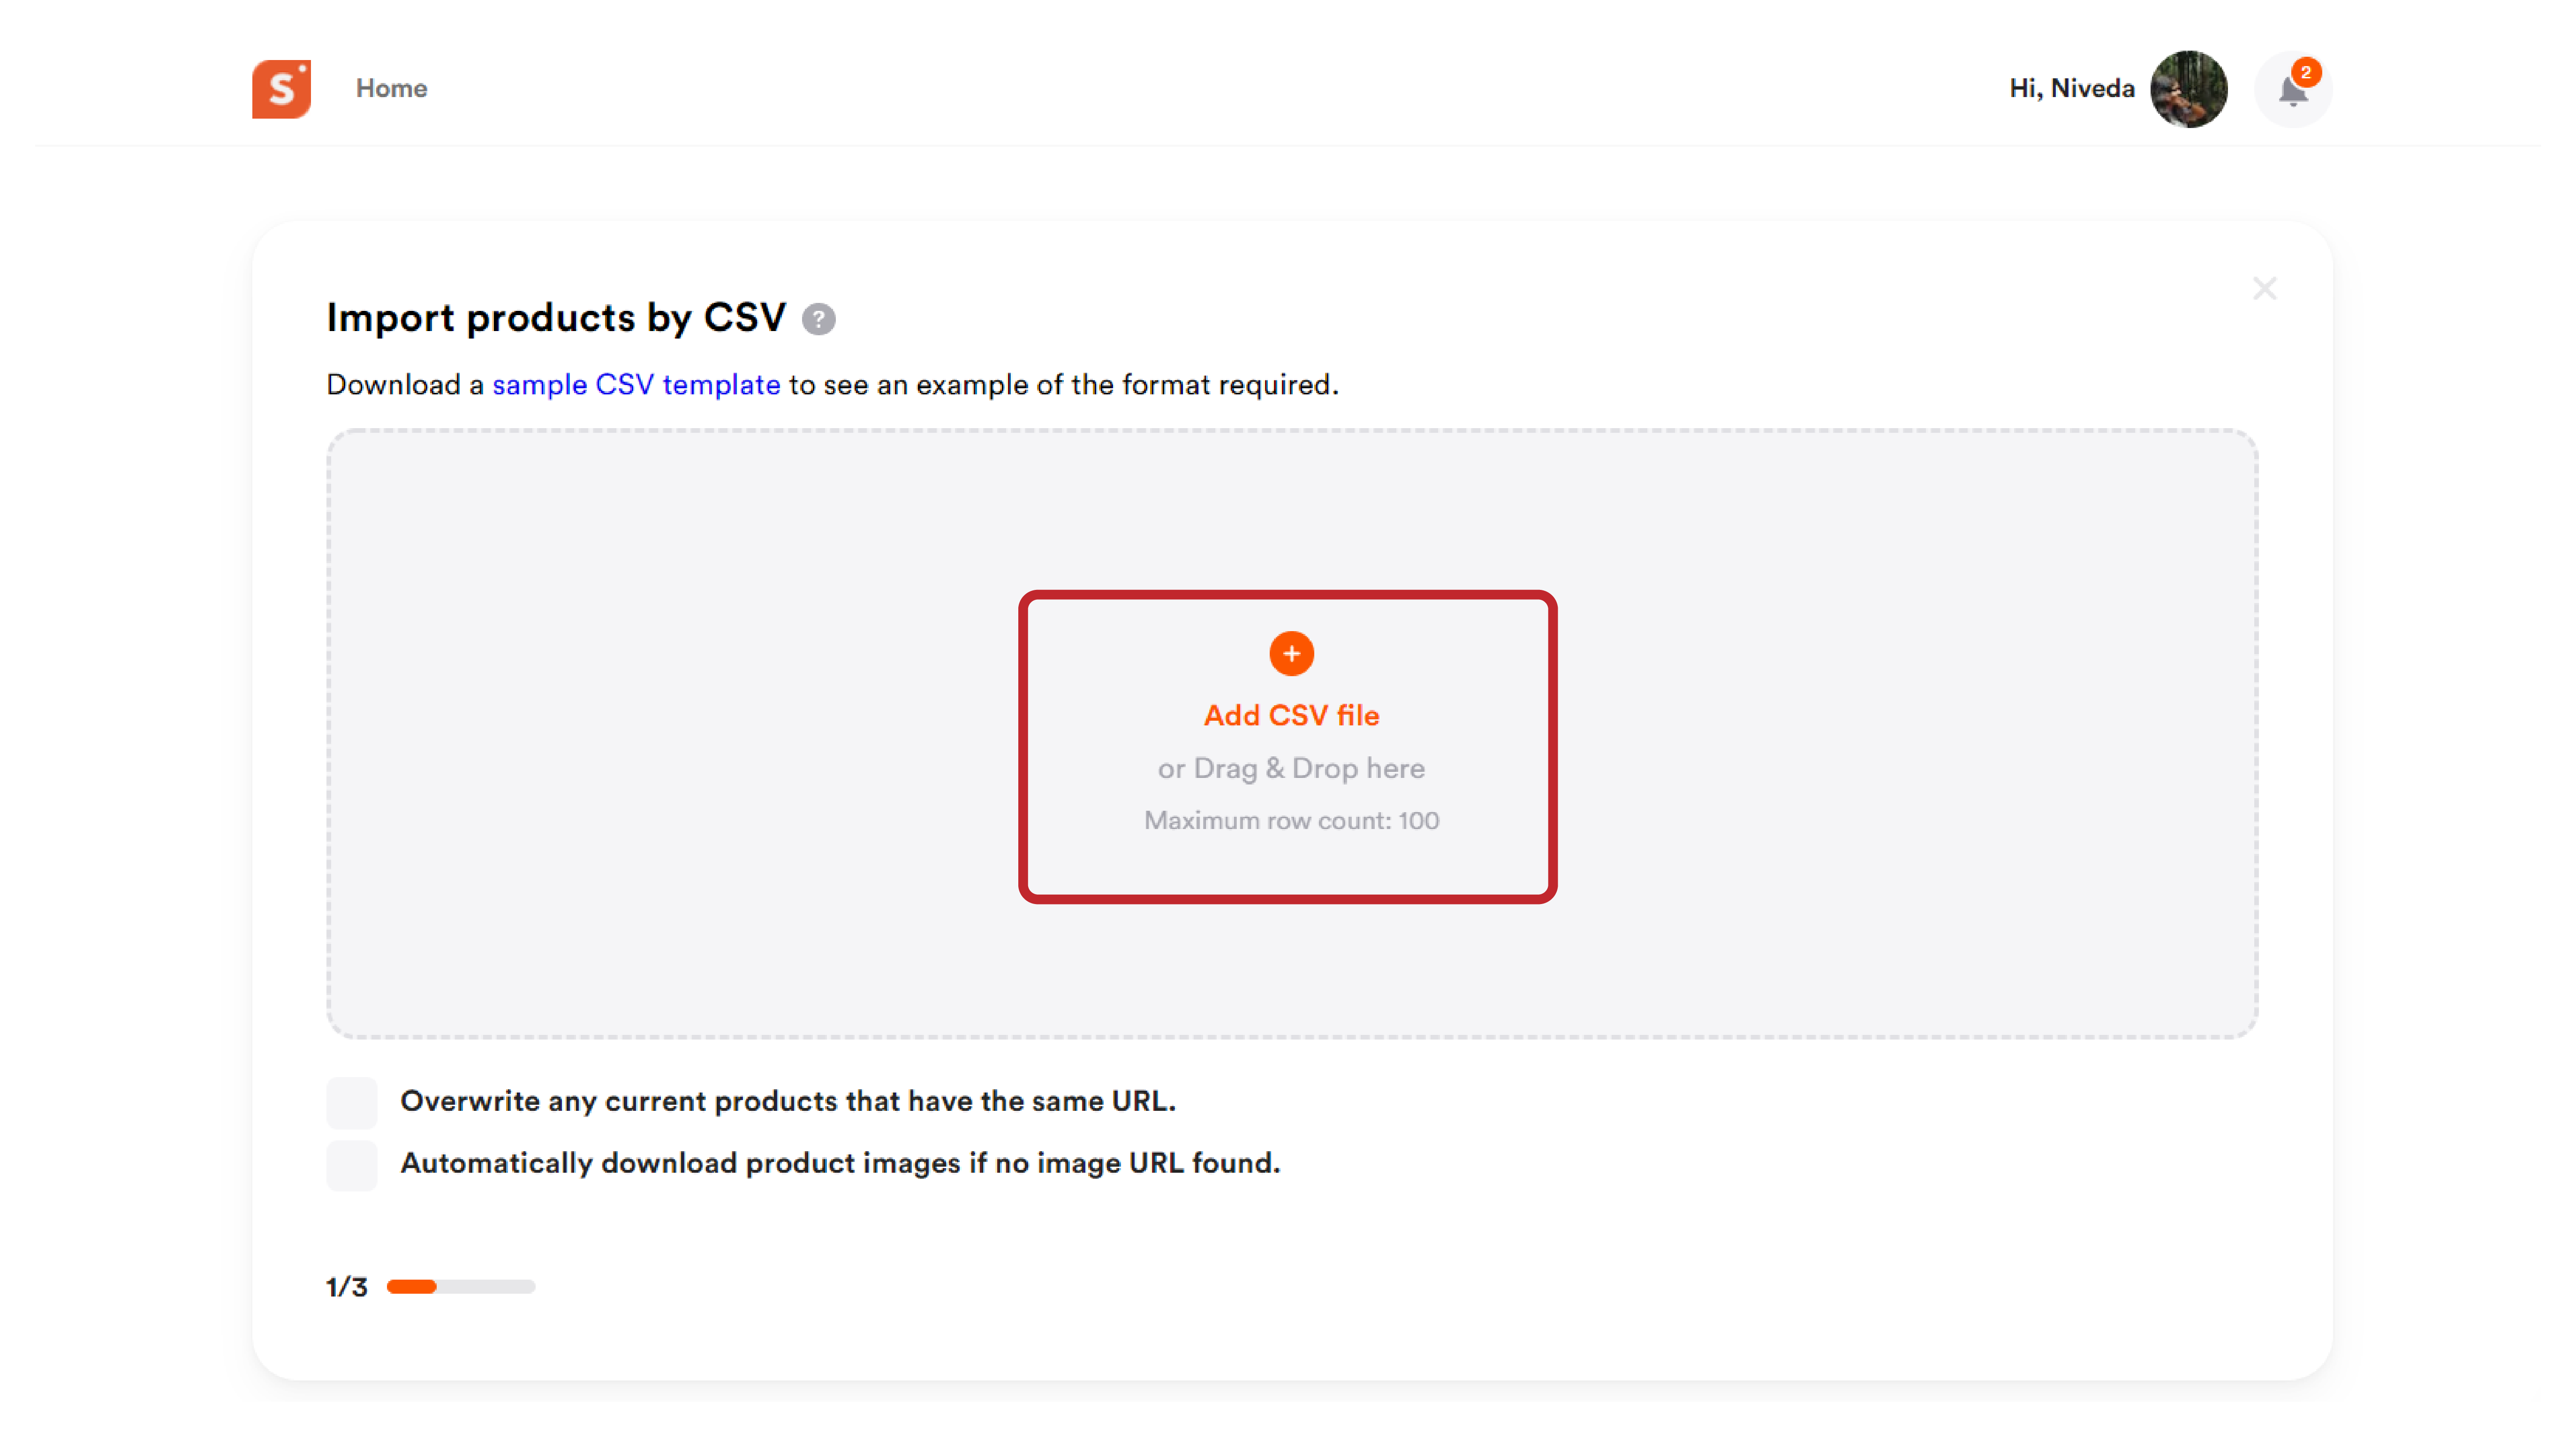
- You will be redirected to the bulk upload page.
- Next, you will need to add your CSV file.
- You can either drag your CSV file or click on the “+” button to select the CSV file.
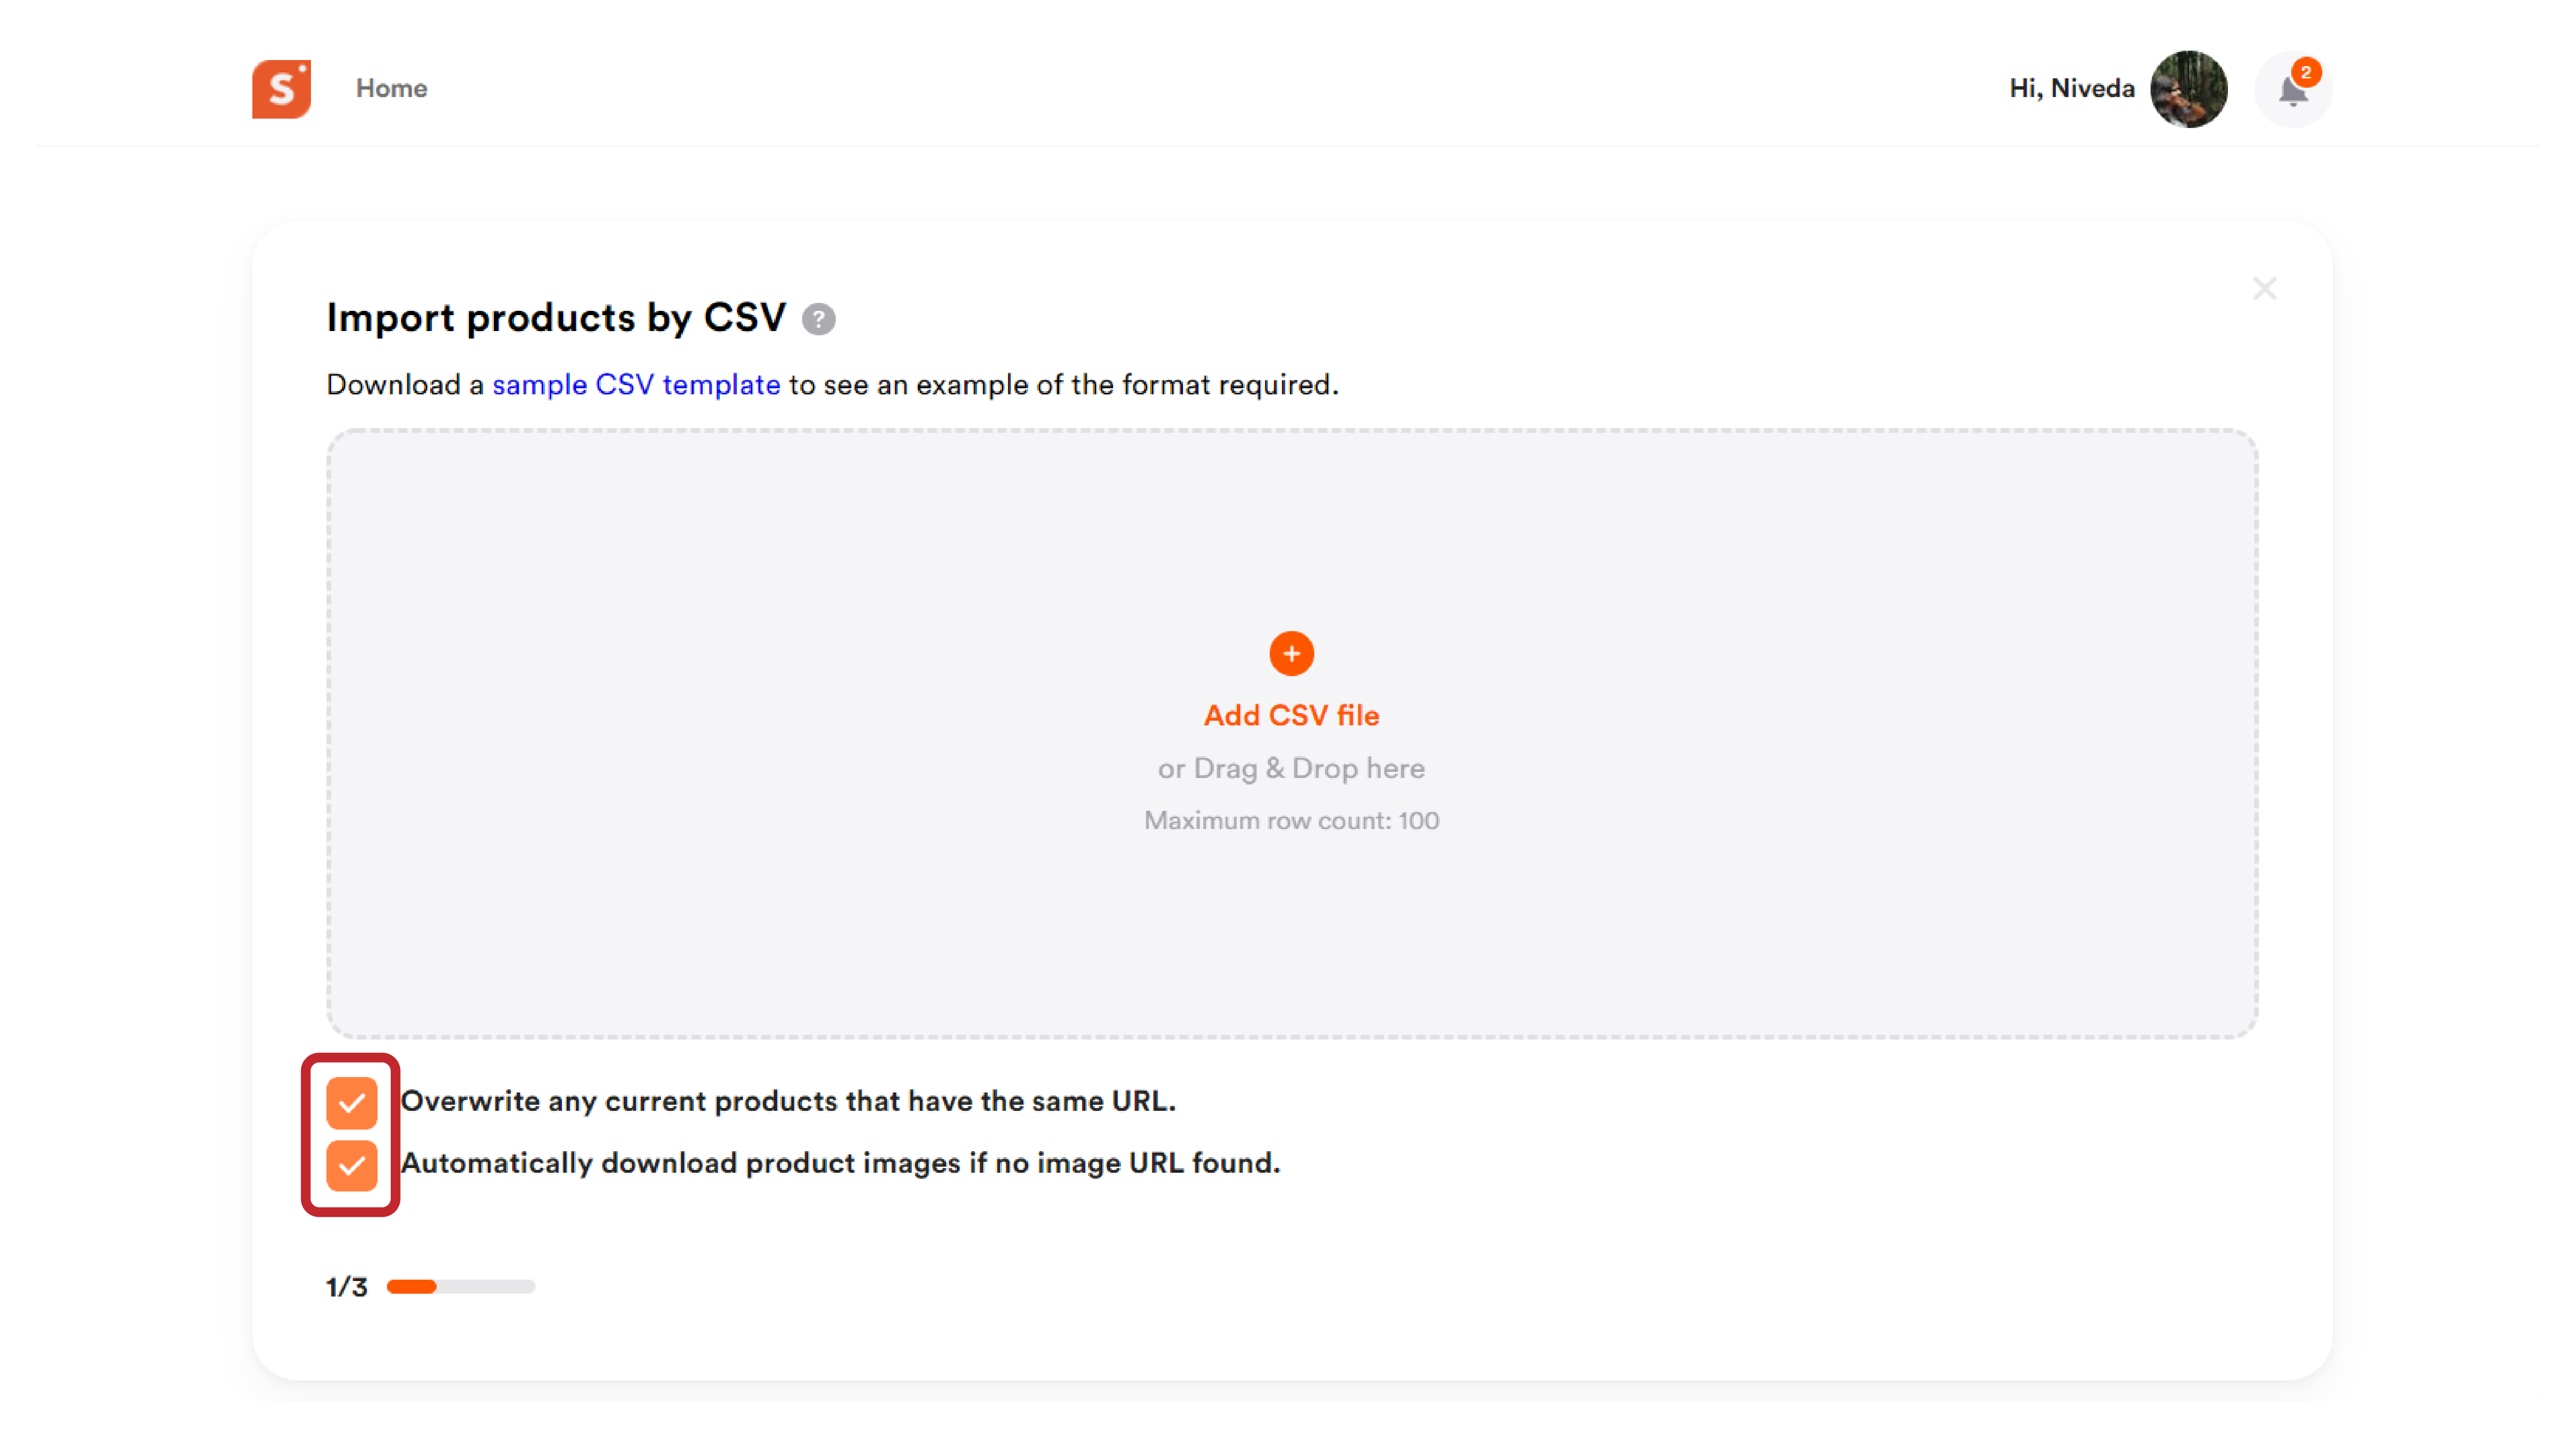
- Click the checkmark on “Overwrite any current product that has the same URL” to avoid duplicates of existing products being added.
- Click the checkmark on “Automatically download product images if no image URL found” to enable our auto-image fetching tool to automatically add relevant images.
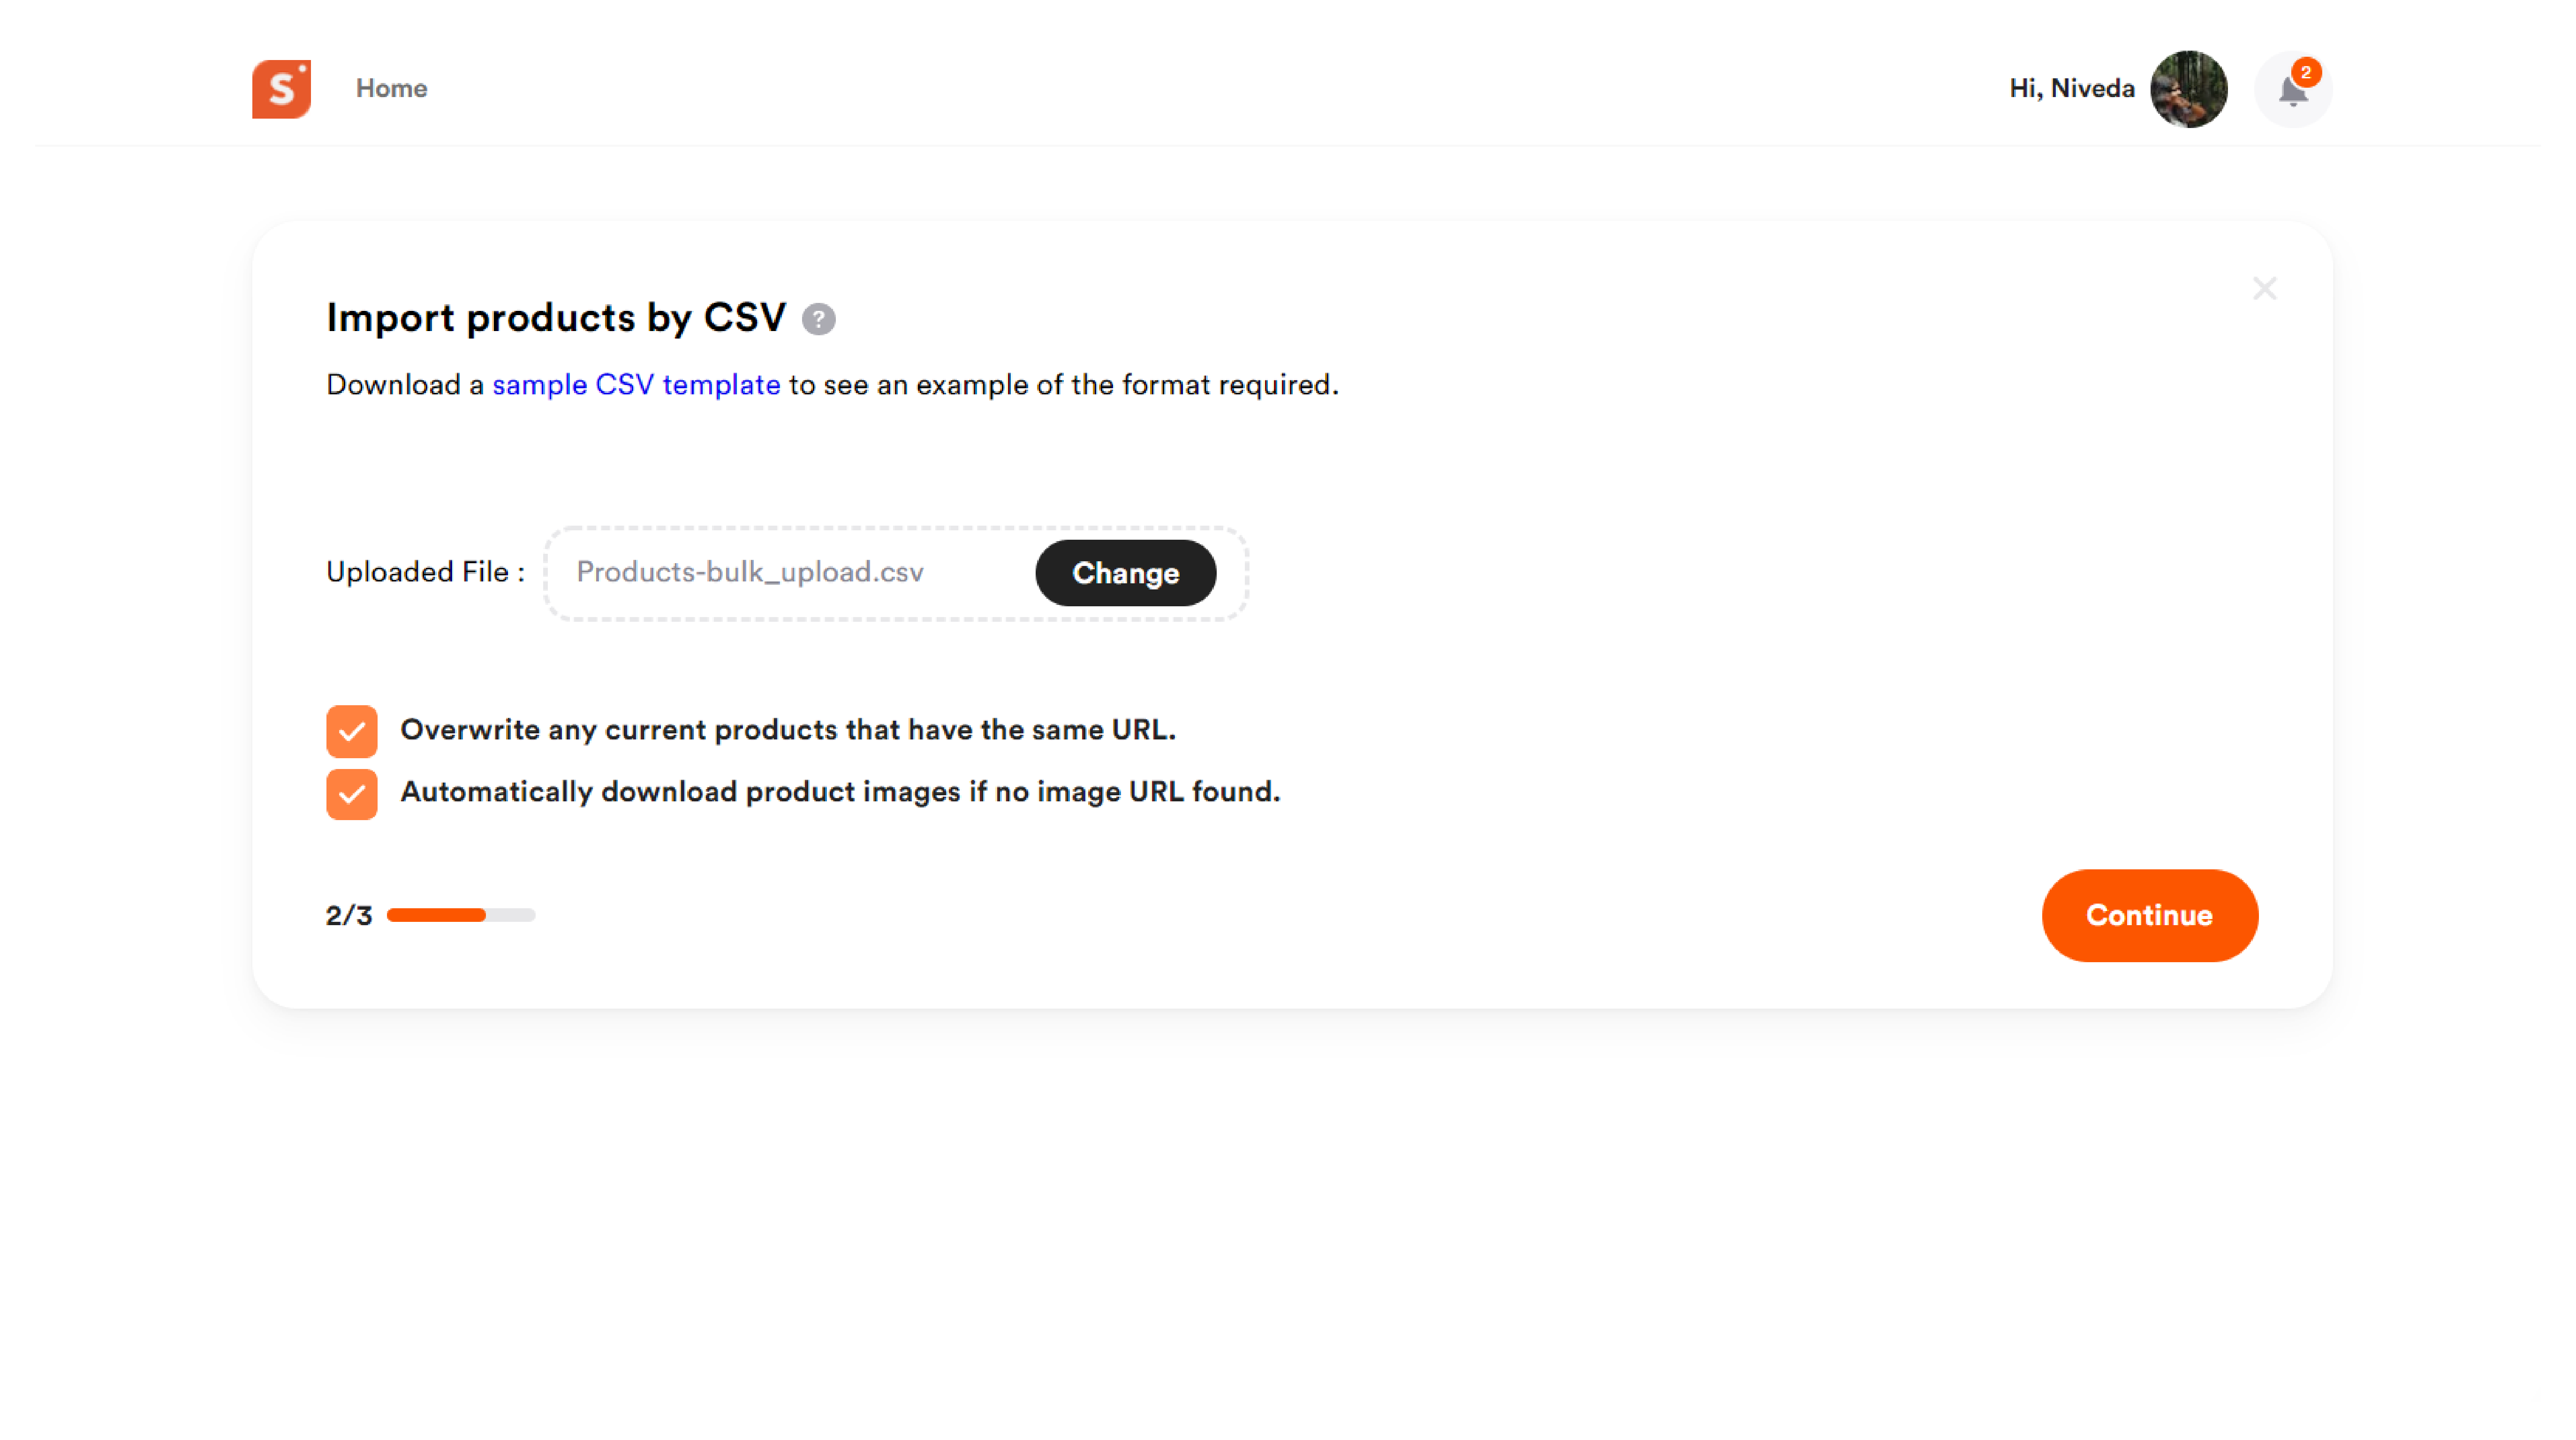
- You can change the uploaded file by clicking on the “Change” option.
- Tap “Continue” if everything looks good from your end with the CSV file upload.
- You will then be redirected to the CSV upload page where all the details of products, product URL, monetization, affiliate URL, image URL, description, and offer URL will be listed.
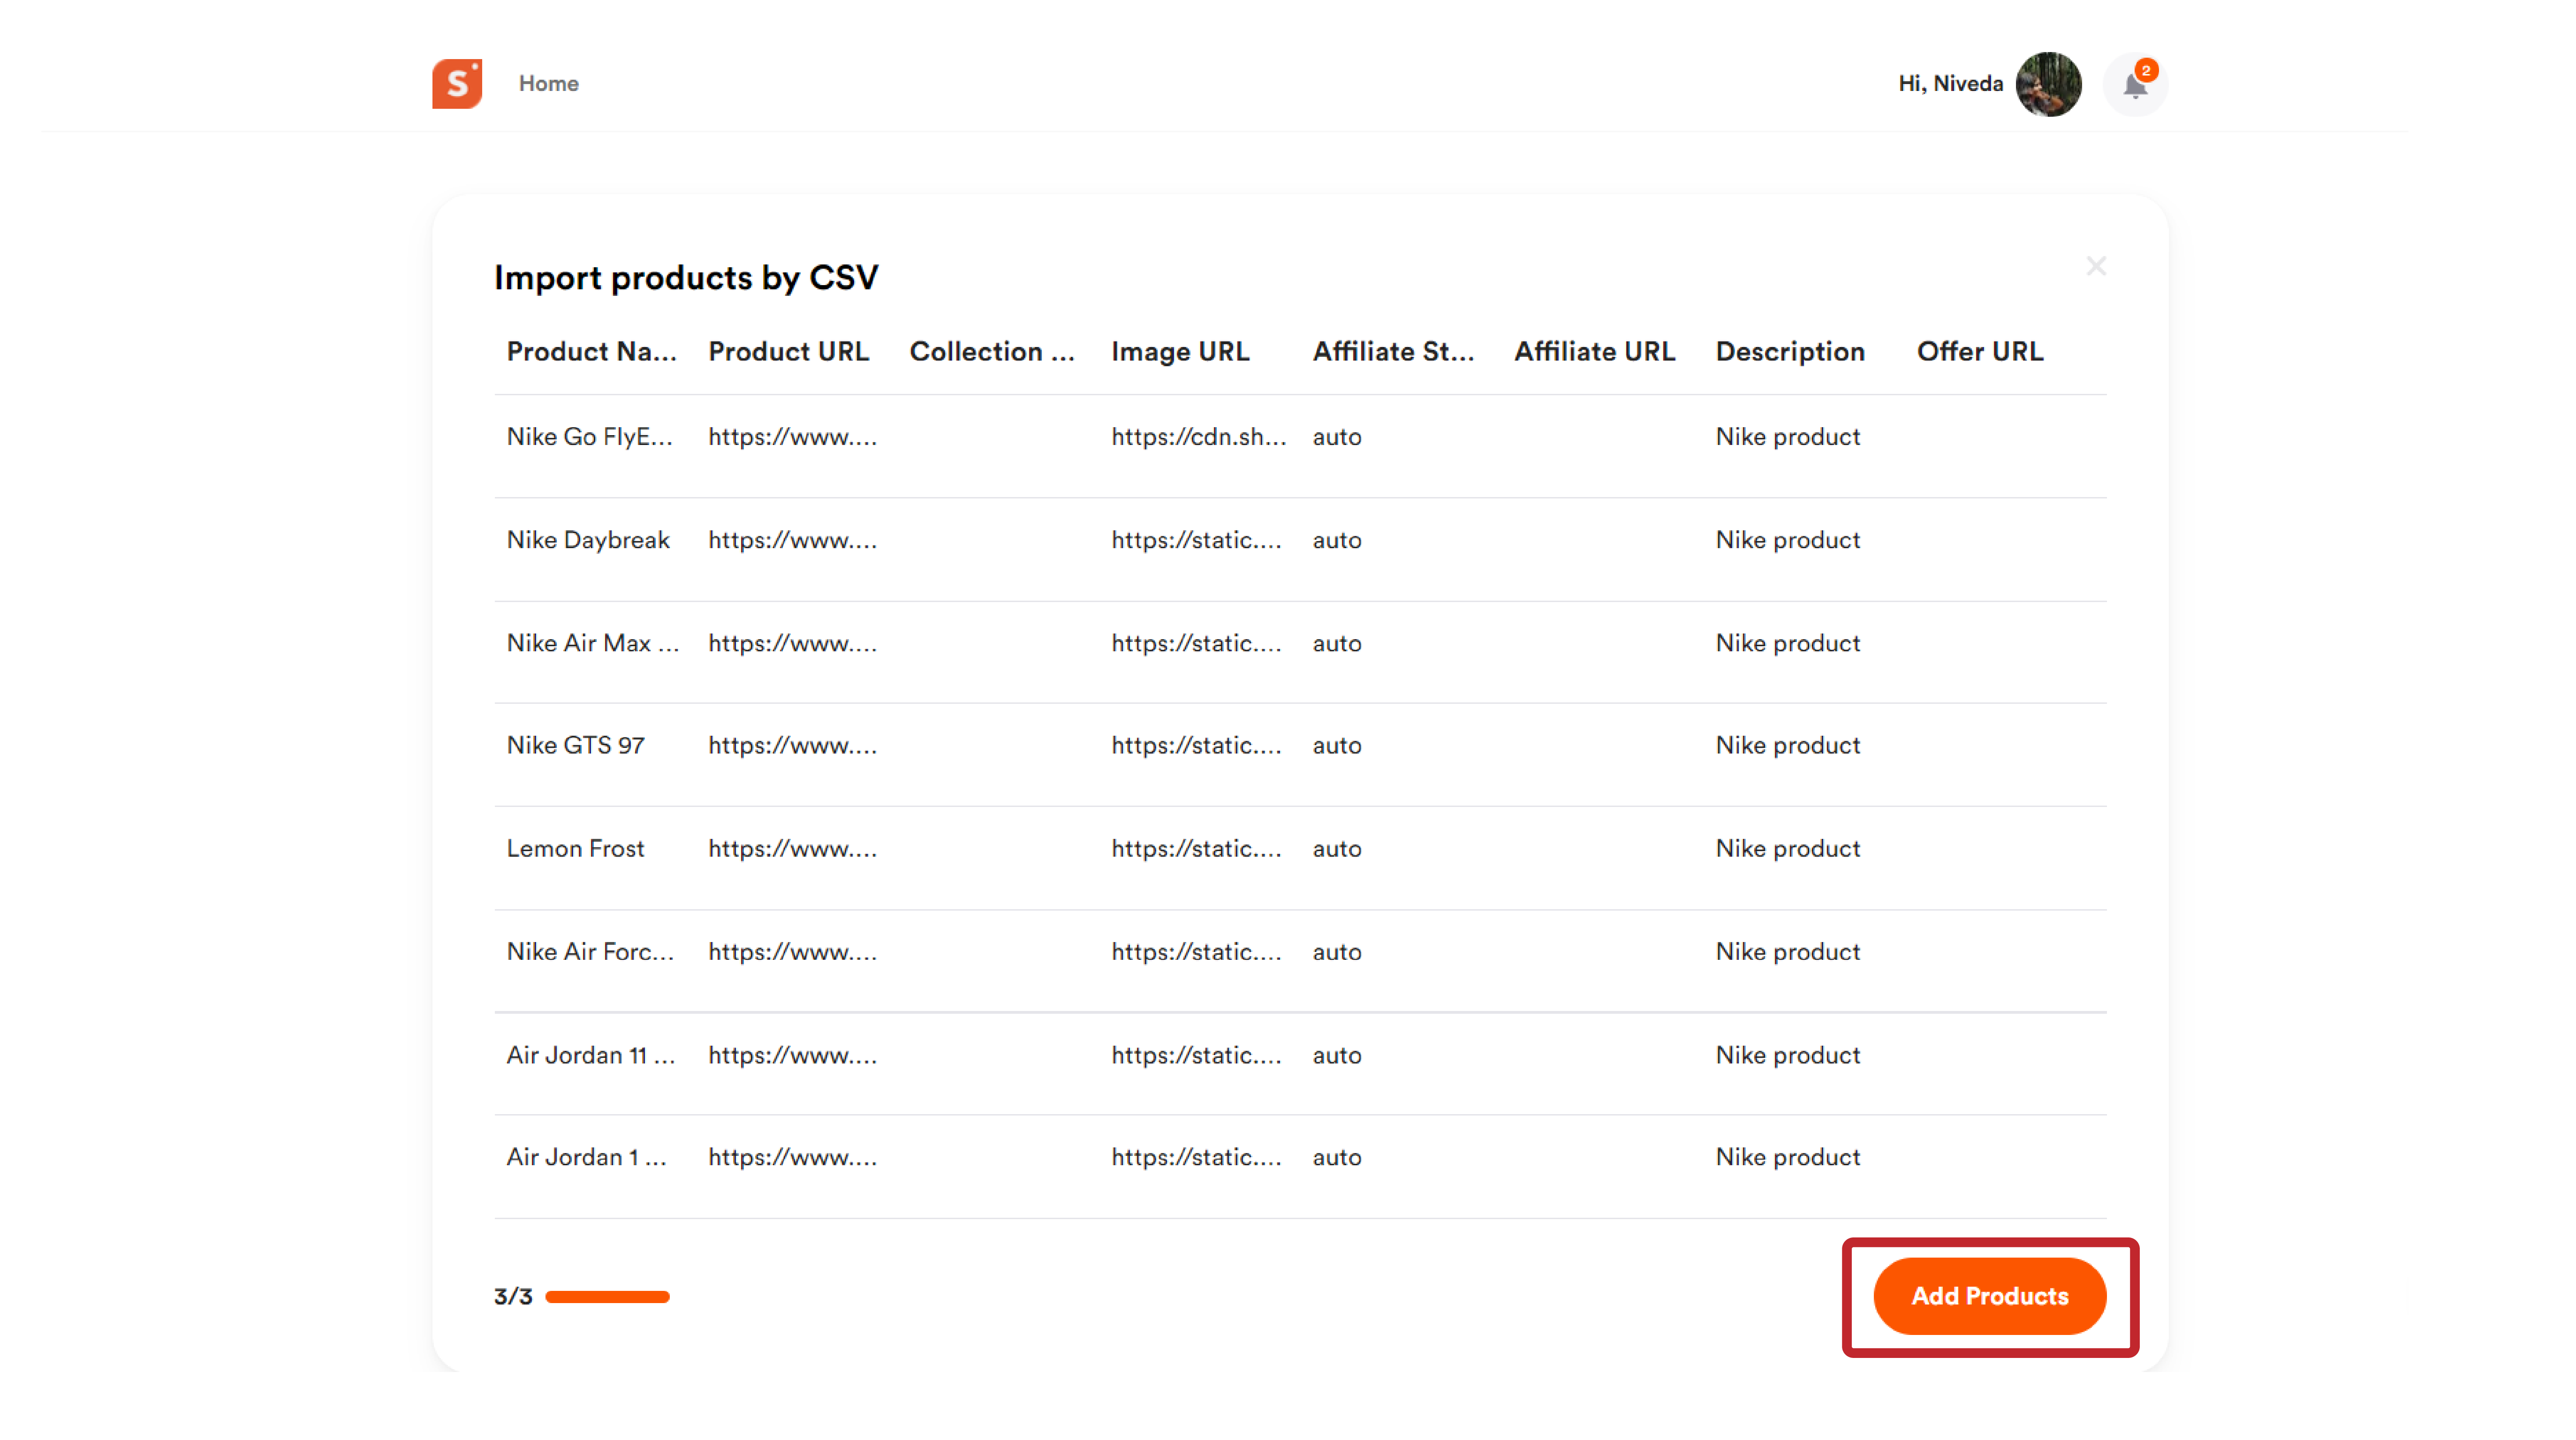
- If you notice any red bubbles on any field, there are some issues with those fields, and these products will not be uploaded to your Shopper profile unless the issues get resolved.
- Click on “Add Products” to initiate the bulk upload process.
- Once the upload is complete, you will be redirected to your home page with all the products from the bulk upload listed.
What do the different columns of CSV file mean?
Before you start uploading products in bulk with CSV files, you need to get a better understanding of what the different columns of CSV files signify.
To help you out further, here is a breakdown of column descriptions and what each tab signifies:
Product Name
Product Name (product_name) will be the first column you come across on the CSV sheet, and it is pretty much self explanatory.
Add the name of the product you are adding.
If you are adding a Nike Air Jordan, add the same name under the product name.
Product URL
Product URL (product_url) column is where you add the URL of the product you are adding.
You can either copy and paste the product URL in the CSV sheet, or manually enter the product URL in the designated field.
This will be the link that will added to a product in your collection.
Always double check, and make sure that you are pasting a valid link that redirects to the right product, so that you don’t miss out on any affiliate revenue.
The product URL you copy will look something like this:
Example: https://www.nike.com/in/t/go-flyease-shoes-3svRCL/DR5540-101
Collection Slugs
When it comes to adding multiple products, you are more likely to assign it to an existing collection in your Shopper profile.
That’s exactly what Collection Slugs (collection_slugs) or Collection URL is there to do.
In order to add a collection slug to your CSV file, head over to your Shopper account.
Now open the collection you wish to add a product into in the bulk upload, and copy the collection URL.
The collection URL will look something like this: https://shopper.com/c/collection_name
If you wish to add the same product to multiple collections, you will need to add a semi-colon (;) between the collection URLs.
Copy the first collection URL first.
Example - https://shopper.com/c/collection1
Next, copy the second collection URL
Example - https://shopper.com/c/collection2
To add the same product to both collection, add the collection slug in this format:
https://shopper.com/c/collection1;https://shopper.com/c/collection2
This will help our system automatically add your products to designated collection while bulk uploading.
Image
If you want to add a specific image to your product, you can add a custom image URL for our system to fetch that image from the source, and have it assigned to your product.
For that, you will need to add a image URL and assign it to the product in the CSV file in the image tab (image).
You can also copy the image URL of an existing image by going to the product or collection and copying the image URL.
In order to do that, simply open the image attached to a product and copy the URL.
Format for an existing product image that you have uploaded will look like this:
If you are taking an image URL of a product, directly from their website, it should look like this:
If you want to use the same image for multiple products, same the URL on the image field of multiple products.
Affiliate Status
You can choose to enable auto monetization, disable monetization or have custom monetization with bulk uploading as well.
This is where the Affiliate Status (affiliate_status) column in the CSV file, comes into play.
You can choose to add a monetization status to each product in the CSV file by entering “auto” “custom” or “disabled” in the designated row of a particular product.
If you add “auto” to a product row, auto monetization will be enabled for that particular product.
If you go want to add a custom monetization (affiliate URL instead), you need to select custom, and if you want to disable monetization, simply add “disabled” to the field.
Please note that if you are adding “custom” to this column, you will need to enter the affiliate URL in the next field.
Affiliate URL
Affiliate URL (affiliate_url) is an optional column in the CSV sheet that is mandatory for any product with custom monetization.
To make it more simple, if you choose to go with custom monetization on the Affiliate Status, you will need to add an affiliate URL.
If you are going with auto monetization or disabled monetization, you can leave the Affiliate URL field blank or empty.
Still need help with formatting your affiliate URL?
Here is an example: https://www.nike.com/in/t/go-flyease-shoes-3svRCL/DR5540-101
Description
To improve the overall accessibility to your product, it helps to add a description.
If you want to add a description to your product, you can use this (description) field in the CSV sheet to manually enter a product description.
Ideally, it’s best to keep the description to a minimal.
Use this empty field to explain what the product is all about. It is also recommended to mention the name of the brand along with the name of the product.
Offer URL
If you are someone that regularly uploads coupons, discount codes, and deals to your Shopper account, you can add it to any products that you add.
We have carried over this feature to bulk uploads as well.
Yes, that’s right, you can tag any offer or deal that you uploaded to a product that has the discount applicable while bulk uploading.
To do this, you can make use of the Offer URL (offer_url) column on your bulk upload CSV file.
This is a completely optional column, and you will only need to attach a deal or discount if you wish to do so.
To add an offer URL, log in to your Shopper account, find the discount deal, copy the URL, and paste it under offer_url field in the same row as the designated product.
Here is an example of how the offer URL’s format will look:
https://www.shopper.com/coupon-codes/myntra-com?cp=CODE126
How Many Products Can I Add at a Time With Bulk Upload?
You can add a maximum of 100 products in one go with the bulk upload feature.
The CSV file you upload should only have a maximum of 100 rows. If the CSV file you are trying to upload, exceeds this limit, you will be directed to edit your CSV file and reduce the number of rows to 100 or less.
Shopper will not accept CSV files that have more than 100 rows.
If you want to upload 500 products, you will need to create 5 different CSV sheets with 100 rows each and upload them one after the other.
Can I add products to multiple collections with bulk upload?
Yes, you can add multiple products to multiple collections as required with our bulk upload feature.
In order to do this, you only need to add the names of collections under the “collection_slugs” filed one after the other, and separated by a semi-colon (;) symbol.
For further reference, here is how the collection_slug field should look for a product being added into two different collections on a Shopper profile:
https://www.shopper.com/c/Amazon-Redirection/JpM3;https://www.shopper.com/c/Crazy-things/o0oL
This product will be added to both collections (Amazon Redirections and Crazy things are collection names here).
Note that you will need to add a semi-colon (;) between the two URLs as these are CSV files.