
Please see below a step-by-step guide on how to set-up a custom domain with Shopper. You'll always connect your domain name to your Shopper store using a CNAME record.
Step 1
Add your domain
For adding your domain go to: https://www.shopper.com/settings?tab=custom_domain
Add your domain to the text field and click Save
Step 2
Update your DNS
My DNS Provider Supports CNAME Behavior for Root/ Naked Domains
(Eg: Akamai, Amazon Route 53, Cloudflare, Dyn, NS1, NameCheap, UltraDns)
Go to your domain’s DNS settings by login to your domain provider’s website.
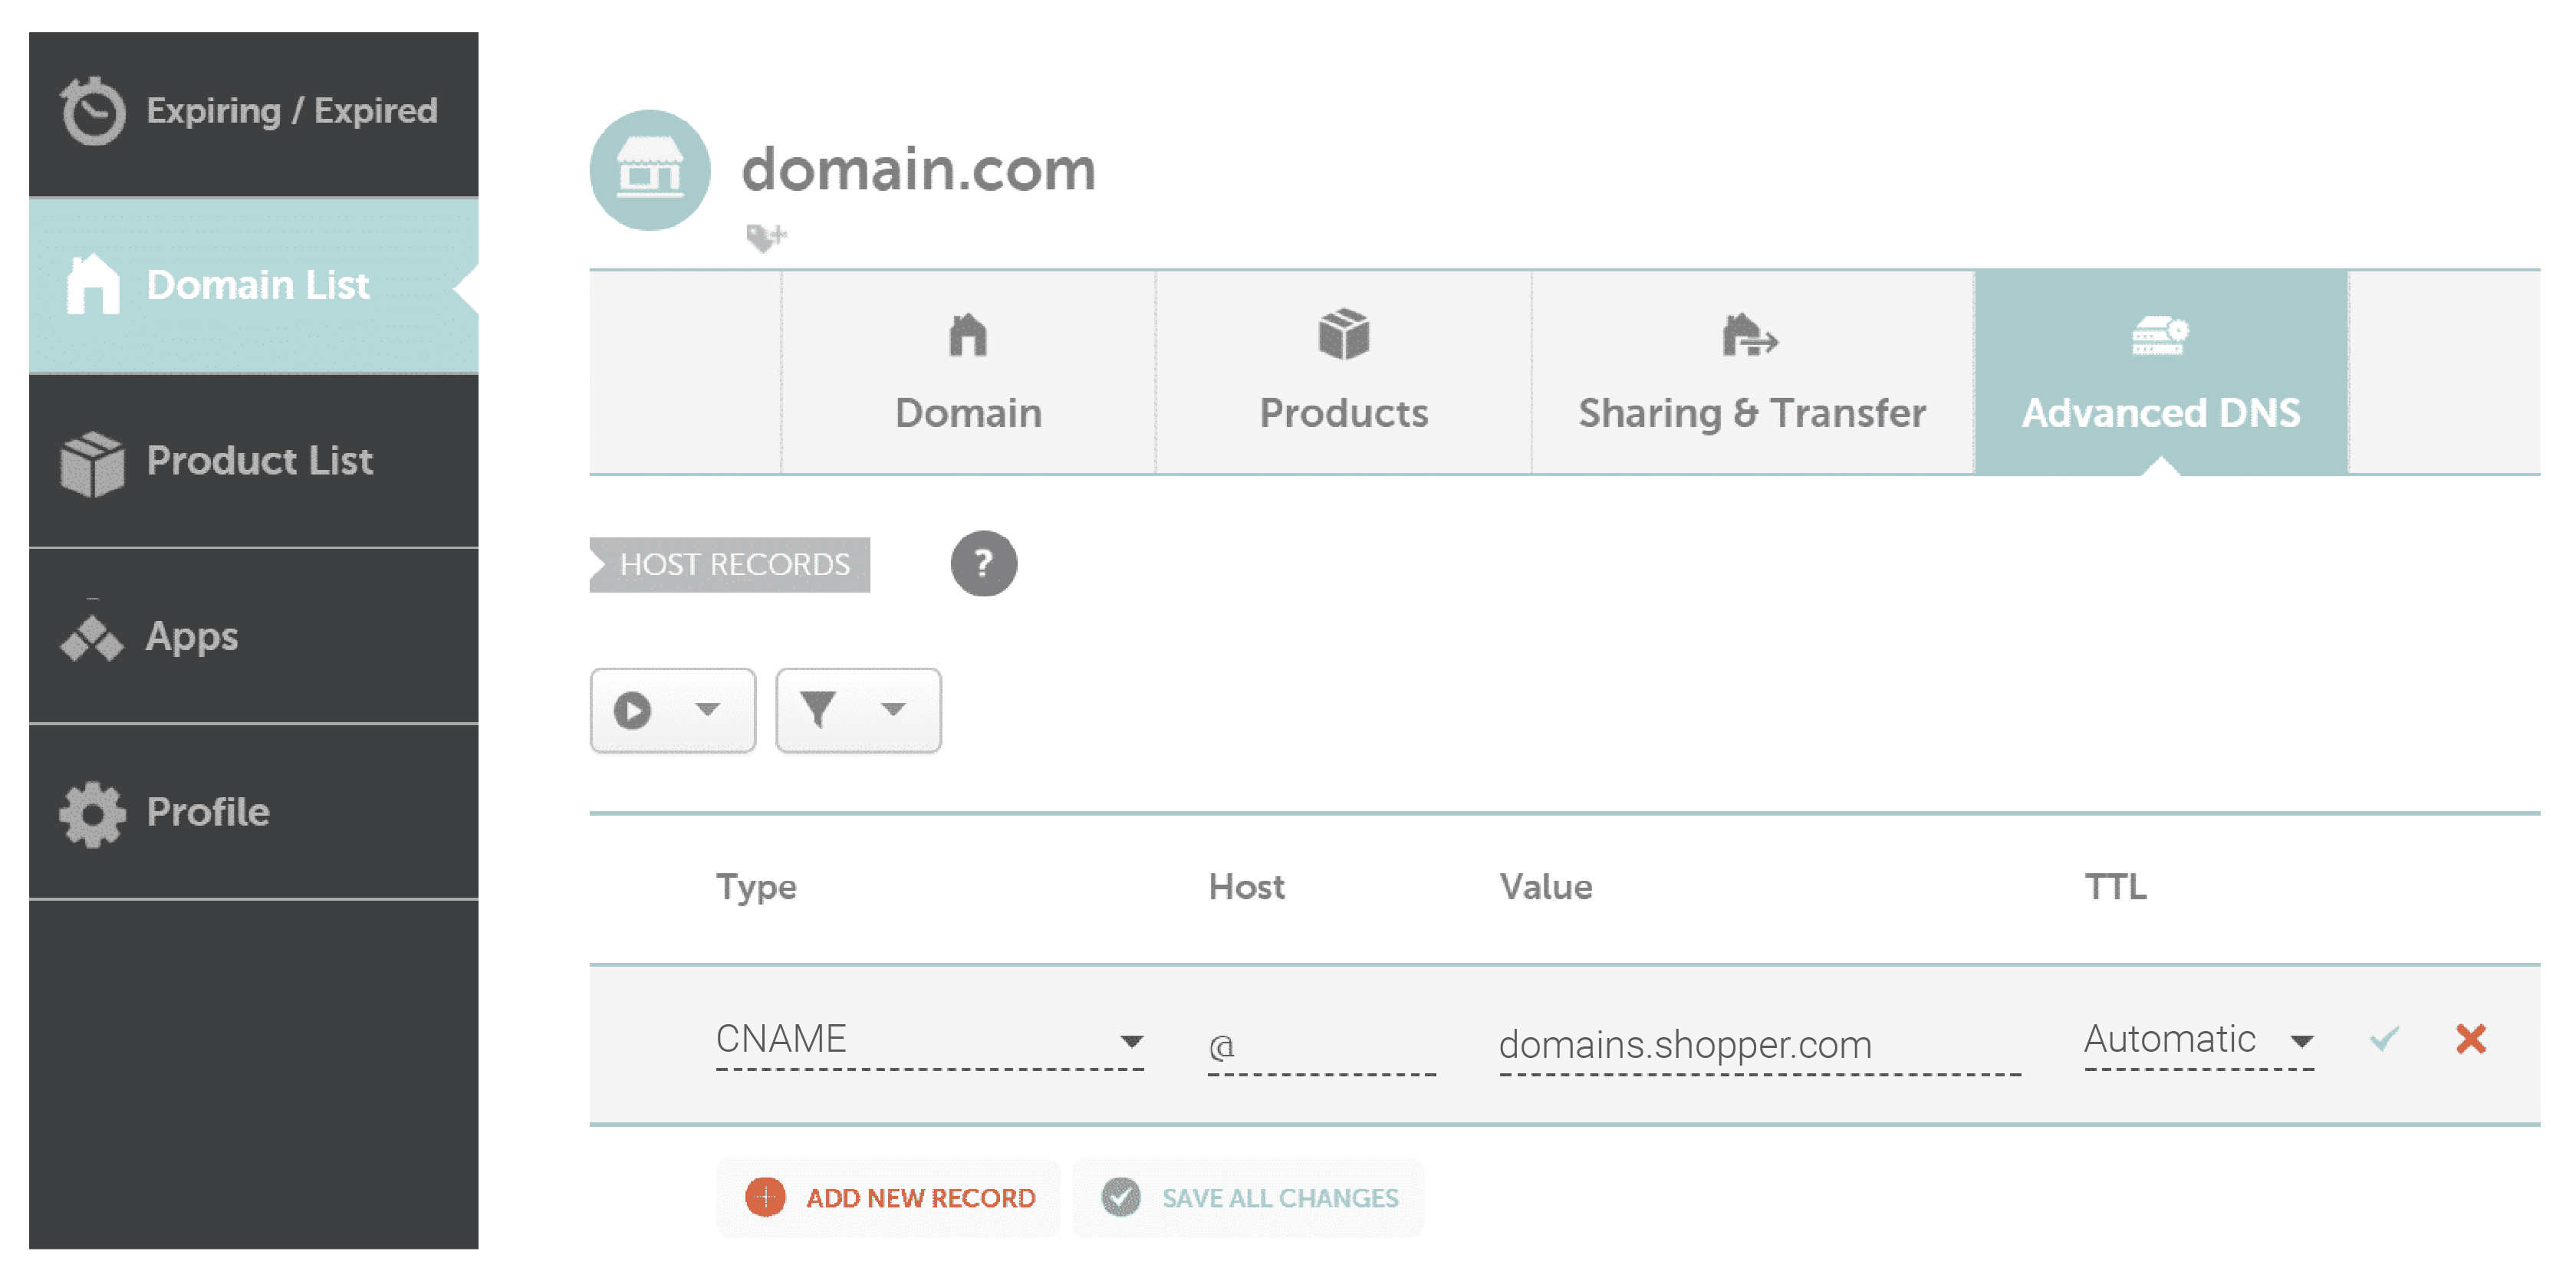
Step 1: Create a CNAME record
For the "name" or "host" field enter @ or your chosen subdomain
For the "points to" or "value" field enter domains.shopper.com
Save your record
You can also forward www to domains.shopper.com. This is an option step and please see below how to do it.
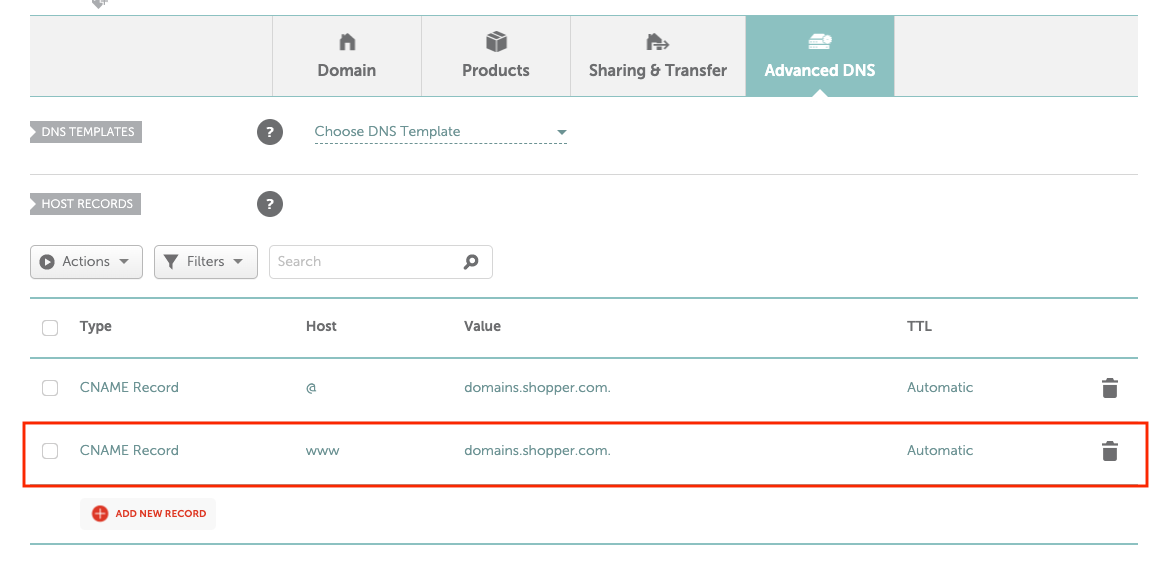
For the "name" or "host" field enter www or your chosen subdomain
For the "points to" or "value" field enter domains.shopper.com
Save your record
Step 3:
Verify your domain connection
Go to your Settings page: https://www.shopper.com/settings?tab=custom_domain
Click on the verify button. Wait for DNS settings to update (typically 30 mins to 48 hours)
My DNS Provider does not support CNAME Behavior for Root/ Naked Domains
(Eg: GoDaddy, Google domains)
Step 1
Add your domain
For adding your domain go to: https://www.shopper.com/settings?tab=custom_domain
Add your domain to the text field and click Save
Step 2
Update your DNS
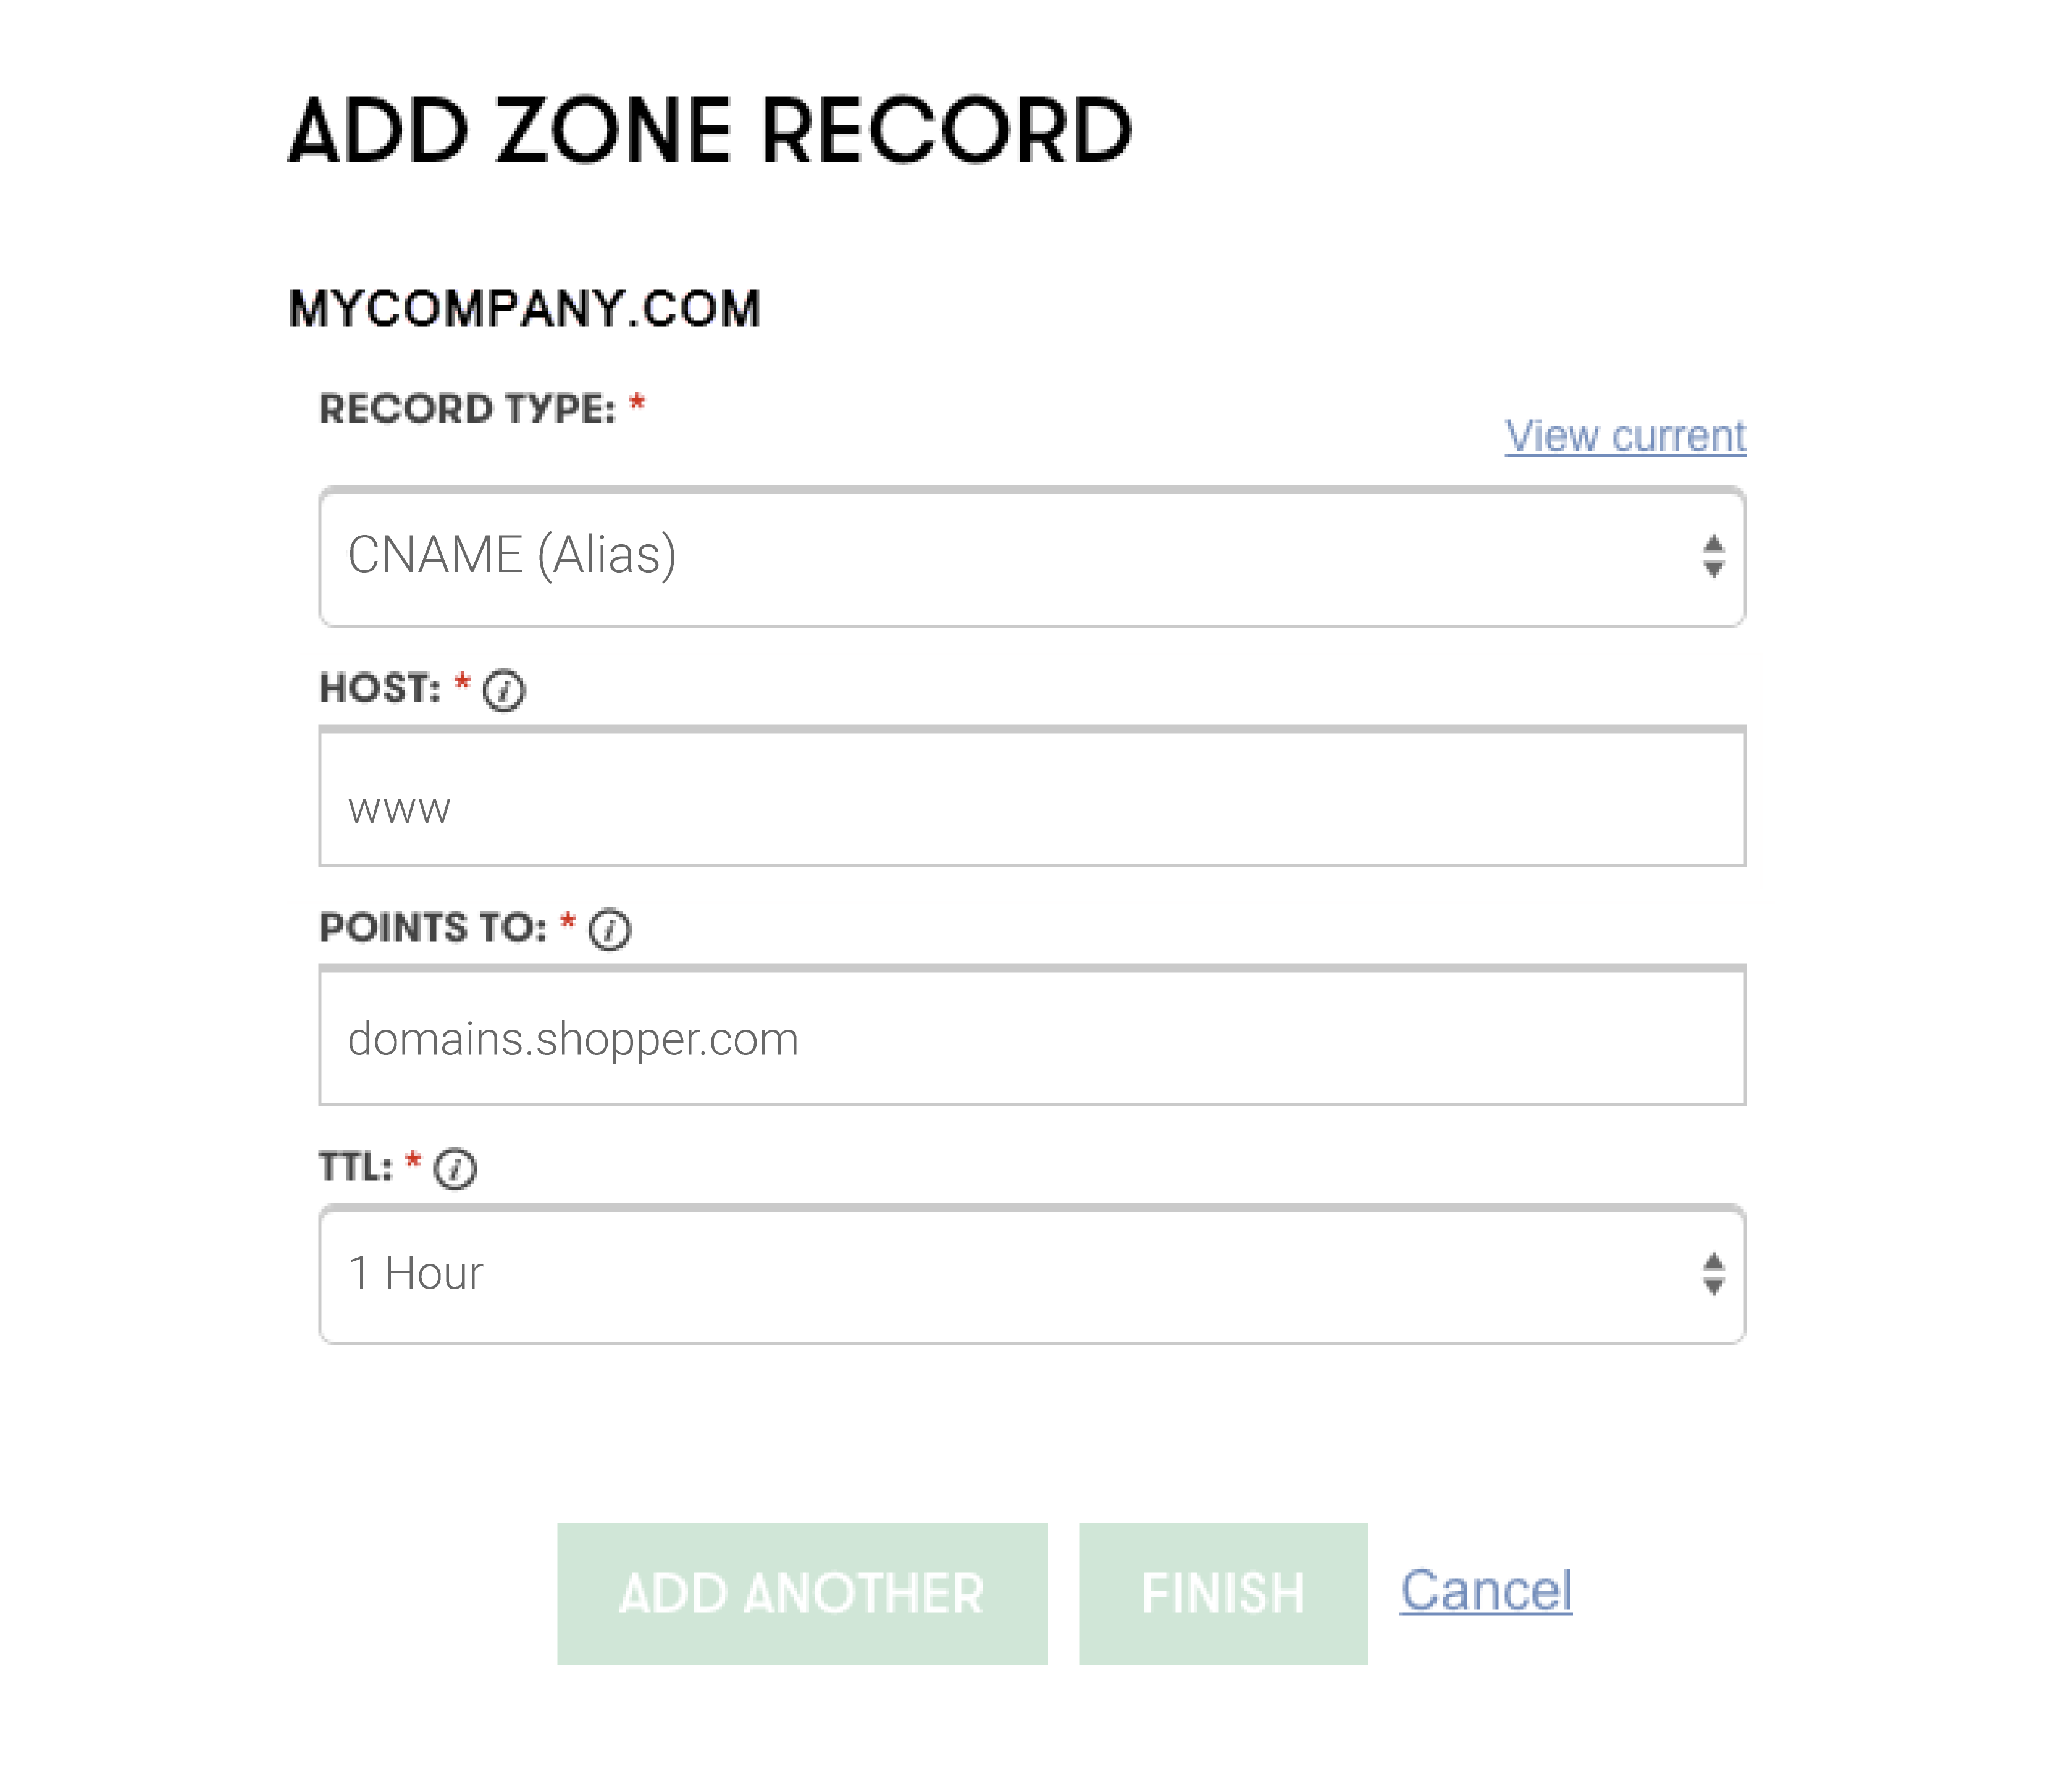
Step 1: Create a CNAME record
For the "name" or "host" field enter www
For the "points to" or "value" field enter domains.shopper.com
Save your record.
Step 2: Go to forwarder settings
Once you complete adding the CNAME record as mentioned in the above step, you need to forward your root domain to your subdomain (like domain.com forwarding to www.domain.com) that's been connected to your Shopper store.
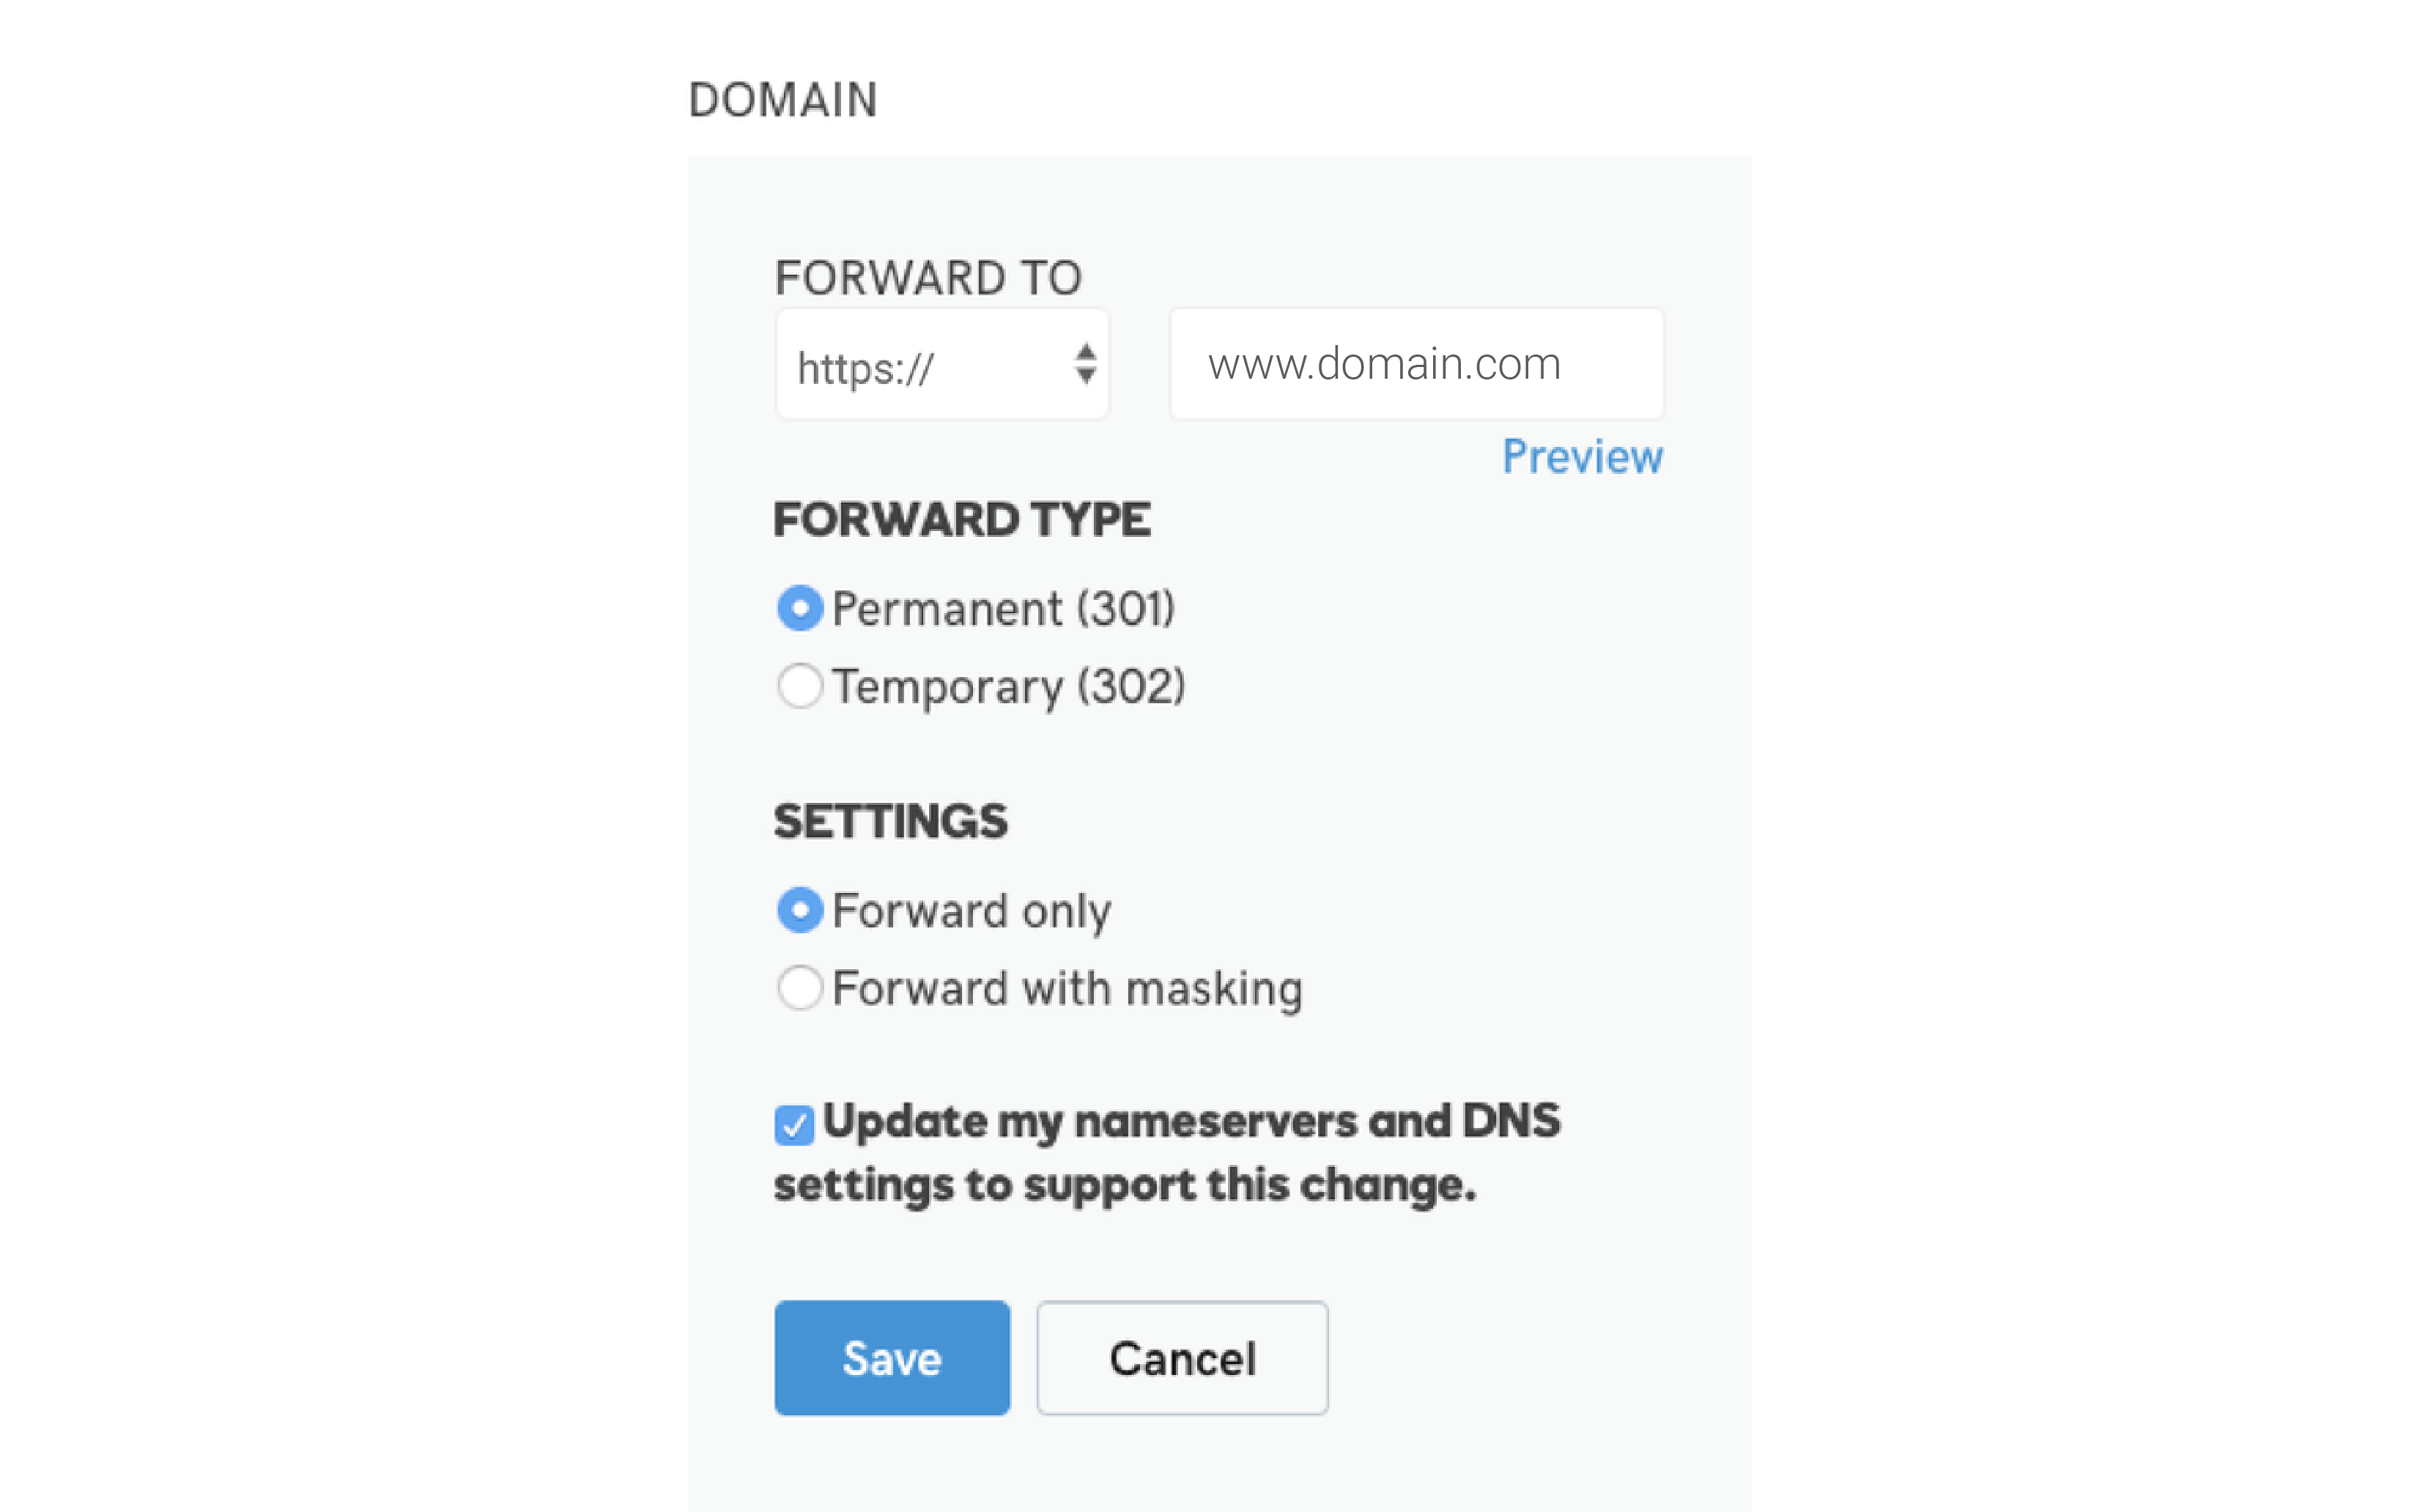
Please note that Forwarding settings should be both "permanent" and "forward only" or without masking.
CloudFlare
The Proxy status should be DNS only if you are using CloudFlare. Make sure it is set to DNS only if it is set to Proxied by default.

Step 3:
Verify your domain connection
Go to your Settings page: https://www.shopper.com/settings?tab=custom_domain
Click on the verify button. Wait for DNS settings to update (typically 30 mins to 48 hours)
If you see the message in the image below, the domain is not yet connected. You will need to wait anywhere from 30 minutes to 48 hours.

However, if this is still showing after 48 hours, we recommend that you look again your DNS record for corrections or ask us for help at support@shopper.com