
Shopper lets you add, and manage multiple stores from a single Shopper.com account.
Having multiple stores on Shopper lets you manage two entirely different accounts from one place, generate more leads, and create more revenue at ease.
Please note that adding multiple stores requires you to have a Creator or Creator Plus account
Continue reading and follow the steps we take you through in order to add a new store to your Shopper account.
The first thing you need to do is log in to your account.
Make sure that you log in to the right account, or the account you want to use as your primary account.
Now that this step is out of the way, the next thing you need to do is to add a new store to your Shopper account.
Add a New Store to Your Shopper Account
To add a new store to your Shopper account, follow these steps:
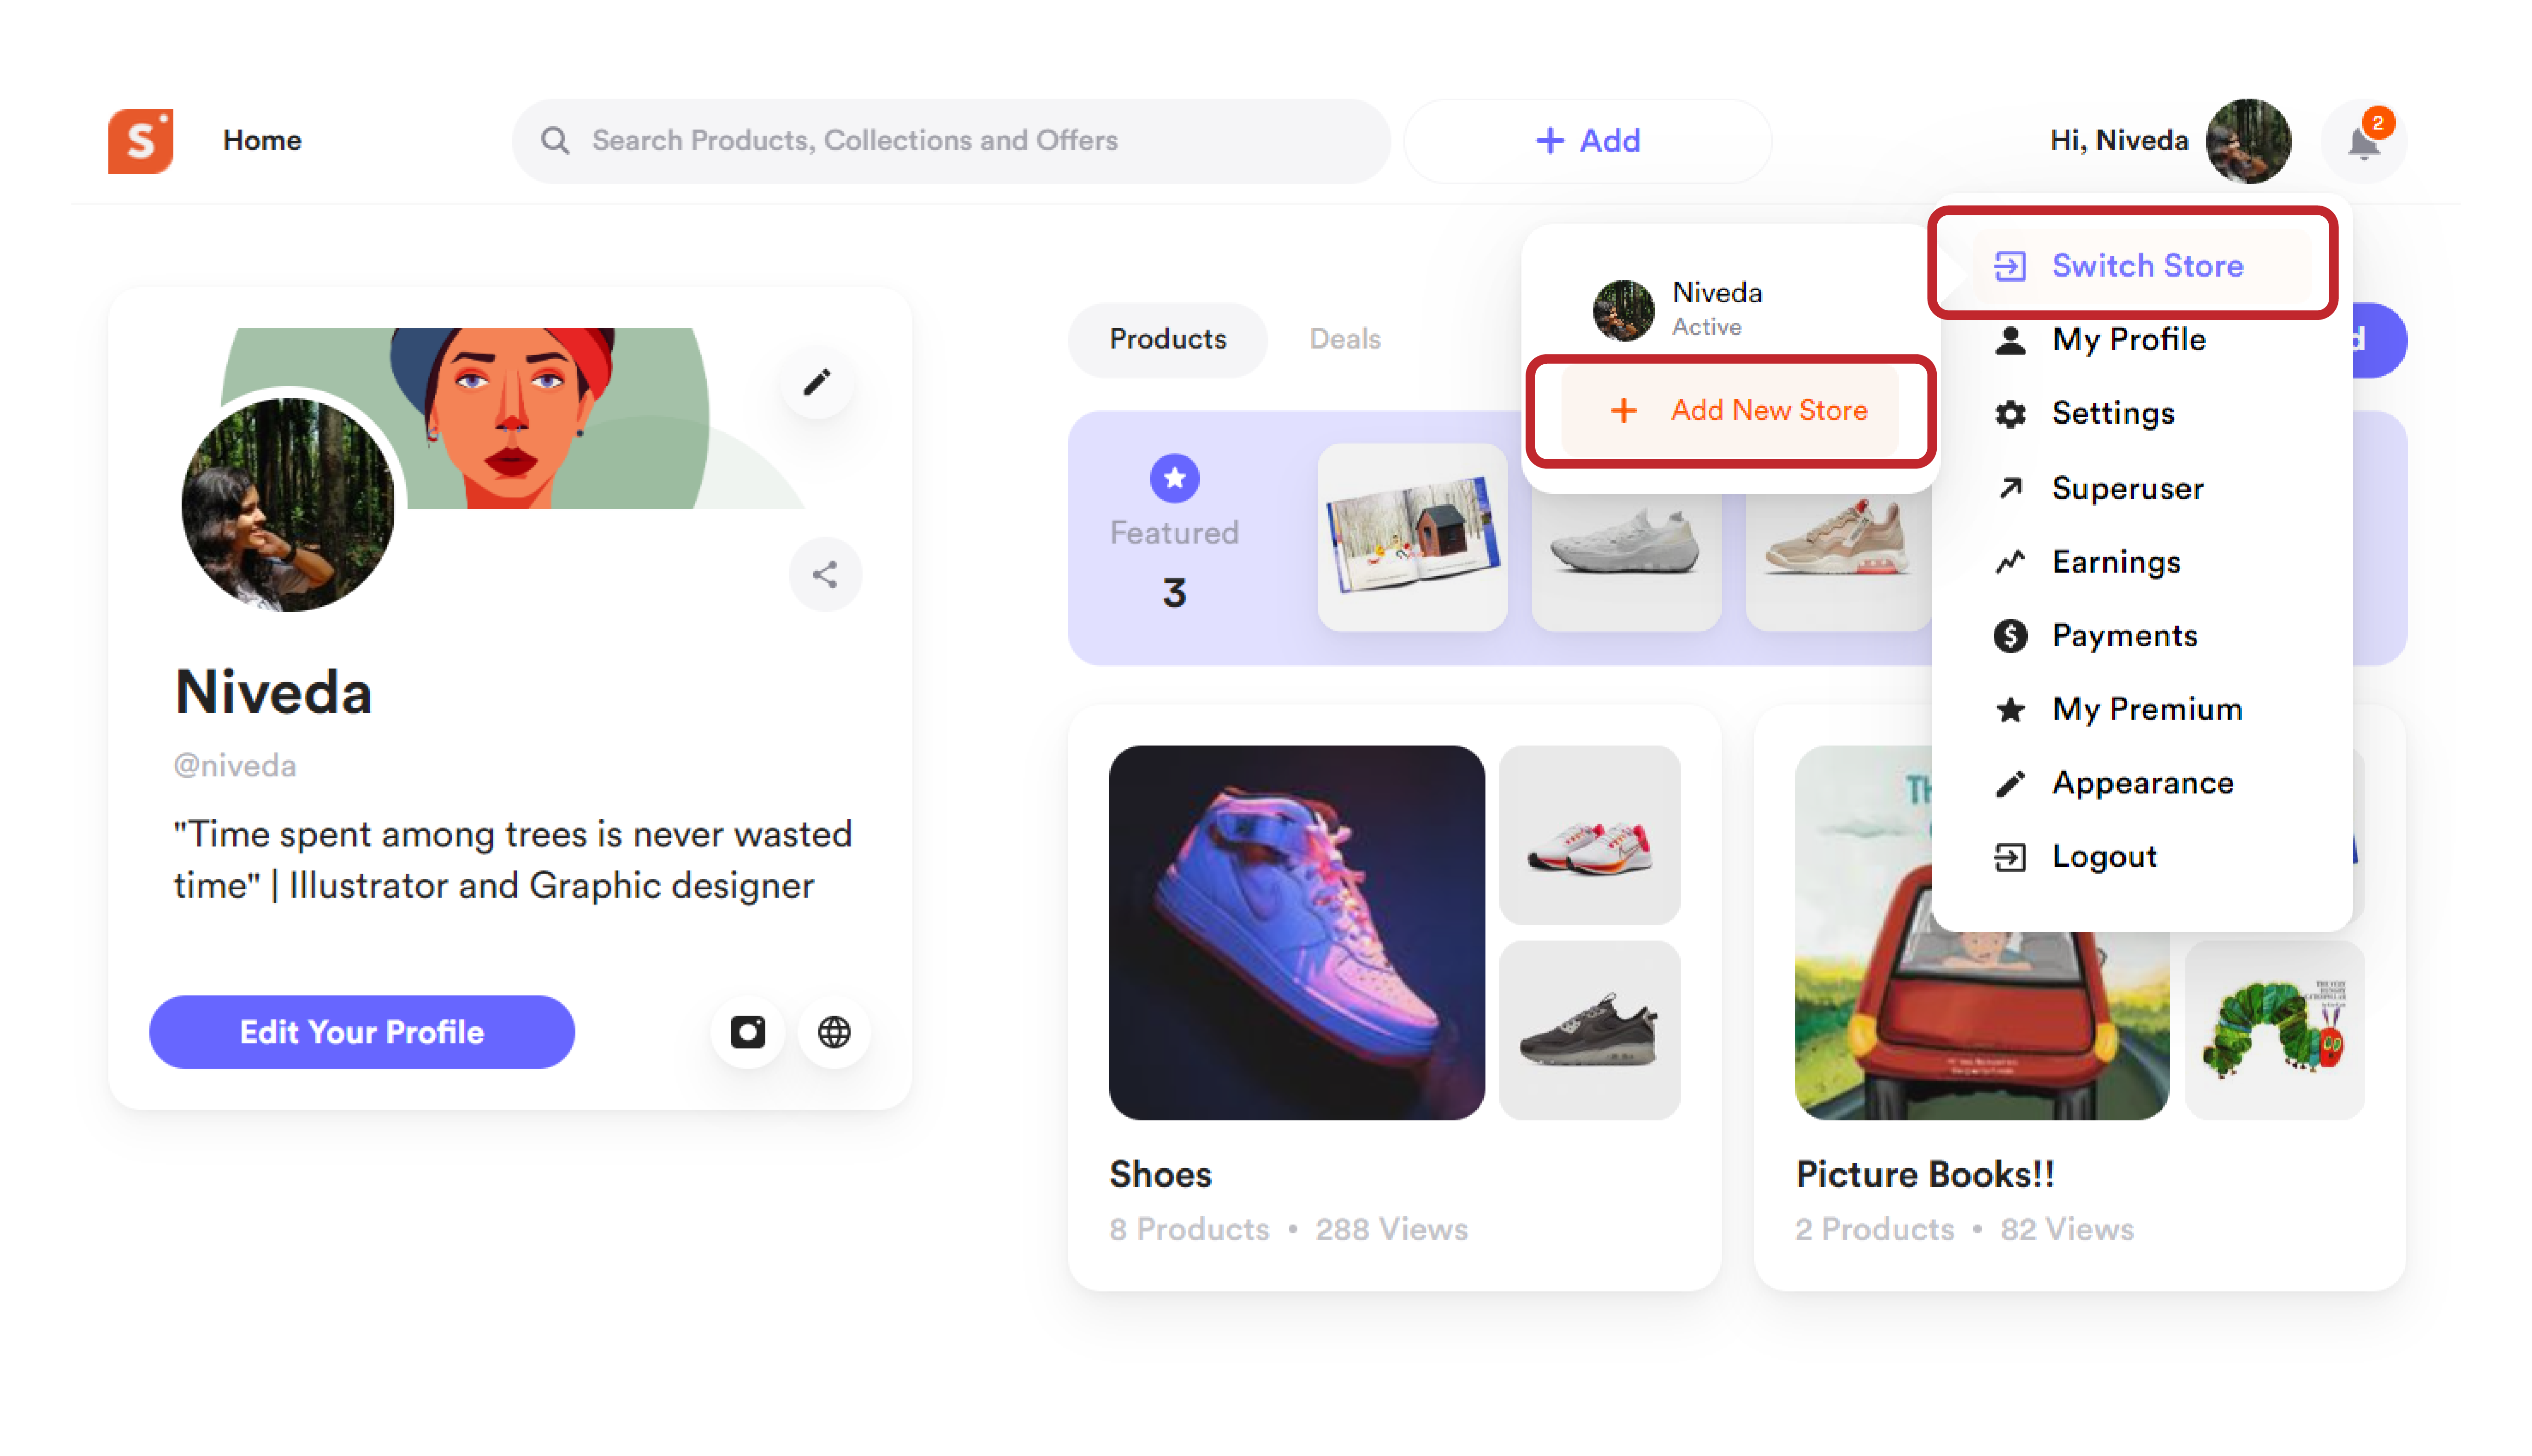
- On your Shopper profile, click on your profile icon from the top right corner.
- Next, select the “Switch Store” option from the drop-down that appears.
- A new sub-drop down will now appear with the “+ Add New Store” option.
- Tap “+ Add New Store” and enter a new email address.
- The new email address will be associated with your new store.
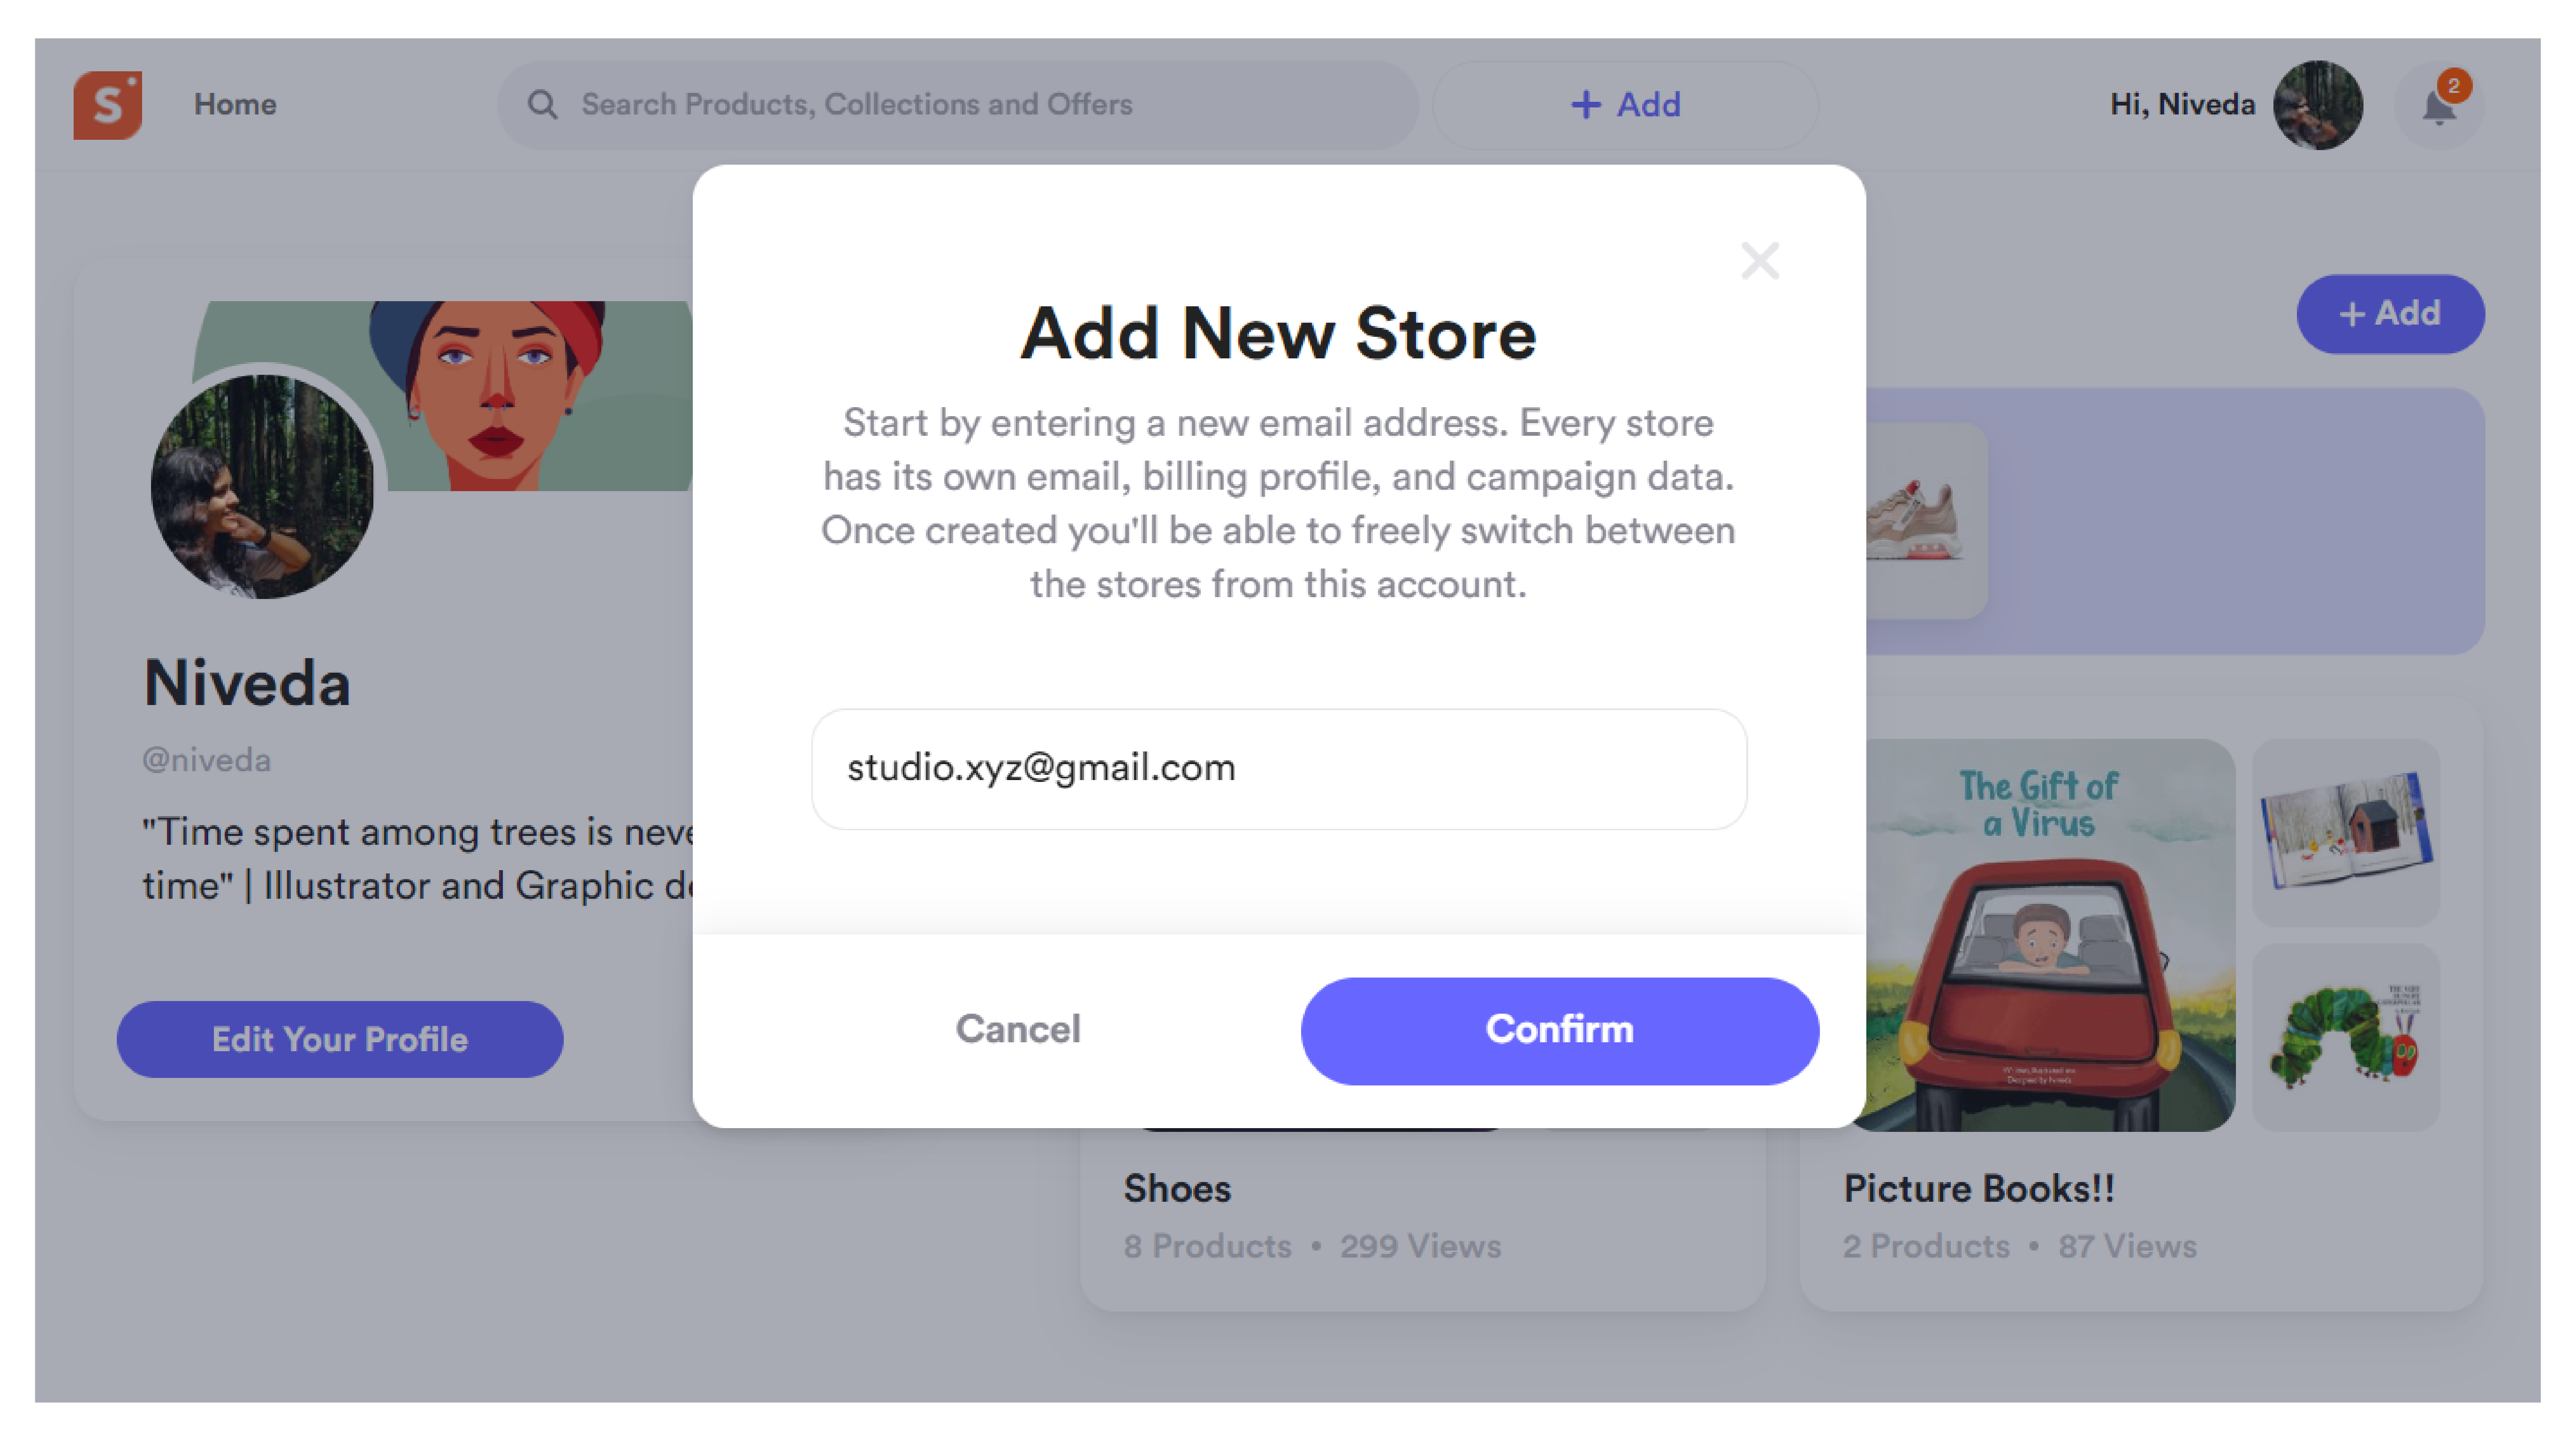
- Click on “Confirm” after entering a valid email address.
Congratulations, you have just activated a new store on your Shopper account.
You can switch between both stores by simply following the same steps, and selecting the store you want to access.
Why Do I Need to Add a New Email for a New Store
Every store on Shopper has its own billing profile and individual campaign data.
As your primary store is already linked to your main account and its email address, you will need to add a secondary email.
Any purchases, earnings generated through affiliate links, billing details, campaign data, and all related information from your new store will be sent to your new email address.
You will need to add your new email address once, and will not be required to re-enter the email information while switching between the stores.