
How to Make Timestamps on YouTube
Are you wondering how to insert the YouTube timestamp into your video? Here's a tutorial that can help. Add a YouTube stamp to your video easily.

Would you like to share a specific part of a YouTube video, but do not know how?
Now you need not worry, because we have the answers you have been searching for. There is a clip option available on YouTube for channels with more than 1,000 subscribers which lets you share a part of the video.
However, what can you do if you want to share a specific segment of a video with someone with a YouTube channel that has fewer than 1000 subscribers?
That’s exactly where YouTube Timestamps can help.
If you are new to YouTube timestamps, continue reading to get all the information you will ever need on how to make timestamps on YouTube.
What is a YouTube Timestamp?
A YouTube Timestamp is a link to a specific part of a YouTube video.
Timestamps on YouTube are useful to skip directly to a particular part of the video instead of watching the entire video.
Another major benefit of using YouTube timestamps is that they can help your viewers engage and improve your overall YouTube video retention.
It is also relatively easy to add timestamps on YouTube, and it can be placed in either the video description or as the first comment.
As a creator, you can also use the YouTube timestamp to great effect by answering specific questions in the comments with a timestamp that has the answer to the question.
It is also easier for your viewers to bring your attention to a particular part of the video with timestamp on YouTube comments.
How to Add a Timestamp to YouTube Videos?
Adding timestamps to YouTube videos is pretty straightforward and relatively easy to do.
The process of adding YouTube timestamps on your description box and comments is more or the less the same, and the only difference comes down to where you decide to add the text.
Here is a step by step guide on how to add a timestamp to YouTube videos:
Step 1: Log In to Your YouTube Account
Regardless of whether you are adding a timestamp to your own video or someone else’s YouTube video, you are required to log in to your account.
Open the browser of your choice to visit YouTube.com or launch the YouTube App (if you are logging in through a phone) and enter the credentials to sign in to your account.
Step 2: Find the Video You Want to Add Timestamps To
If you are planning to add timestamps to the video description, this will be a really easy step. Simply head over to your channel and select the video that you want to add YouTube timestamps on.
However, if you want to add timestamps as comments on someone else’s video, tap the search bar, hit the channel name or video title and find the video.
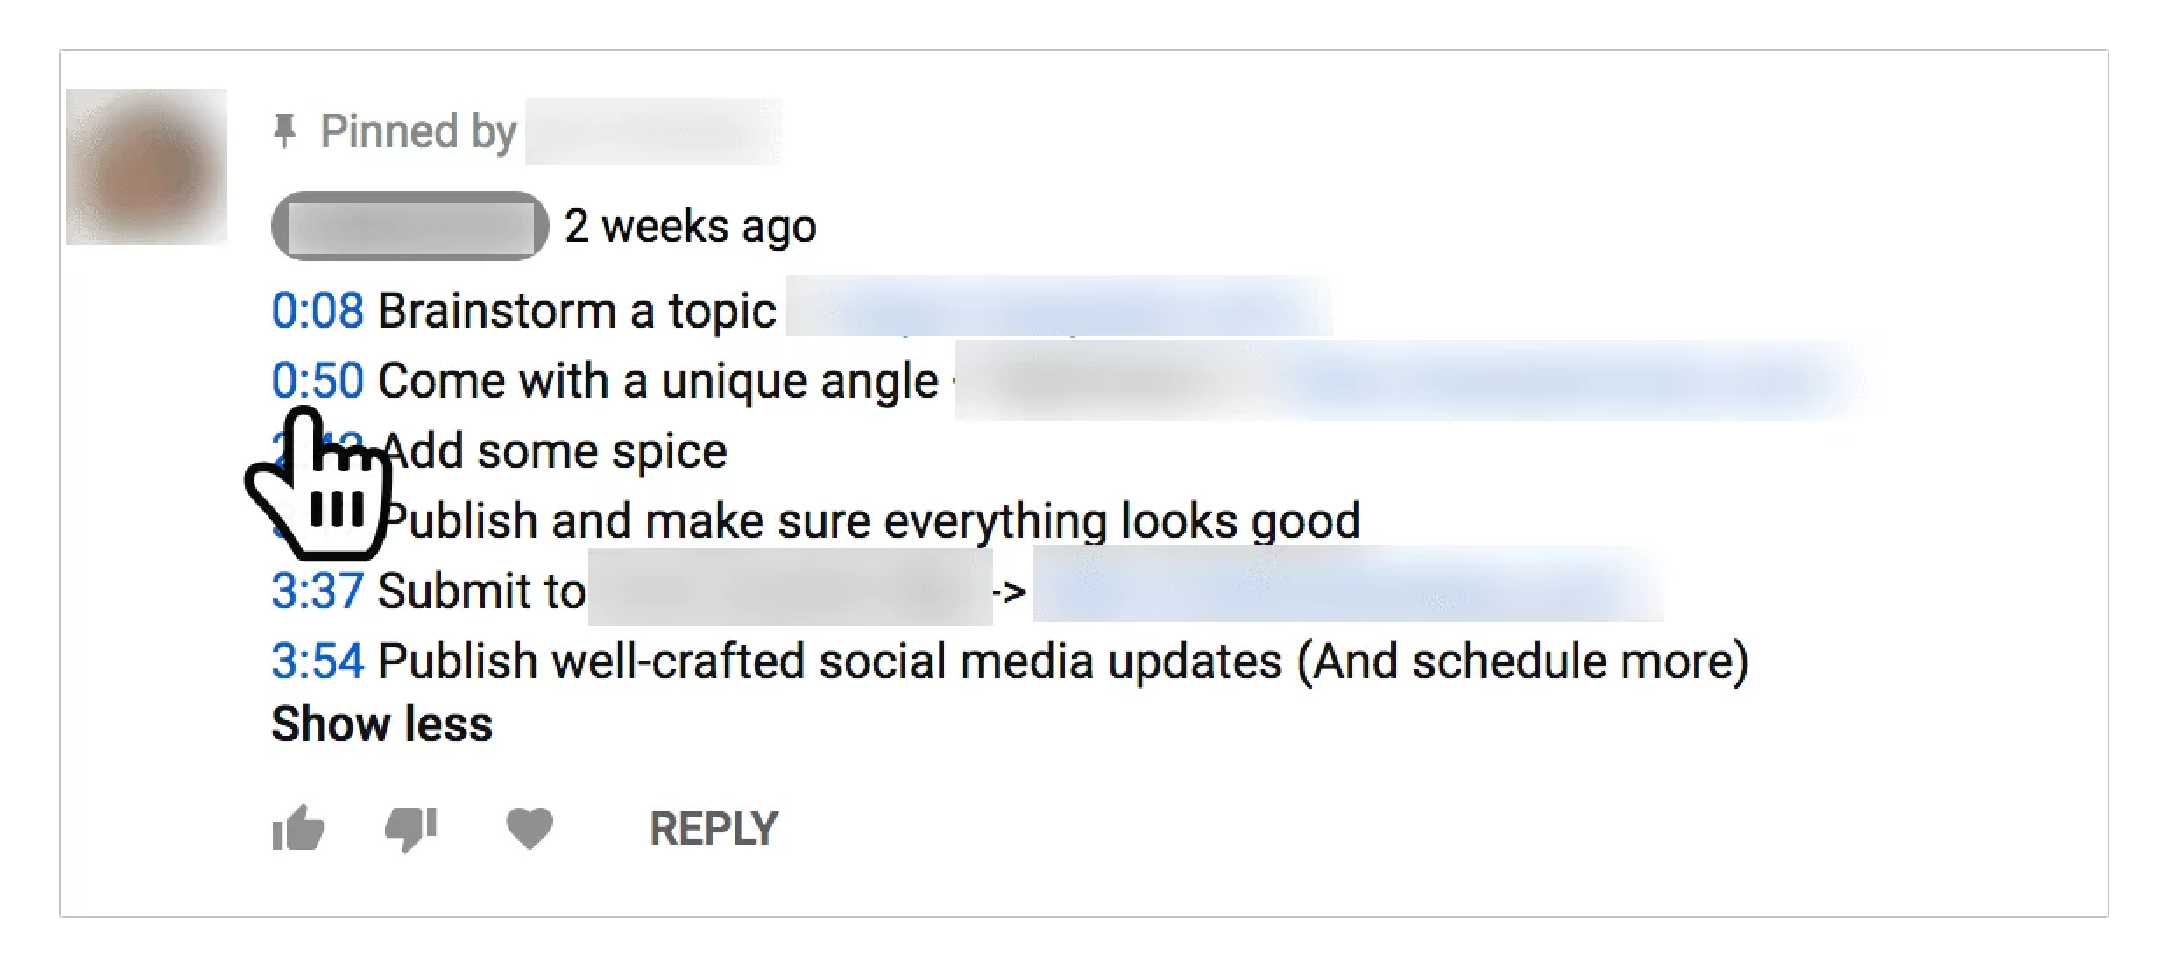
Now head over the comments section and paste the time stamp that you wish to add.
You can add multiple timestamps on comments and still have it look organized by adding a line break in between.
Step 3: Go Through the Video and Take Note

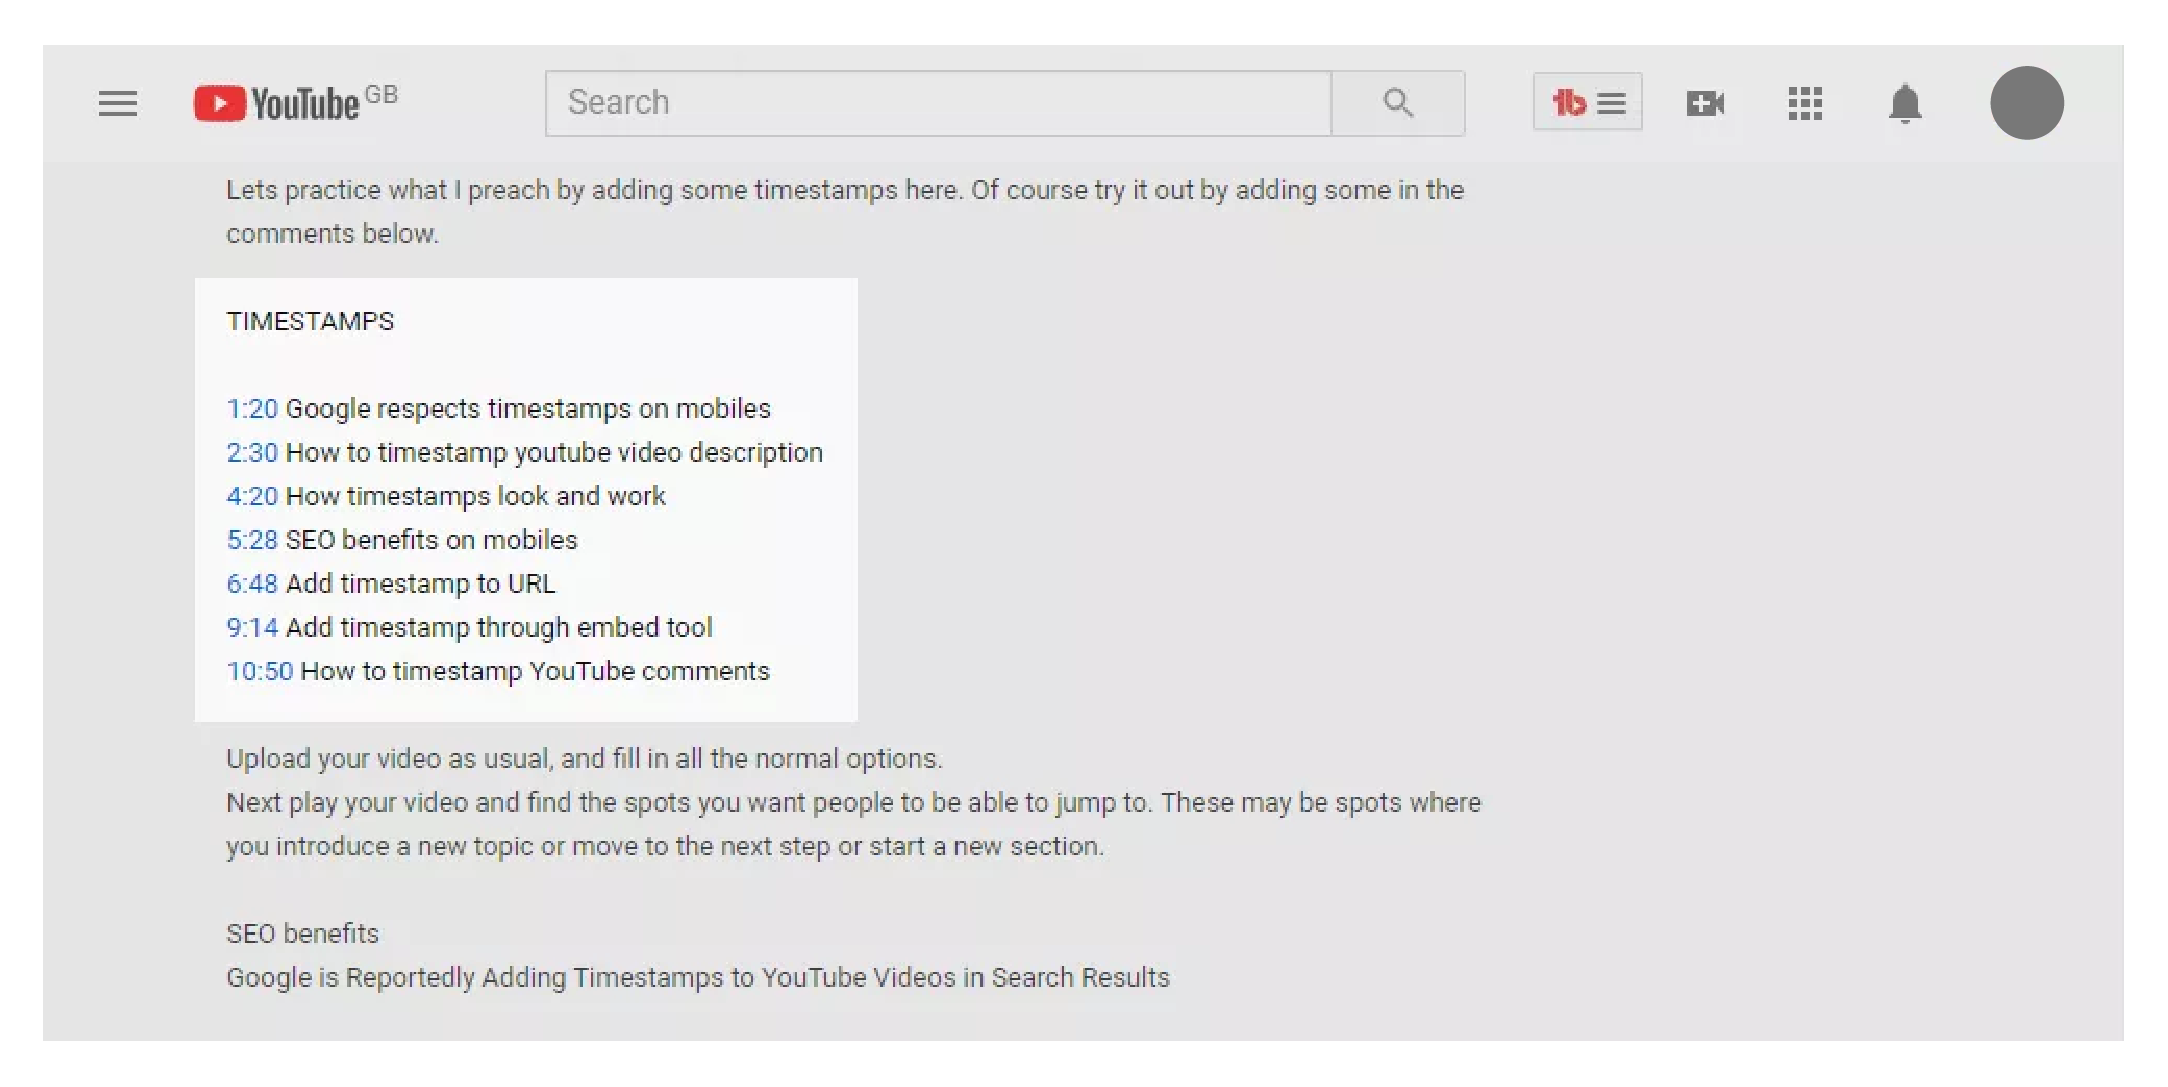
When you add a timestamp or multiple timestamps on a YouTube video, it is important that you add some context to what the timestamp is all about.
The best way to get the context is to go through the video and take note of what the interesting points are. Note down the specific time from where you want a viewer to have a look, and repeat the same for multiple timestamps.
Go through the entire video and compile a timestamp listing that can then be converted into timestamps on your YouTube videos.
Step 4 (A): Adding Timestamp to Your Video Description
To add a timestamp on YouTube to your video description follow these steps:
- Log in to your YouTube account.
- Select the video you wish to add the timestamp to.
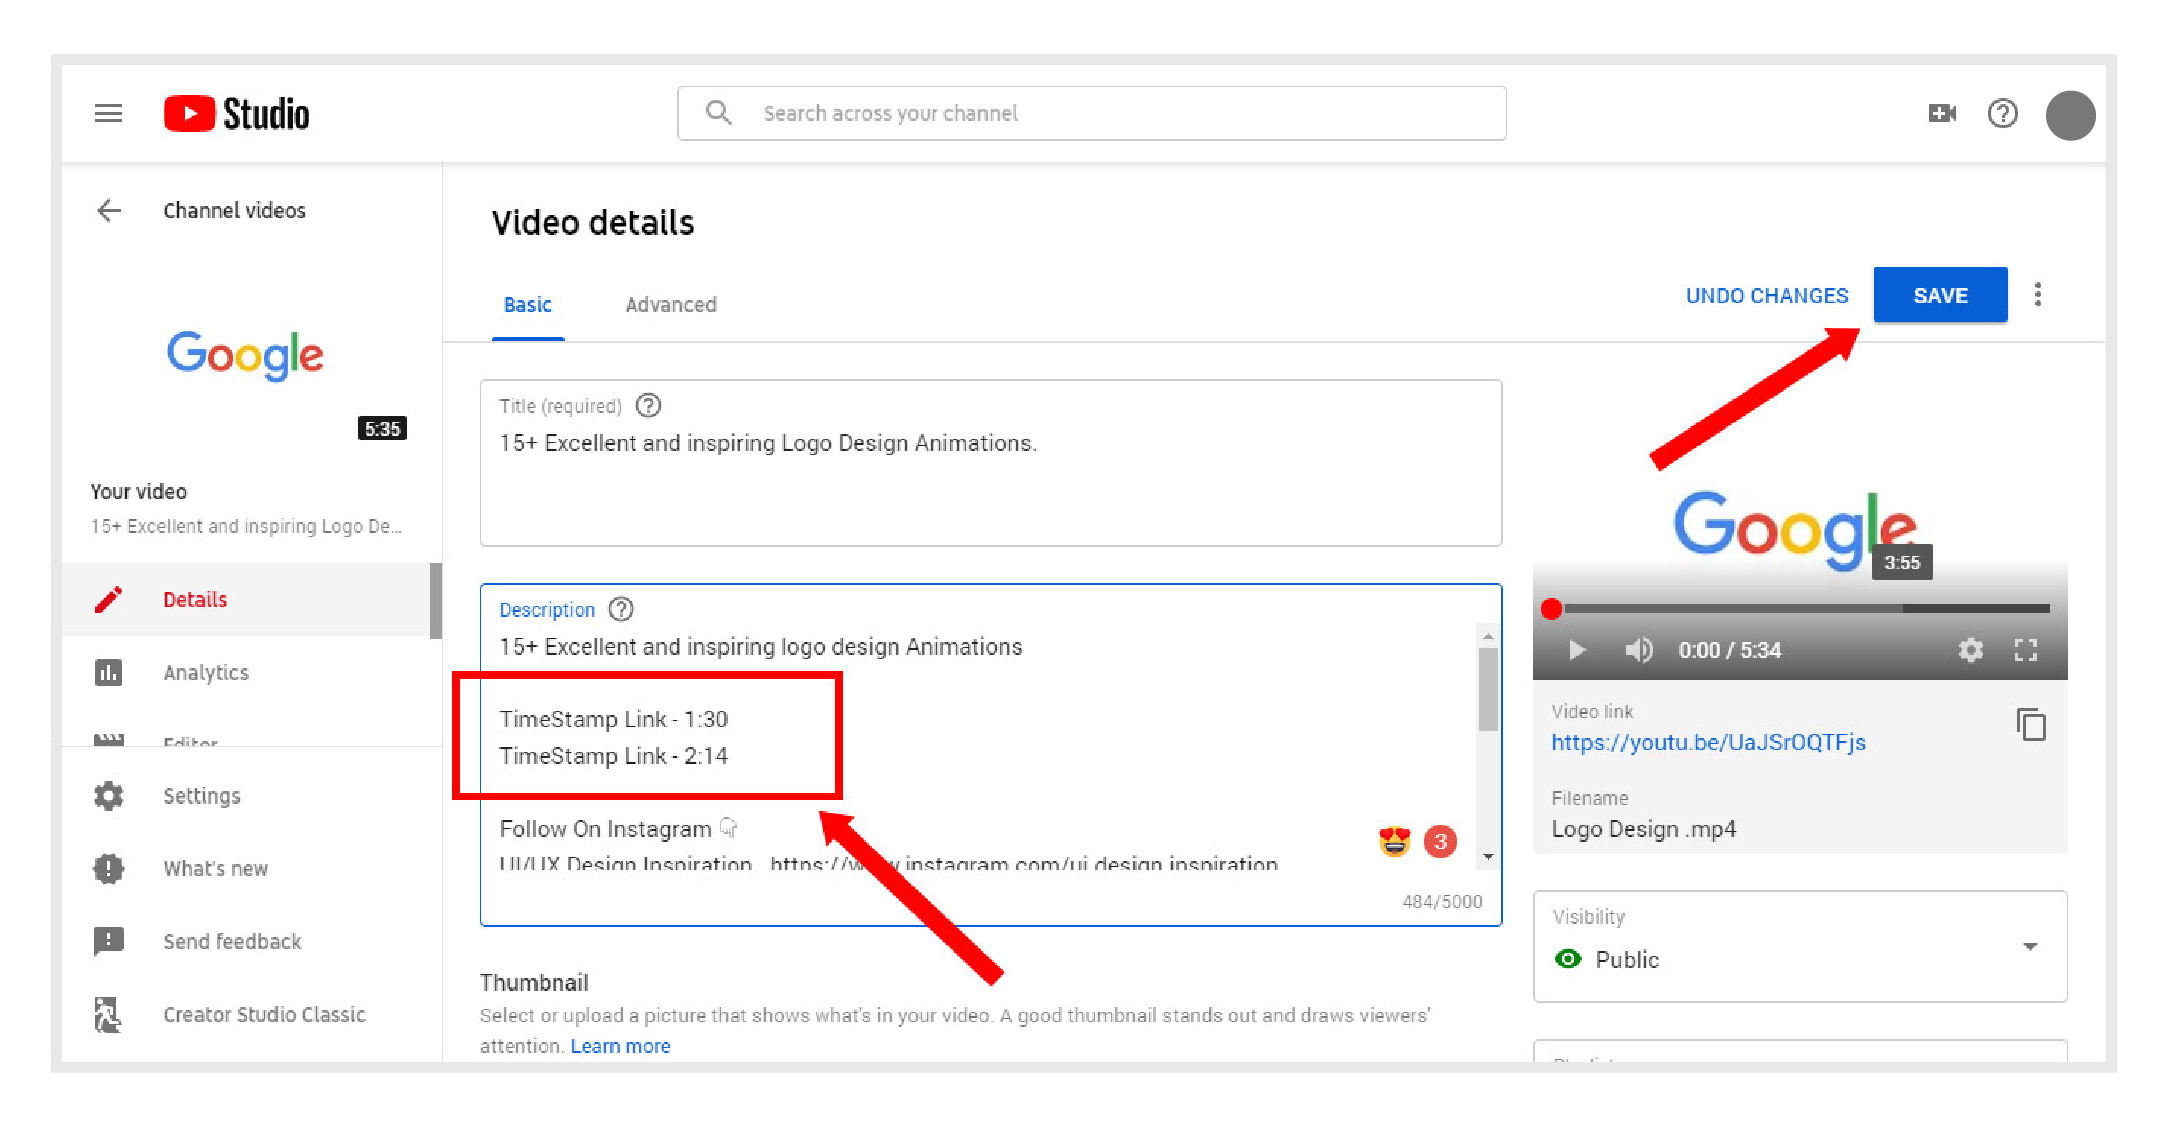
- Now look for the “Edit Video” option under the mini-player.
- Tap the “Edit Video” option to be redirected to YouTube Studio editor.
- Select the “Description” tab to start editing the description.
- Add a section for Timestamp and paste the YouTube Timestamps you want to include.
- You will need to add the time in minutes : seconds (00:00) format
- Ideally, its best to add the time, and give a brief description of what it is
- Follow this up with a line break, second timestamp and brief description.
- Repeat until you add all the timestamps that you wish to add.
- Click on “Save Changes” from the top right corner once you are done
Step 4(B): Adding Timestamp to a Video Comment
Now that you know how to add timestamps to your YouTube video description, let’s take a look at an alternative way to add a timestamp to a YouTube video as a comment.
To add a timestamp on YouTube as a video comment, follow these steps:
- Log in to your YouTube account.
- Make your way to the YouTube channel that has the video you want.
- Go through their video content and take notes
- When you have timestamps ready, add them as a comment.
- Add a brief description to the timestamp to direct people
- You can add a line break in between for multiple timestamps.
Benefits of Adding Timestamps to YouTube Videos
Adding timestamps on YouTube is a great way to improve the overall response of your video on the platform, and there are plenty of great benefits that come with it.
If you are new to timestamps or not sure about their functionality, here are some key benefits of YouTube Timestamps.
- Timestamps improve your video’s SEO and can help it rank better.
- Makes it easy for your audience to navigate through your video.
- Can create hype to the video by giving a glimpse of what comes next.
- Improves audience retention as they go through the different timestamps.
- Saves time for viewers and they can get straight to the point if they are short on time.
- Makes sure that everyone gets to see the relevant parts of your video.
- Timestamps also increase the video views as users clicking on timestamps are counted as a new view.