
7 Must Know YouTube Features To Increase Your Subscribers
There is no doubt that YouTube is one of the biggest social media platforms (if not the biggest).
The competition for video views, subscribers, and audience retention is fierce between creators.
This is made even more exciting by the fact that the quality of the content is pretty high.
Each day, new creators join YouTube and up their game, so it's important to know some YouTube features to increase your subscribers.
From staying up to date about all the latest updates to making use of new features like YouTube Shorts, there is a lot to keep tabs on when it comes to YouTube. That’s why we have you covered with the top must-know YouTube features that every creator must know.
So let’s dive straight into it!
1. Playlists Increases Watch Hours and Audience Retention
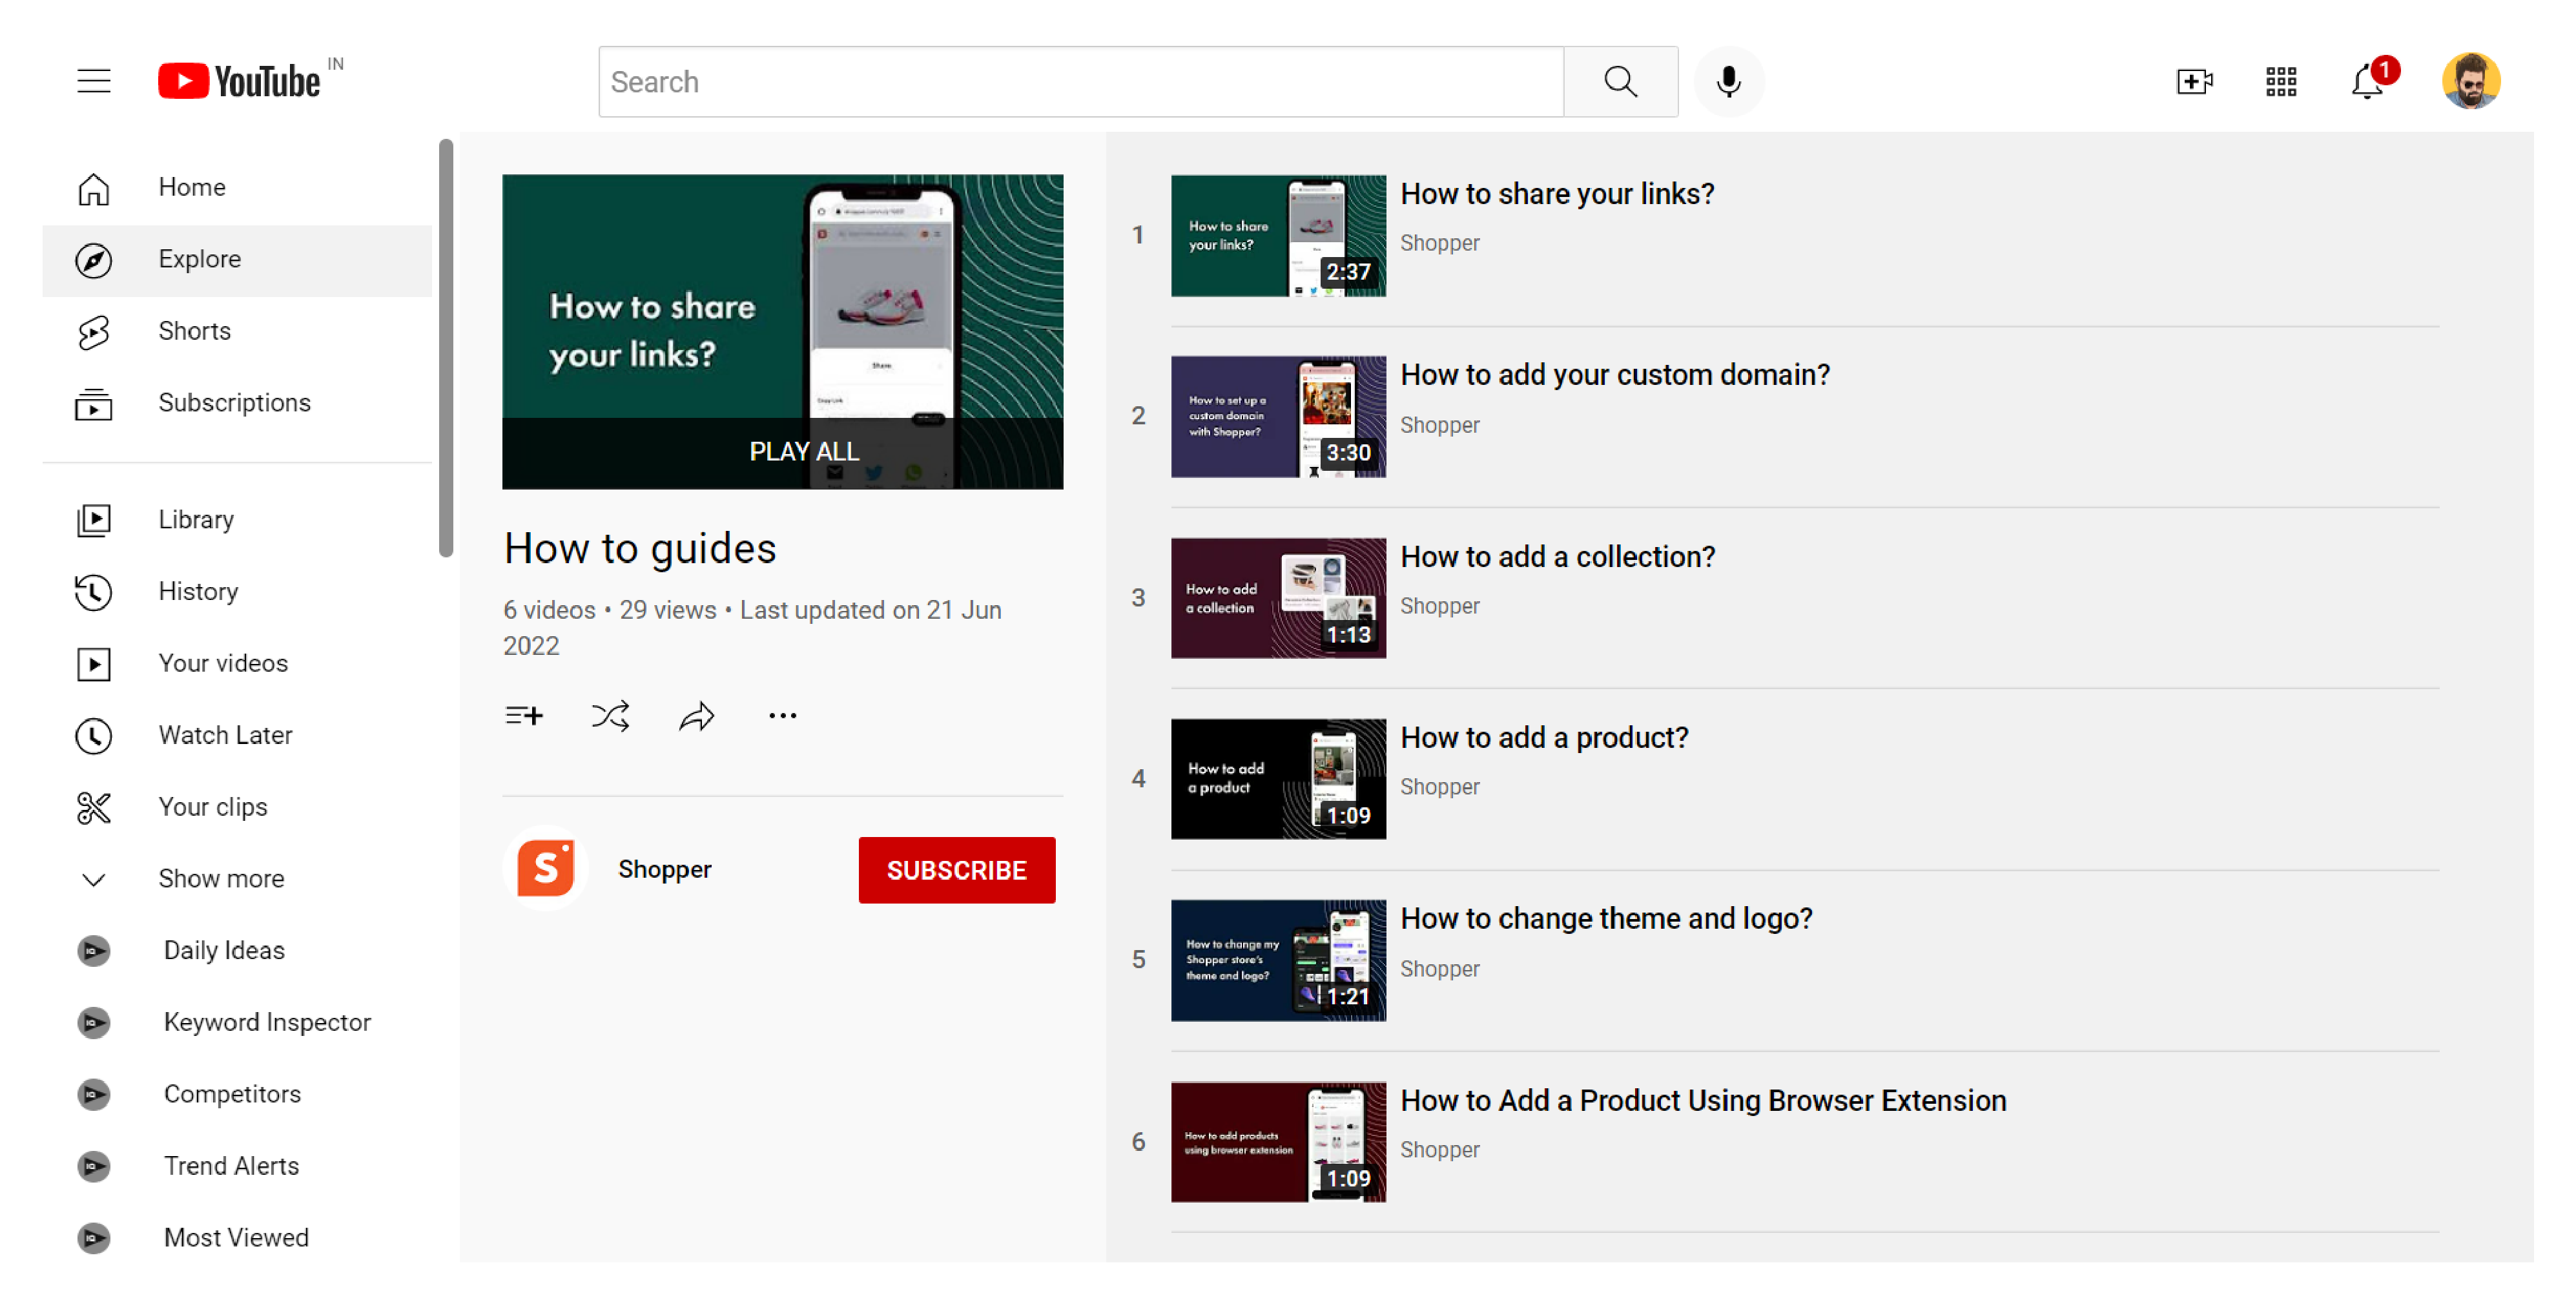
If you are someone that has been ignoring the “Playlist” option while uploading a new video, it is about time you made some playlists.
Playlists are YouTube’s version of collections that features a set of similar content. People who like a niche or style of videos can easily navigate through all your similar videos by having playlists.
If you are wondering why you need to add playlists, here are some key benefits of having multiple playlists:
- All the videos in your playlists automatically play one after the other.
- The audience tends to stay around and watch multiple videos that are similar.
- People that prefer a niche are more likely to subscribe if they see multiple videos of the same niche.
- Increases watch hours as people go through all the videos on your playlist.
- Ensures that people stick around your content for more time, improving audience retention.
2. Create Your Custom YouTube URL When it Becomes Available
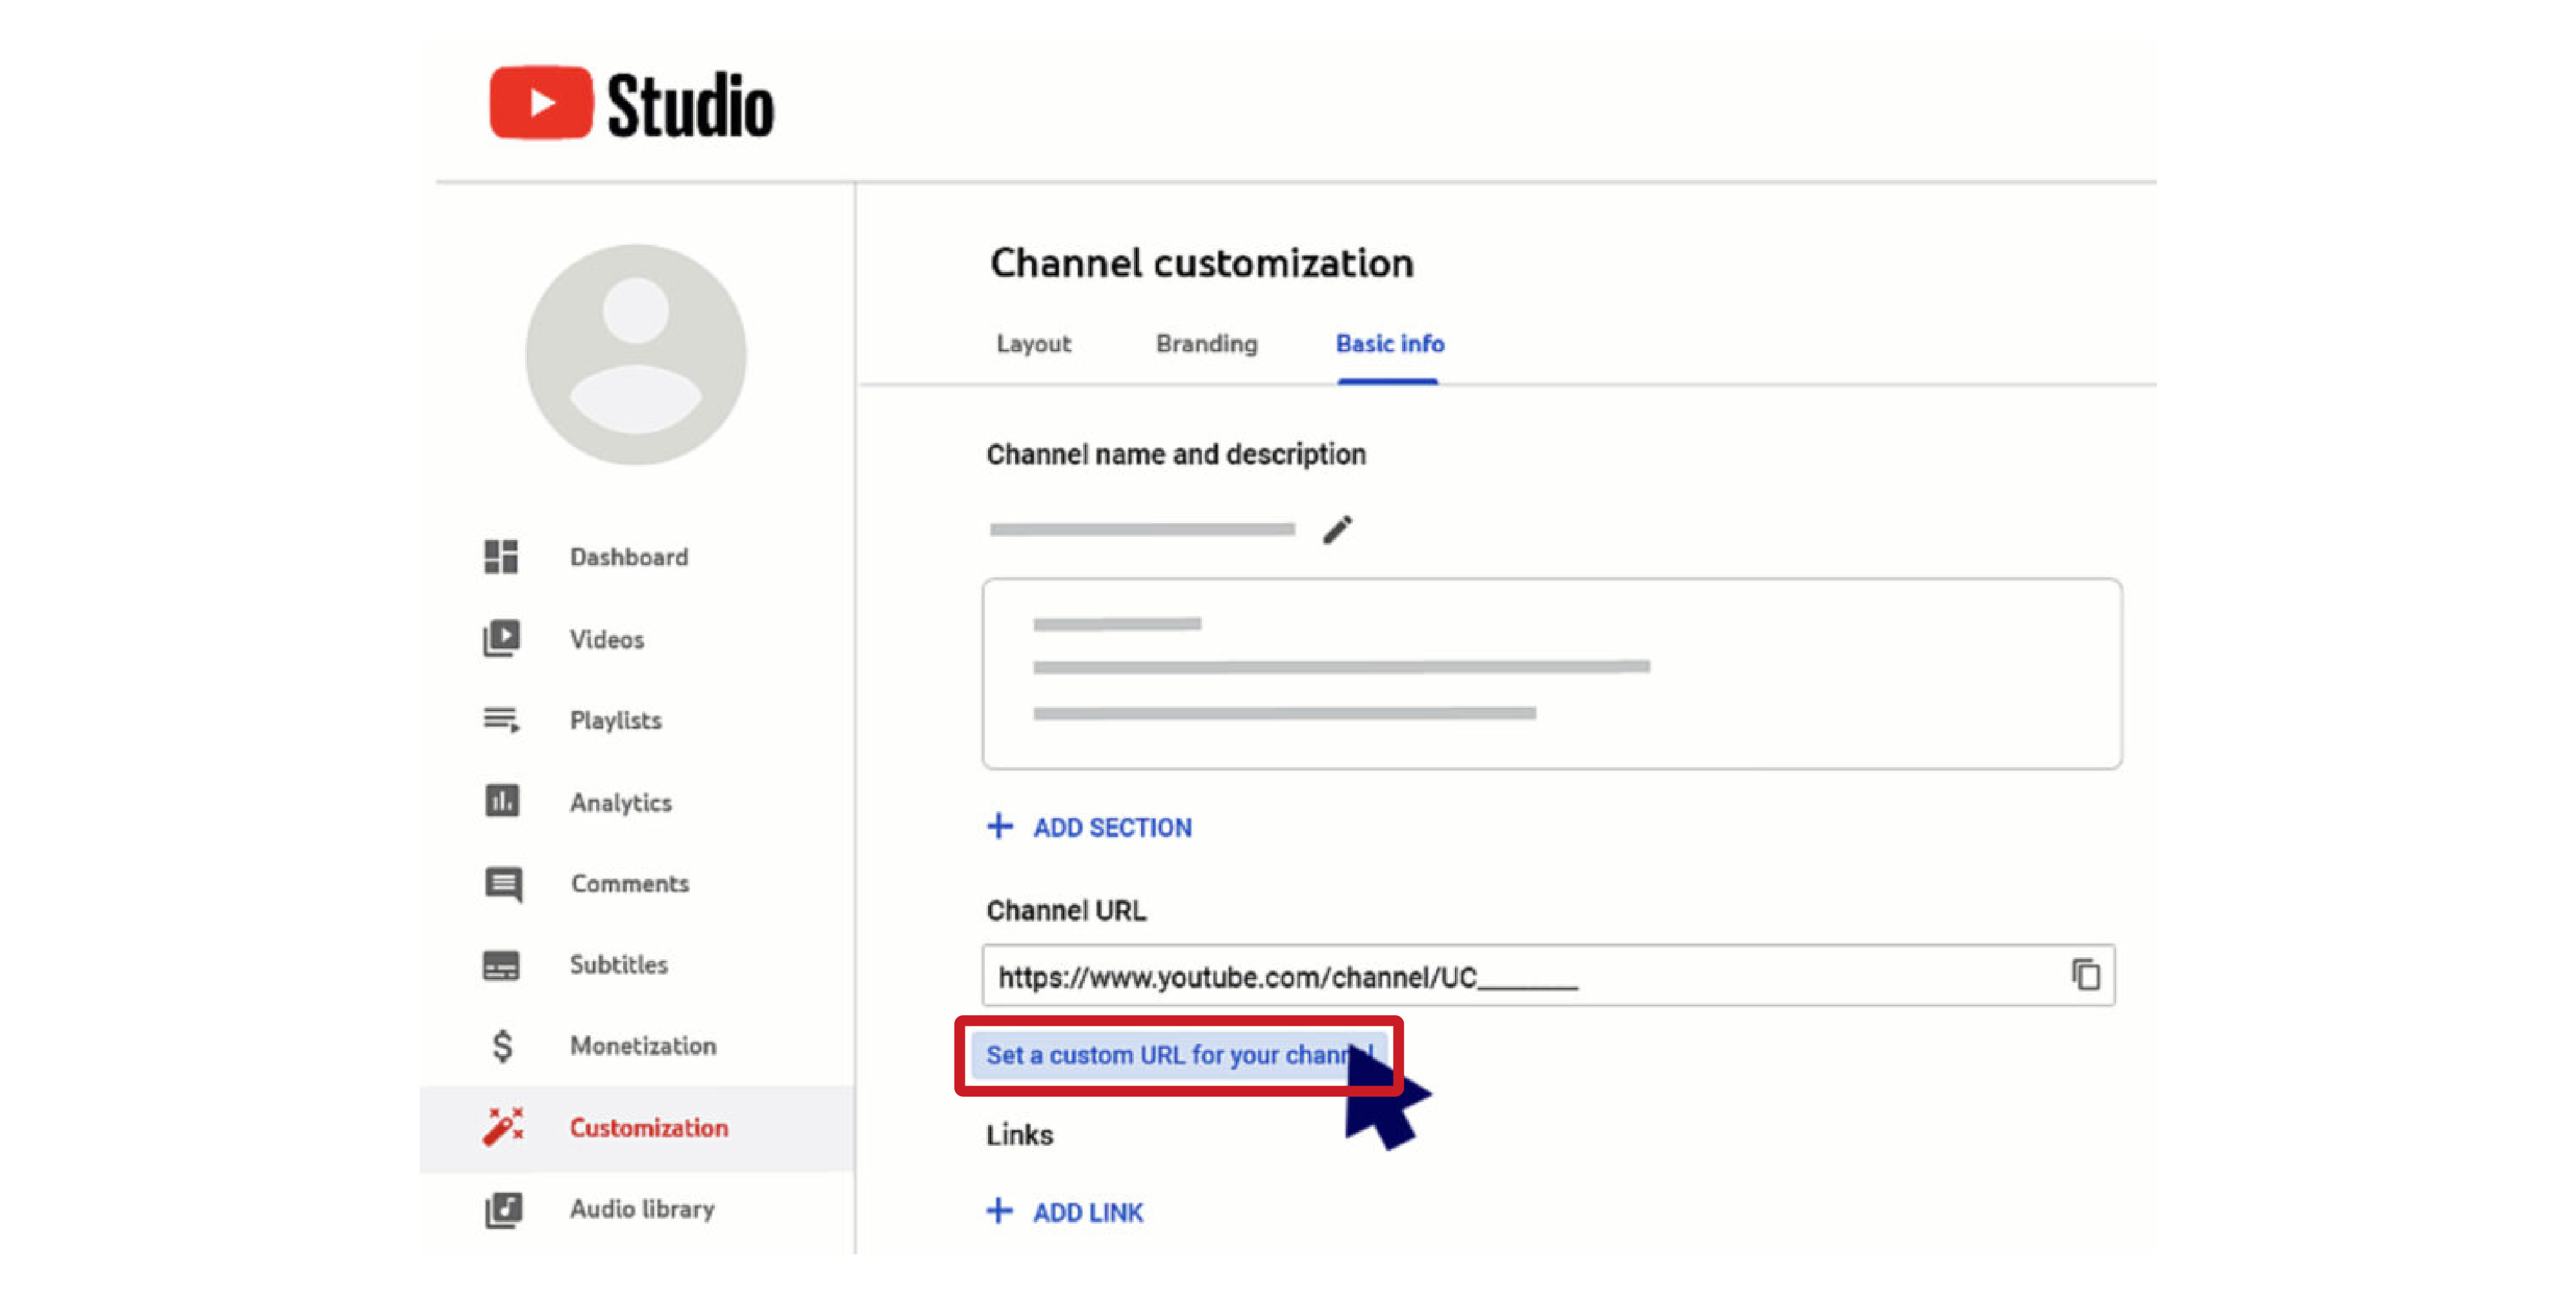
Custom URL for your YouTube channel is one of the first locked features that are unavailable for creators that are starting their YouTube adventure.
However, this is one of the easiest features to unlock and can help you a lot in your journey to becoming an established YouTube creators.
That’s why it always helps to have it enabled and ready sooner, rather than later.
Fortunately, the requirements for YouTube custom URL are very easy to achieve if you have an active YouTube channel.
If you have a YouTube channel with at least:
- 100 subscribers
- Completed 30 days after creation
- Have an uploaded banner image
- Have an uploaded profile picture
You are eligible to claim the custom URL. You can change the custom URL three times per year, but you have a cooldown period of 72 hours in between channel URL changes. If you are not sure about how to set up a custom URL on YouTube, follow these steps:
- Sign in to your YouTube channel.
- Access the YouTube Studio by clicking on your profile picture.
- In the YouTube Studio, select “Customization”
- From there click on “Basic Info” and navigate to “Channel URL”
- Tap the “Set a Custom URL” option and create your custom URL.
- Click on “Publish” and select “Confirm” to register, and claim your custom URL
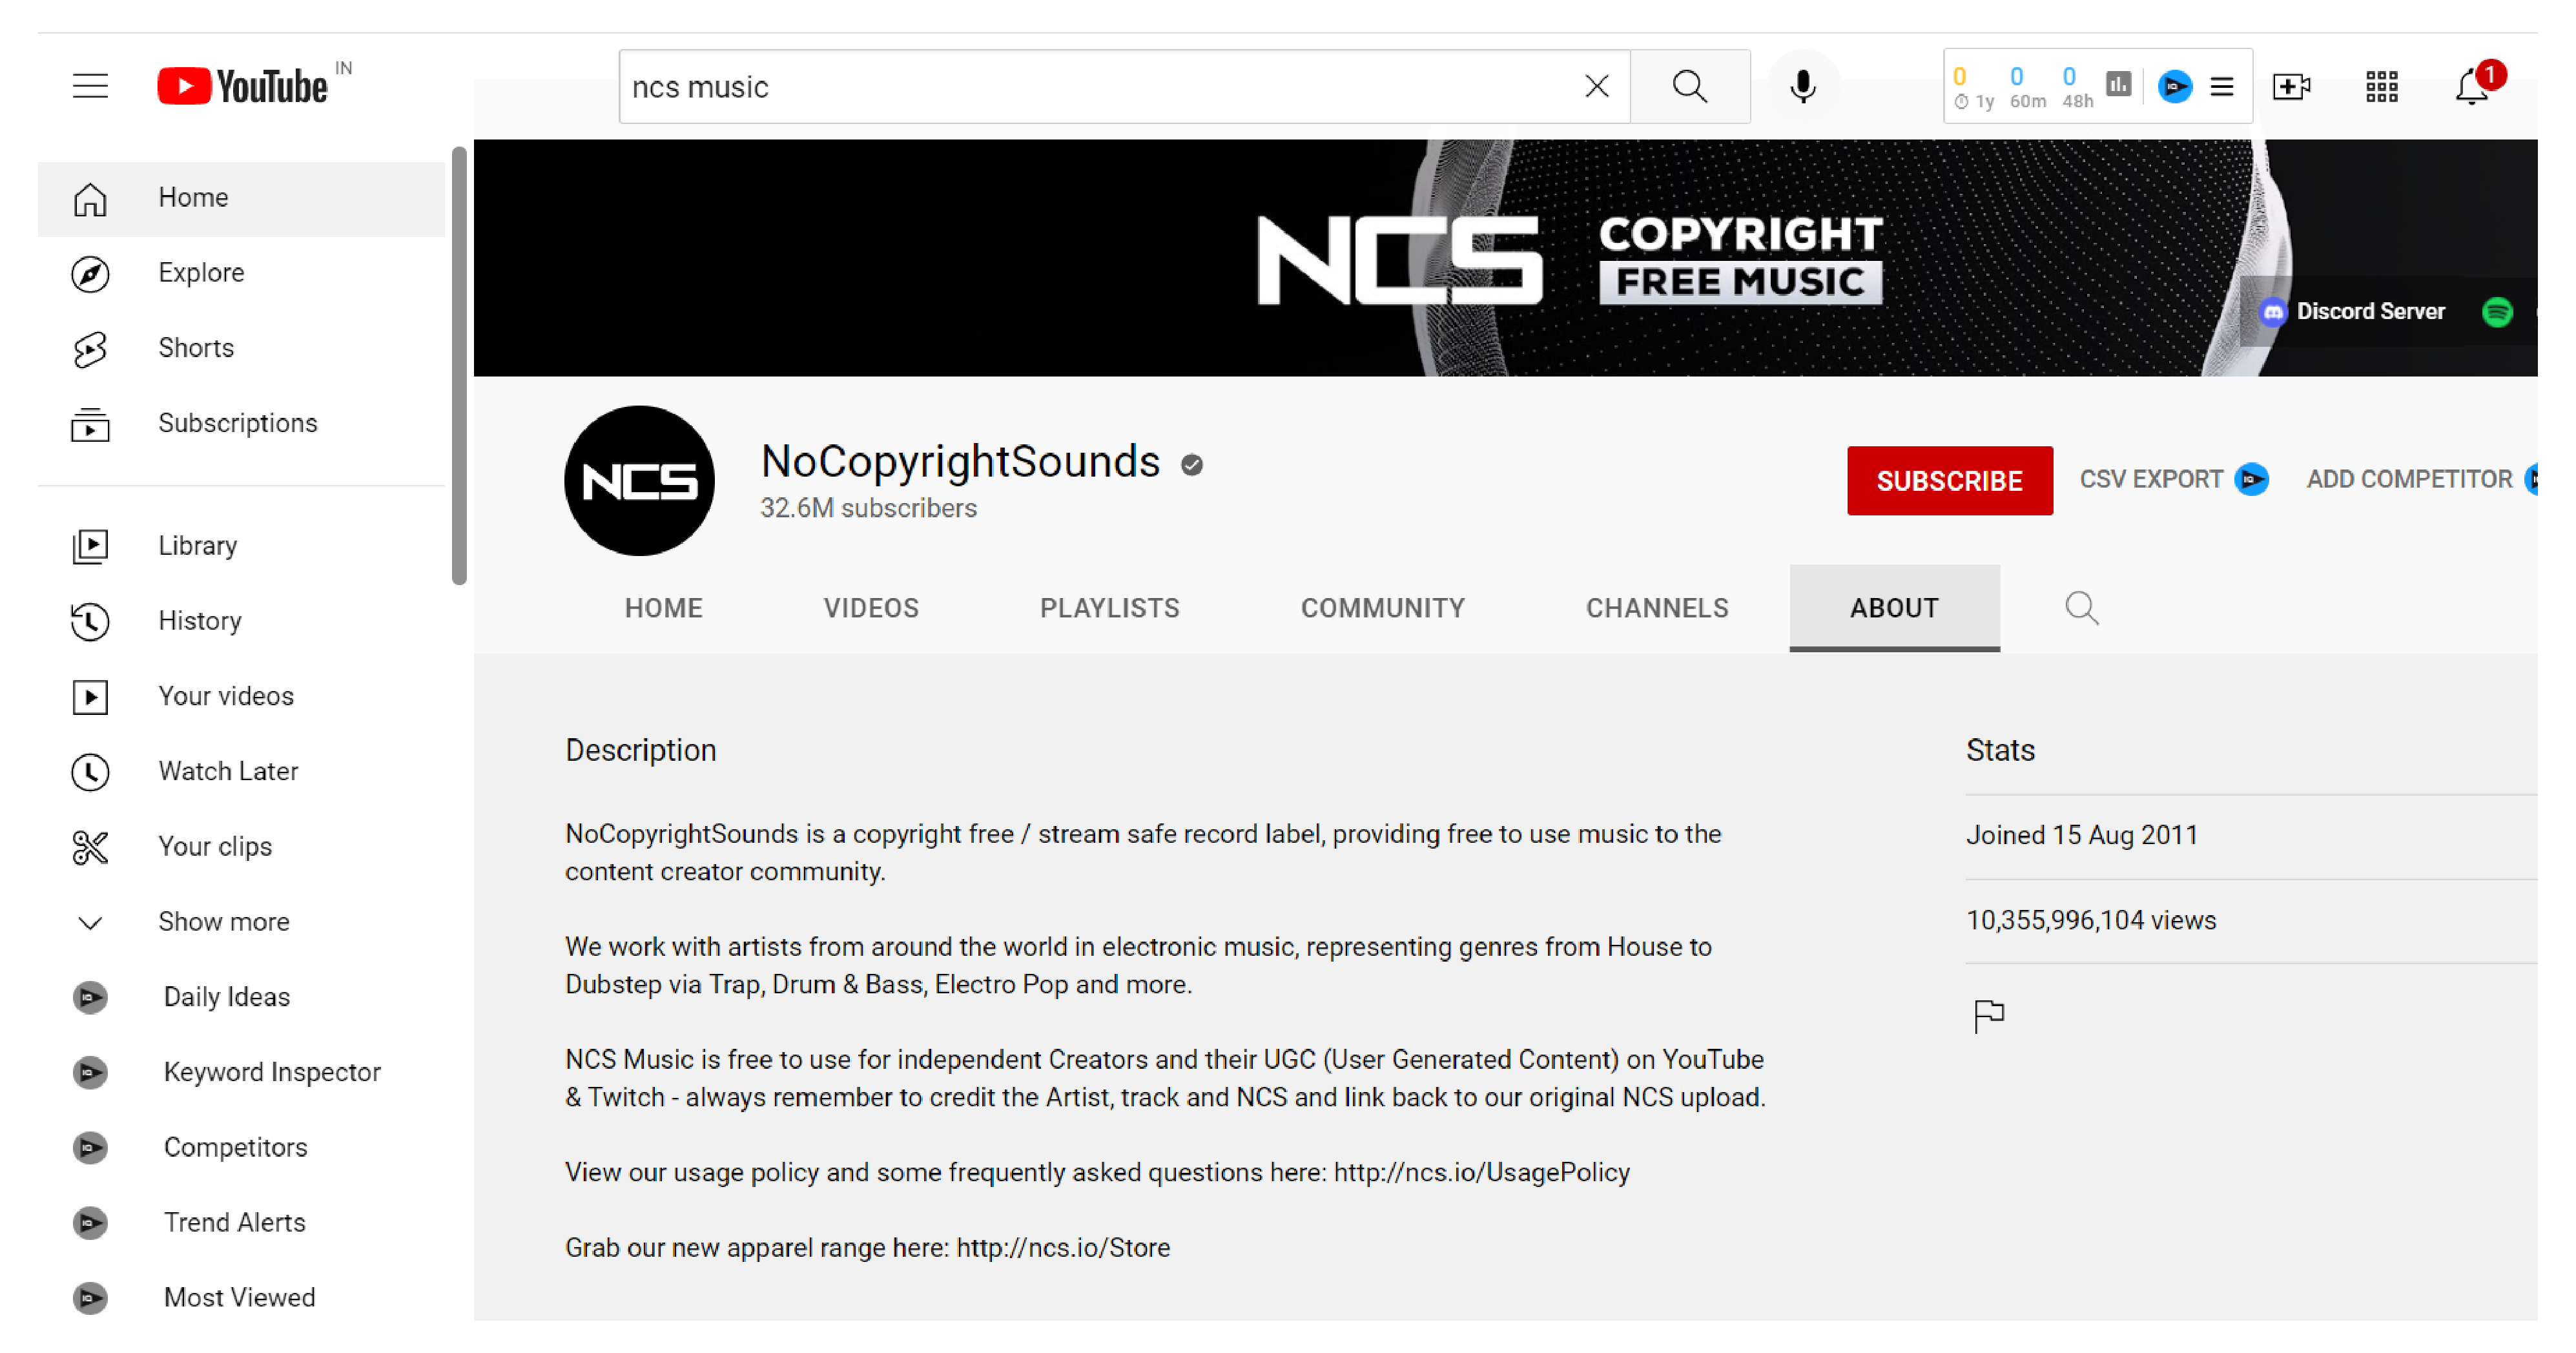
3. Make Use of Non-Copyrighted Content
YouTube copyright laws have been strictly enforced for a long time now.
Unfortunately, it is the way YouTube has been designed to make sure that content from creators doesn’t get stolen and used without proper permission.
However, this does restrict creators from using their favorite music on their next YouTube video.
As a beginner, you are likely to miss this out, but there are plenty of creators out there that make non-copyrighted high-quality content - be it music, templates or footage.
In return, they only ask you to mention the original video’s link and give due credit to your video description. This gives their video more exposure, and a consistent supply of new audience, views, and subscribers.
So what happens if your video does get a copyright infringement?
Depending on the severity of your violation, it can either result in monetization being disabled for the particular video, or getting your video taken down.
However, it all comes down to whether it is just a copyright claim or a more severe copyright strike.
Please note that if you do end up receiving a copyright strike, you lose the monetization feature, and if you get three strikes, you end up getting your channel terminated.
You can also make use of YouTube’s audio library to get a wide range of non-copyrighted music to use in your video.
4. Your End Screen Should Not Be An Ending
Yes, your YouTube video’s end screen should not be an ending!
Instead, it should be the beginning of your next video for all the visitors that come to your channel and watch one video.
Placing the right template, adding the right videos, and trying out different strategies are key to making your end screen interesting.
Creators often miss out and fail to make the most out of the simple yet powerful features that YouTube offers. Ironically, the majority of these features are available to creators from day one.
You don’t need even a single subscriber to enable the end screen and it’s available to you from the first video you upload.
When you think about adding a random video, take a moment and think!
Is the video you adding, an interesting hook? Is it appealing to a new visitor who came to your channel because you made a video that they look forward to?
Shouldn’t the video match the video you published so that it motivates people to consume more of your content?
Pro Tip: Add a relevant video that matches the current video or is similar in tone or content. Now, for the next video, add an end screen that is relevant to the second video, and continue this theme.
This will naturally create a chain reaction and ensure that the visitor stays on your page.
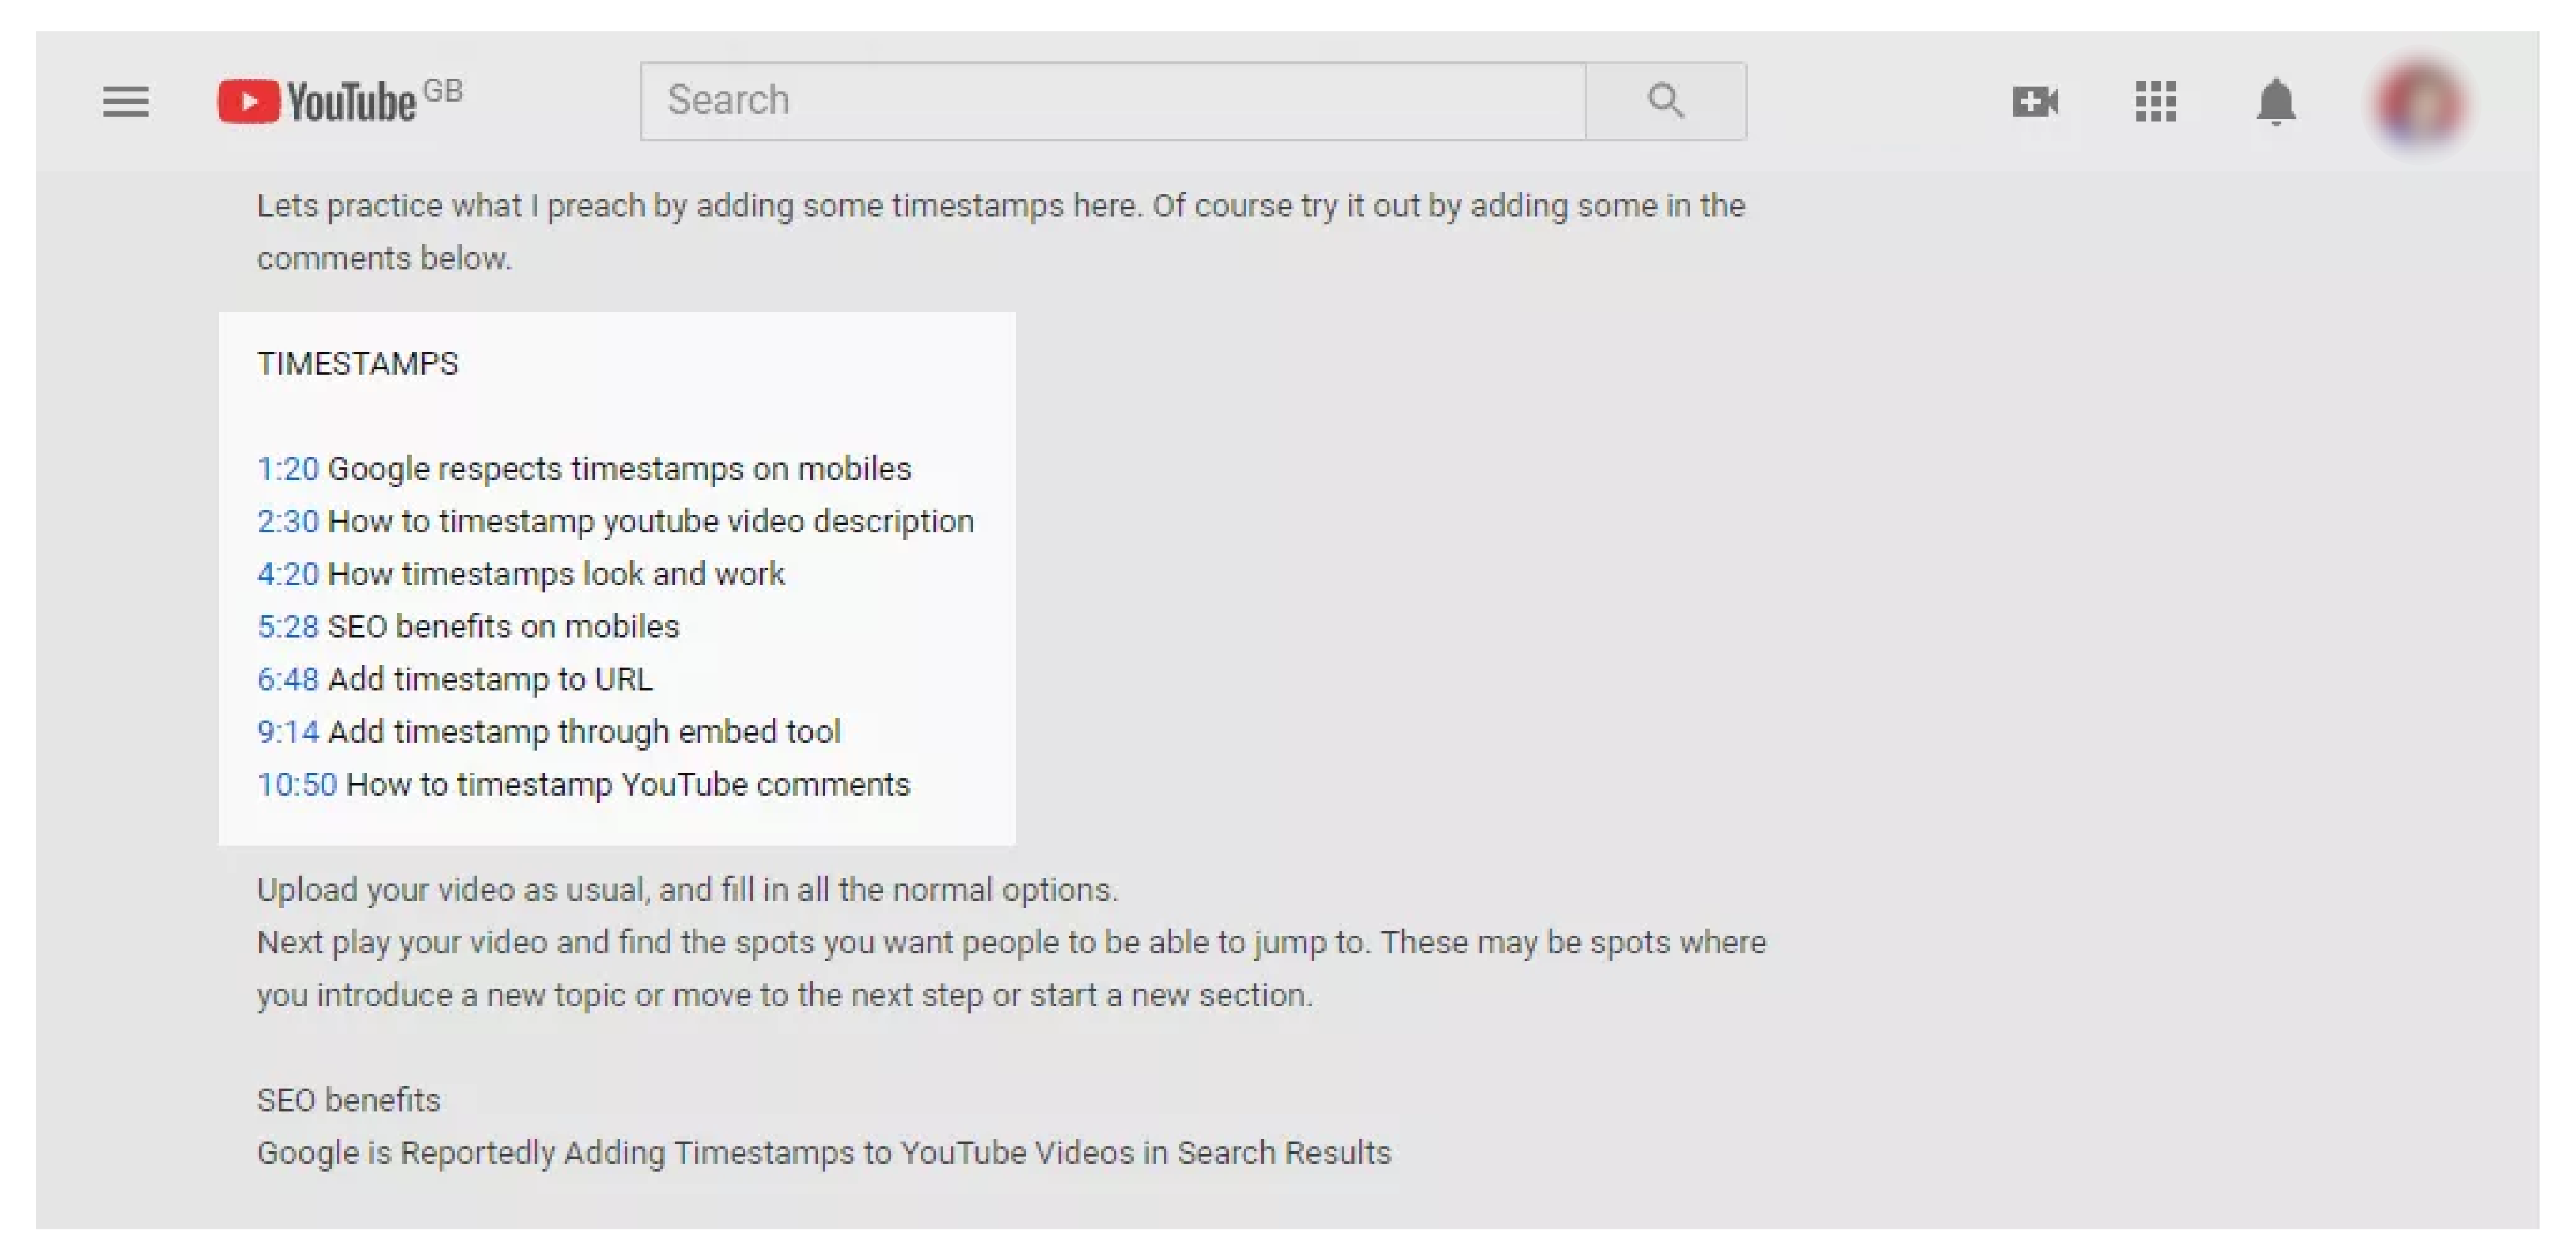
5. Time Stamps are More than Just Random Numbers
Video chapters are an ever-evolving feature that’s getting a lot of emphasis of late.
When it comes to YouTube videos in the fast-paced modern world, people want to consume the maximum content in the least possible time.
That’s why timestamps are of importance like never before.
Not only do they save time for viewers that want to skip the intro or get to the interesting bits in a hurry. They ensure that nobody misses out on the core subject of your video!
However, there is an even better benefit of adding timestamps to YouTube videos - Chapters!
Yes, that’s right. YouTube recently made it possible for creators to add automatic and manual chapters to their YouTube videos.
While automatic chapters tend to work great for videos in English, the same cannot be said for non-English speaking YouTube videos. That’s where manual chapters come into play.
If you didn’t know how to add manual timestamps to YouTube videos, here is a step by step guide:
- Log in to your YouTube account
- Access YouTube studio by clicking on the profile icon
- Scroll down until you come across the “YouTube Studio” option.
- The “YouTube Studio” interface will now open up.
- From the left menu panel, you need to click on the “Content” option.
- This will list out all the videos on your YouTube channel.
- From there select the video that you wish to add your chapters to.
- Click on the pencil icon to start editing the “Description”
- Add a list of timestamps, with your first timestamp starting at 00:00
- You are required to add at least three timestamps listed in ascending order.
- Click on save once you are done adding the chapters.
Please note that the minimum length of video chapters is 10 seconds and you can have as many chapters as required.
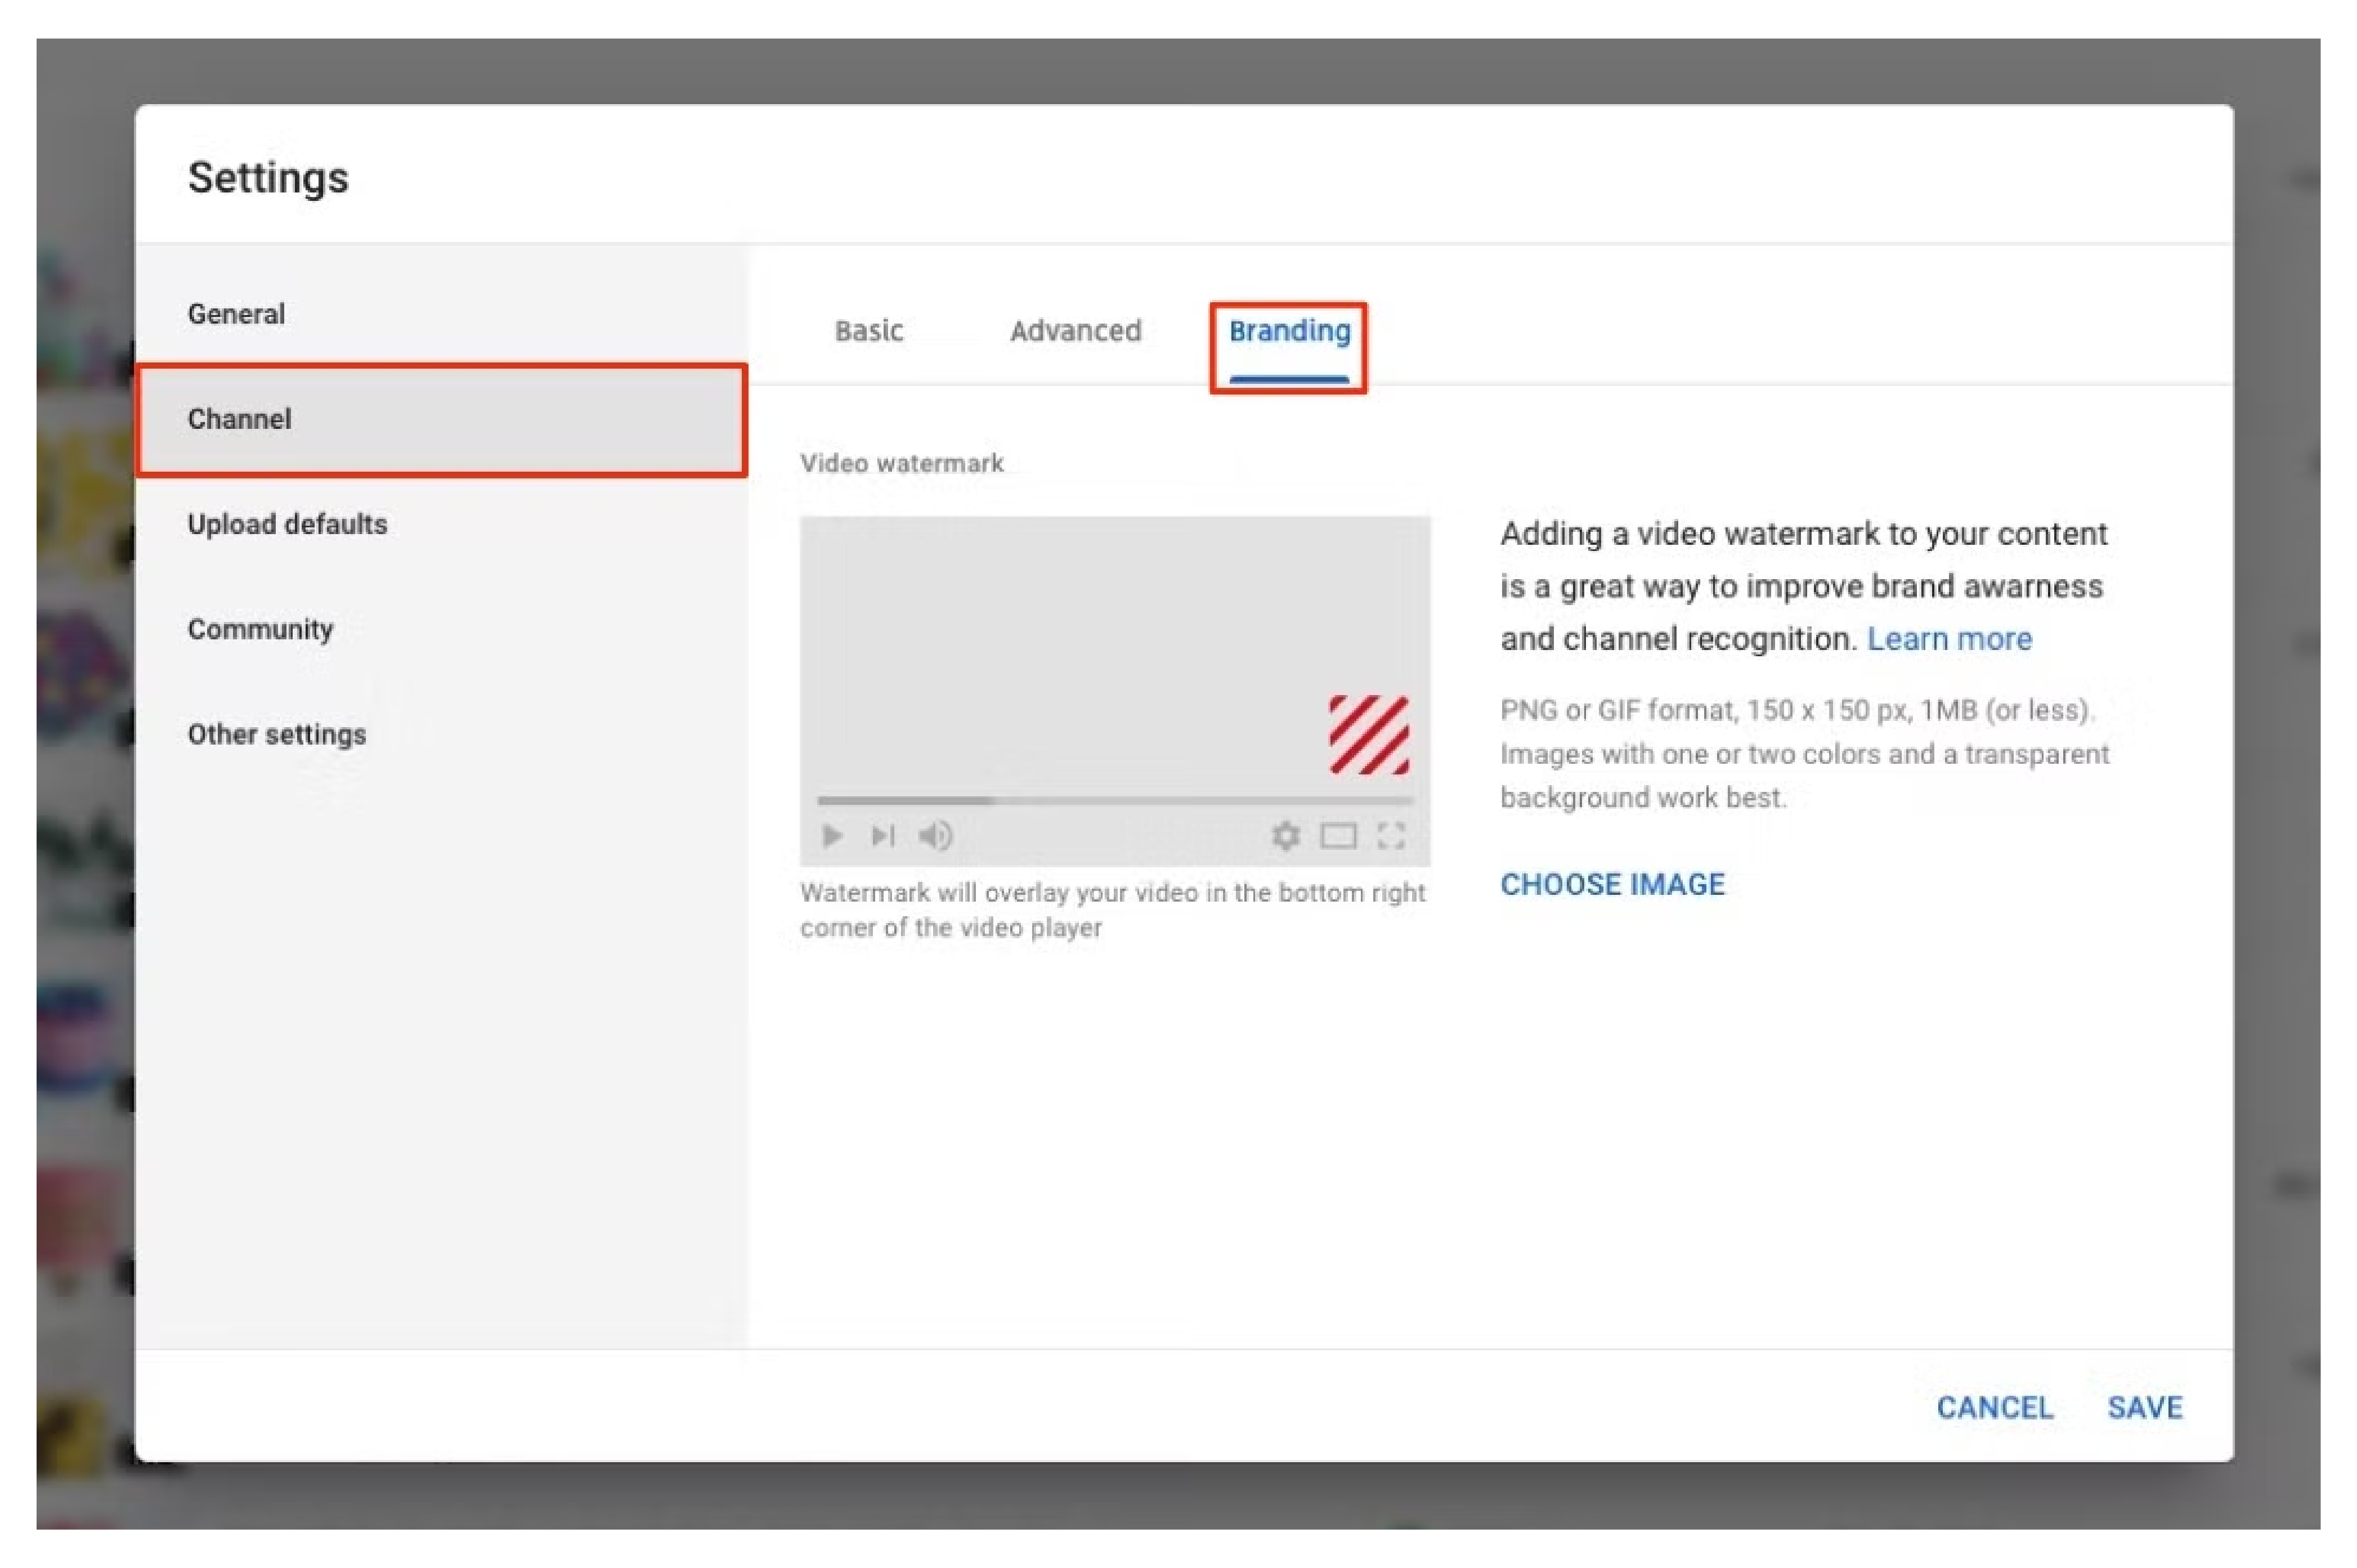
6. Make Use of the Video Watermark Feature
This is yet another feature from YouTube that’s available for all creators from day one.
Video watermark on YouTube usually appears towards the bottom right corner of your YouTube video player.
The best thing about adding video watermarks to your video is the Call to Action feature that accompanies the video watermarks.
By adding a watermark, whenever someone clicks on the watermark, YouTube will encourage people to subscribe to your content by popping up a subscribe button.
Ideally, it’s highly recommended to go for a watermark with transparent background. This ensures that your watermark remains subtle and does not get into conflict with your YouTube video.
The image you use on the watermark can be anything from your profile picture to a subscribe button-themed picture.
Now that you are all hyped up to add a subscribe button to your YouTube videos, here is a step by step guide on how to add the video watermark:
- Log in to your YouTube account.
- Head over to your YouTube profile and click on your profile picture.
- From there, you need to scroll down and select the “Your Channel” option
- Look for the “Customize Channel” option and tap on it.
- You will then be taken to the “Channel Customization” menu.
- From the three tabs, select “Branding” to get multiple options.
- Scroll down until you come across “Video Watermark”
- Add the image you wish to add as “Video Watermark” and save the changes.
YouTube allows creators to either add a watermark at the end of the video, throughout the entire video or at a custom time stamp based on the creator’s choice. Ideally, it’s best to select the “entire video” to get the best result.
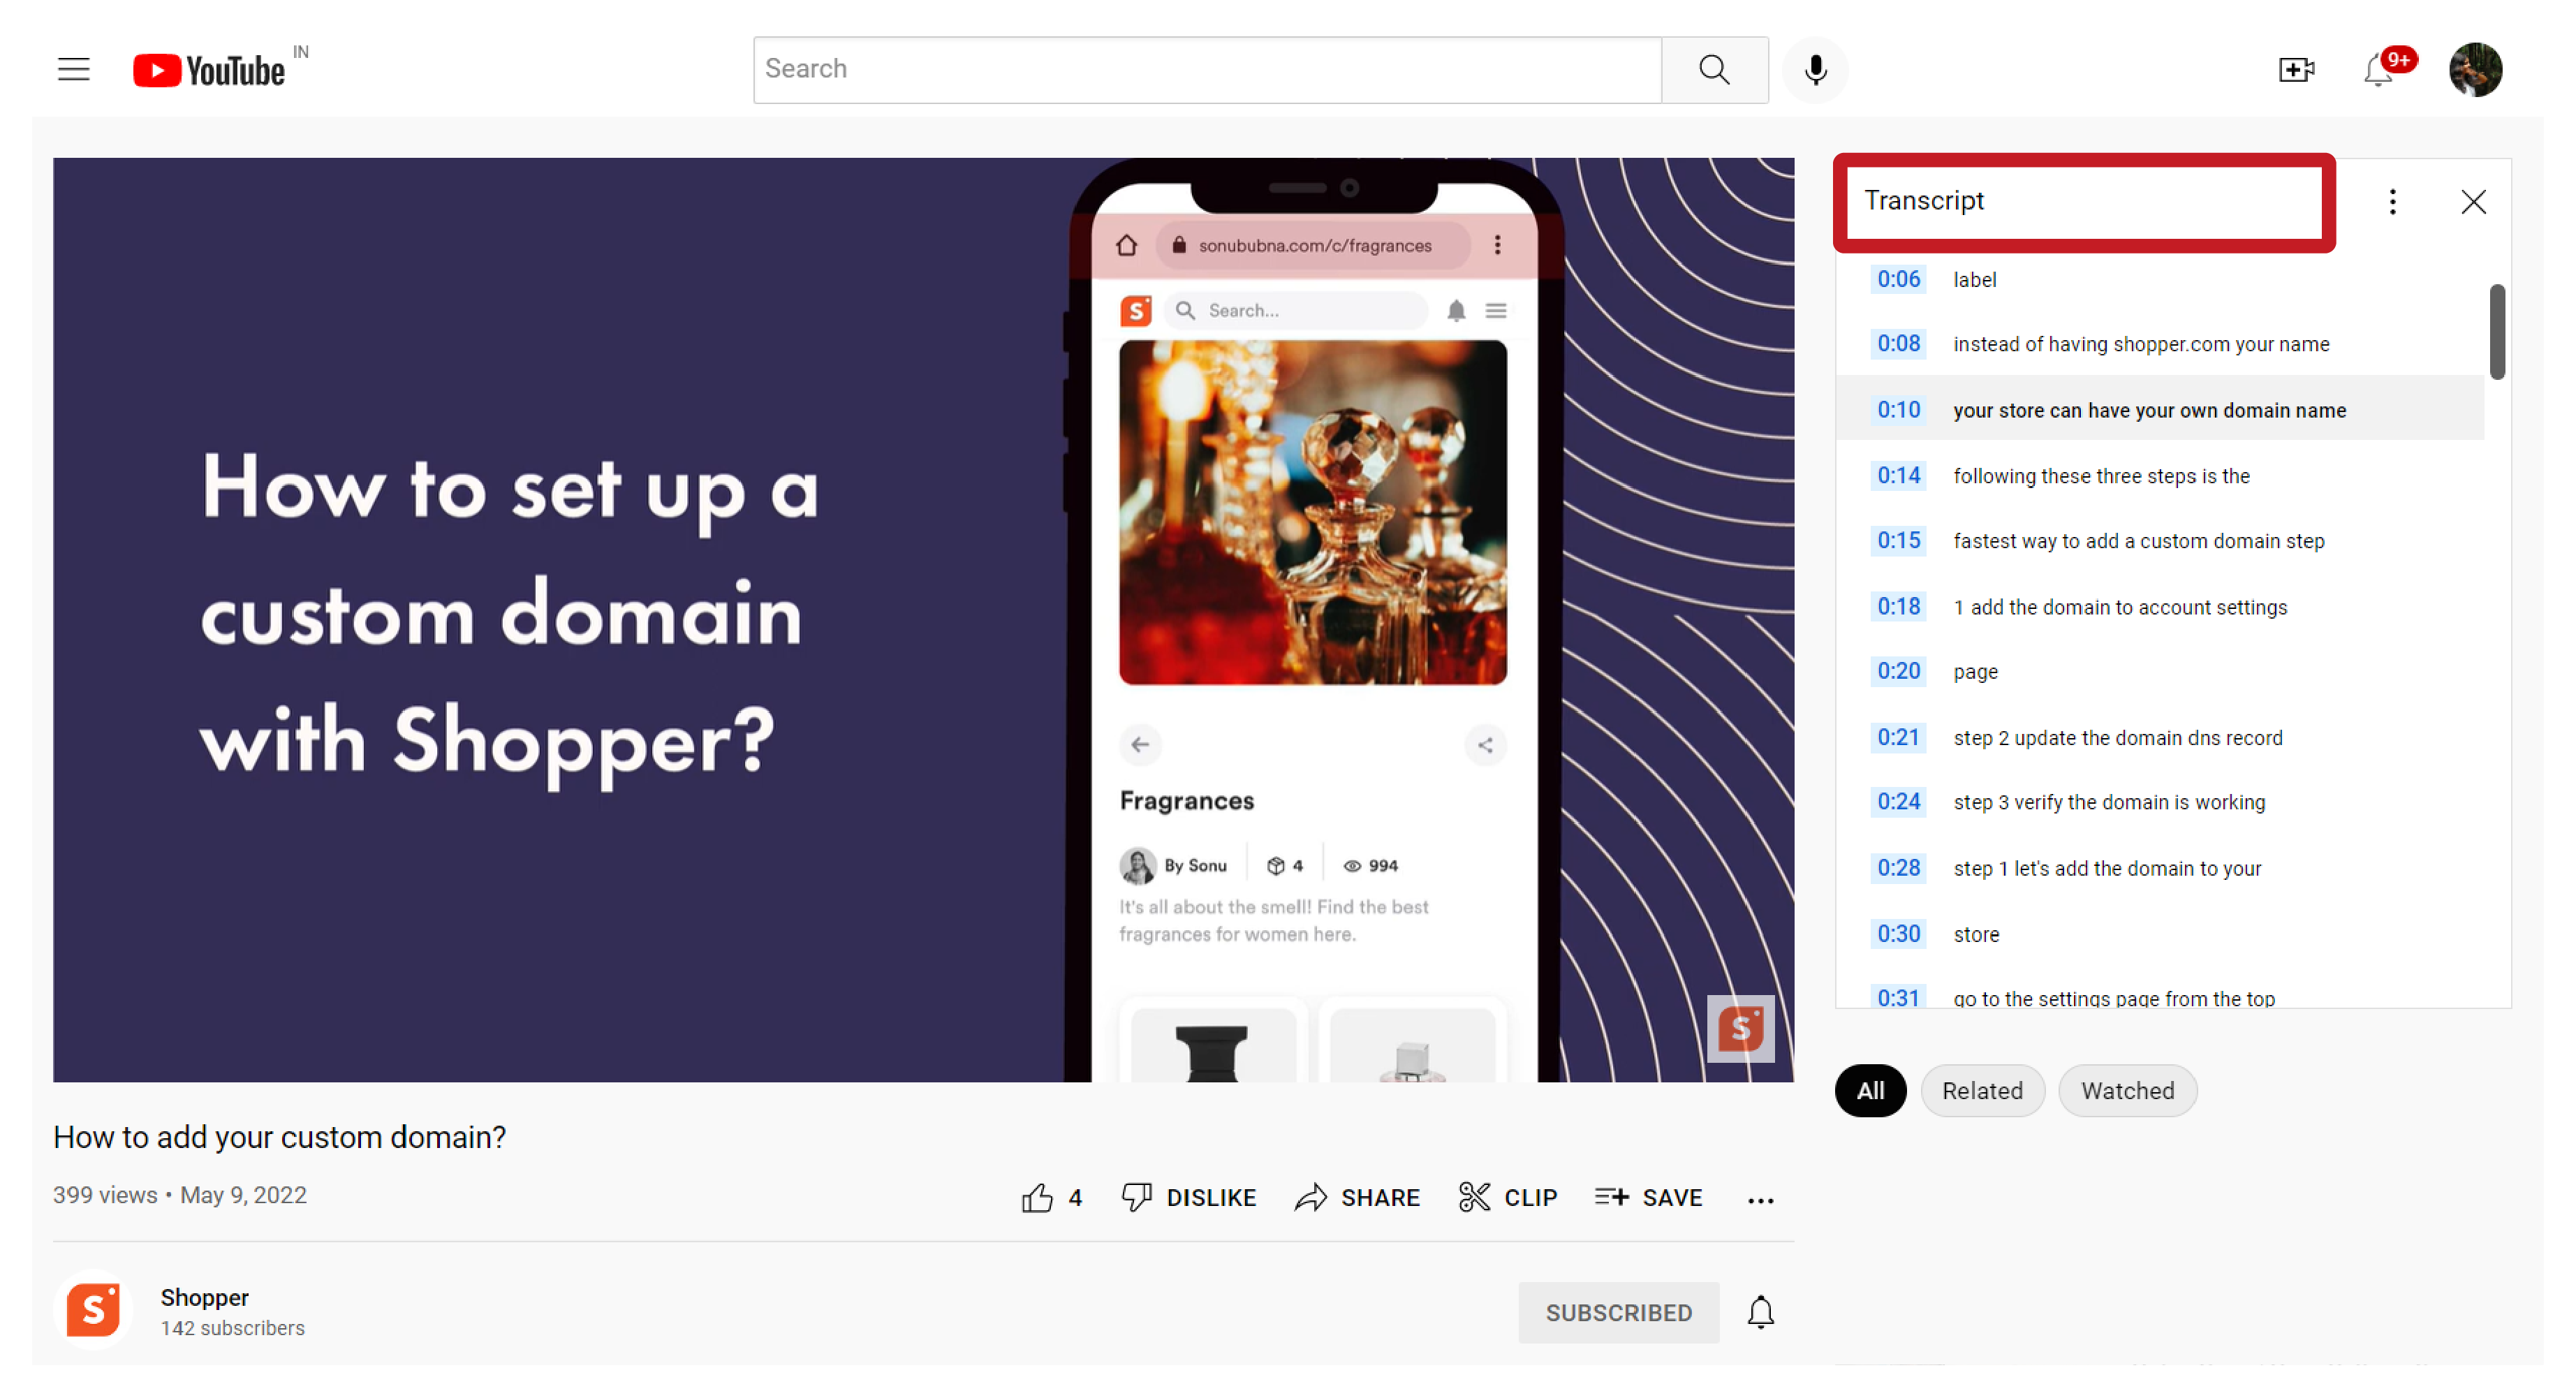
7. Edit or Upload a YouTube Transcript to Improve Your SEO
YouTube, at the end of the day, is a search engine like Google.
The only difference is that instead of being a conventional search engine, YouTube is a search engine for videos.
However, you can still make use of the basic optimization strategies to improve your video’s overall reach and discoverability. One of the easiest ways you can achieve the same is by editing or uploading a YouTube transcript to improve your SEO.
Even though it’s the YouTube video title, description, and keyword optimization that are key to improving your overall SERP ranking on YouTube, transcripts can work wonders too.
YouTube automatically adds transcripts to your videos.
They are more or less very accurate for videos with English audio. However, the same cannot be said for non-English speaking videos. If the videos have language that is unrecognizable by YouTube, They will simply add [foreign] instead of a transcript.
You can either add a transcript manually or import a text that features the transcription.
If you are unsure about how to add a transcript to your YouTube video, follow these steps:
- Head over to the video you want to add the transcript too.
- Now look for the three-dot symbol which can be found next to like, dislike, and share options.
- Alternatively, you can also click on the “Subtitles/CC” option as well.
- Now add a language to your video if you haven’t already
- You will then be directed to add subtitles or closed captions to your video.
- You can choose to either upload a pre-written text transcript or a timed subtitles file.
- You can also consider pasting the entire transcript as a paragraph (does not work well for non-English video transcripts)
- You also have the option to type in the transcript manually as you watch the video.
Pro Tip: Once you are done adding the transcript manually, you can consider copying the entire transcript with timestamps and pasting it on your video description.
This will help you to manually set up chapters, and also improves the SEO as many keywords related to the video can be strategically placed in the video description.
Adding transcripts also improves the overall accessibility of your videos.